

A touch of Paris to this DIY budget-friendly Atlanta, GA Kitchen

Finding our House
This was my very first budget-friendly kitchen renovation! This kitchen was the reason my husband and I were able to afford a house in our dream Atlanta neighborhood. We saved over $100k on our home, because the kitchen was in such poor condition. There were pest infestations, plumbing problems, and electrical issues, but we saw an opportunity to live in a beautiful neighborhood at an affordable price, and nothing was going to stop the vision we had for this space.


Almost three years ago, my husband and I purchased our first home. We were driving through the cutest Atlanta neighborhood, and spotted a “for sale by owner” sign.
From the looks of it, we could tell it was a fixer-upper, but that was right up our alley! The house was in a great location, and we were willing to put in the work we needed to get a deal on the house. That “work,” ended up being the kitchen.

The Kitchen Plan
The moment I stepped in to the kitchen, I could see its potential and knew exactly how I wanted to design the space. I’d been to Paris, France a few times that year, and I loved how homely I felt in their establishments. Even though the architecture was modern and luxurious, I still felt comfortable along with a need to lounge. These were some of the same feelings I wanted to bring to our kitchen.

A Galley Style Kitchen
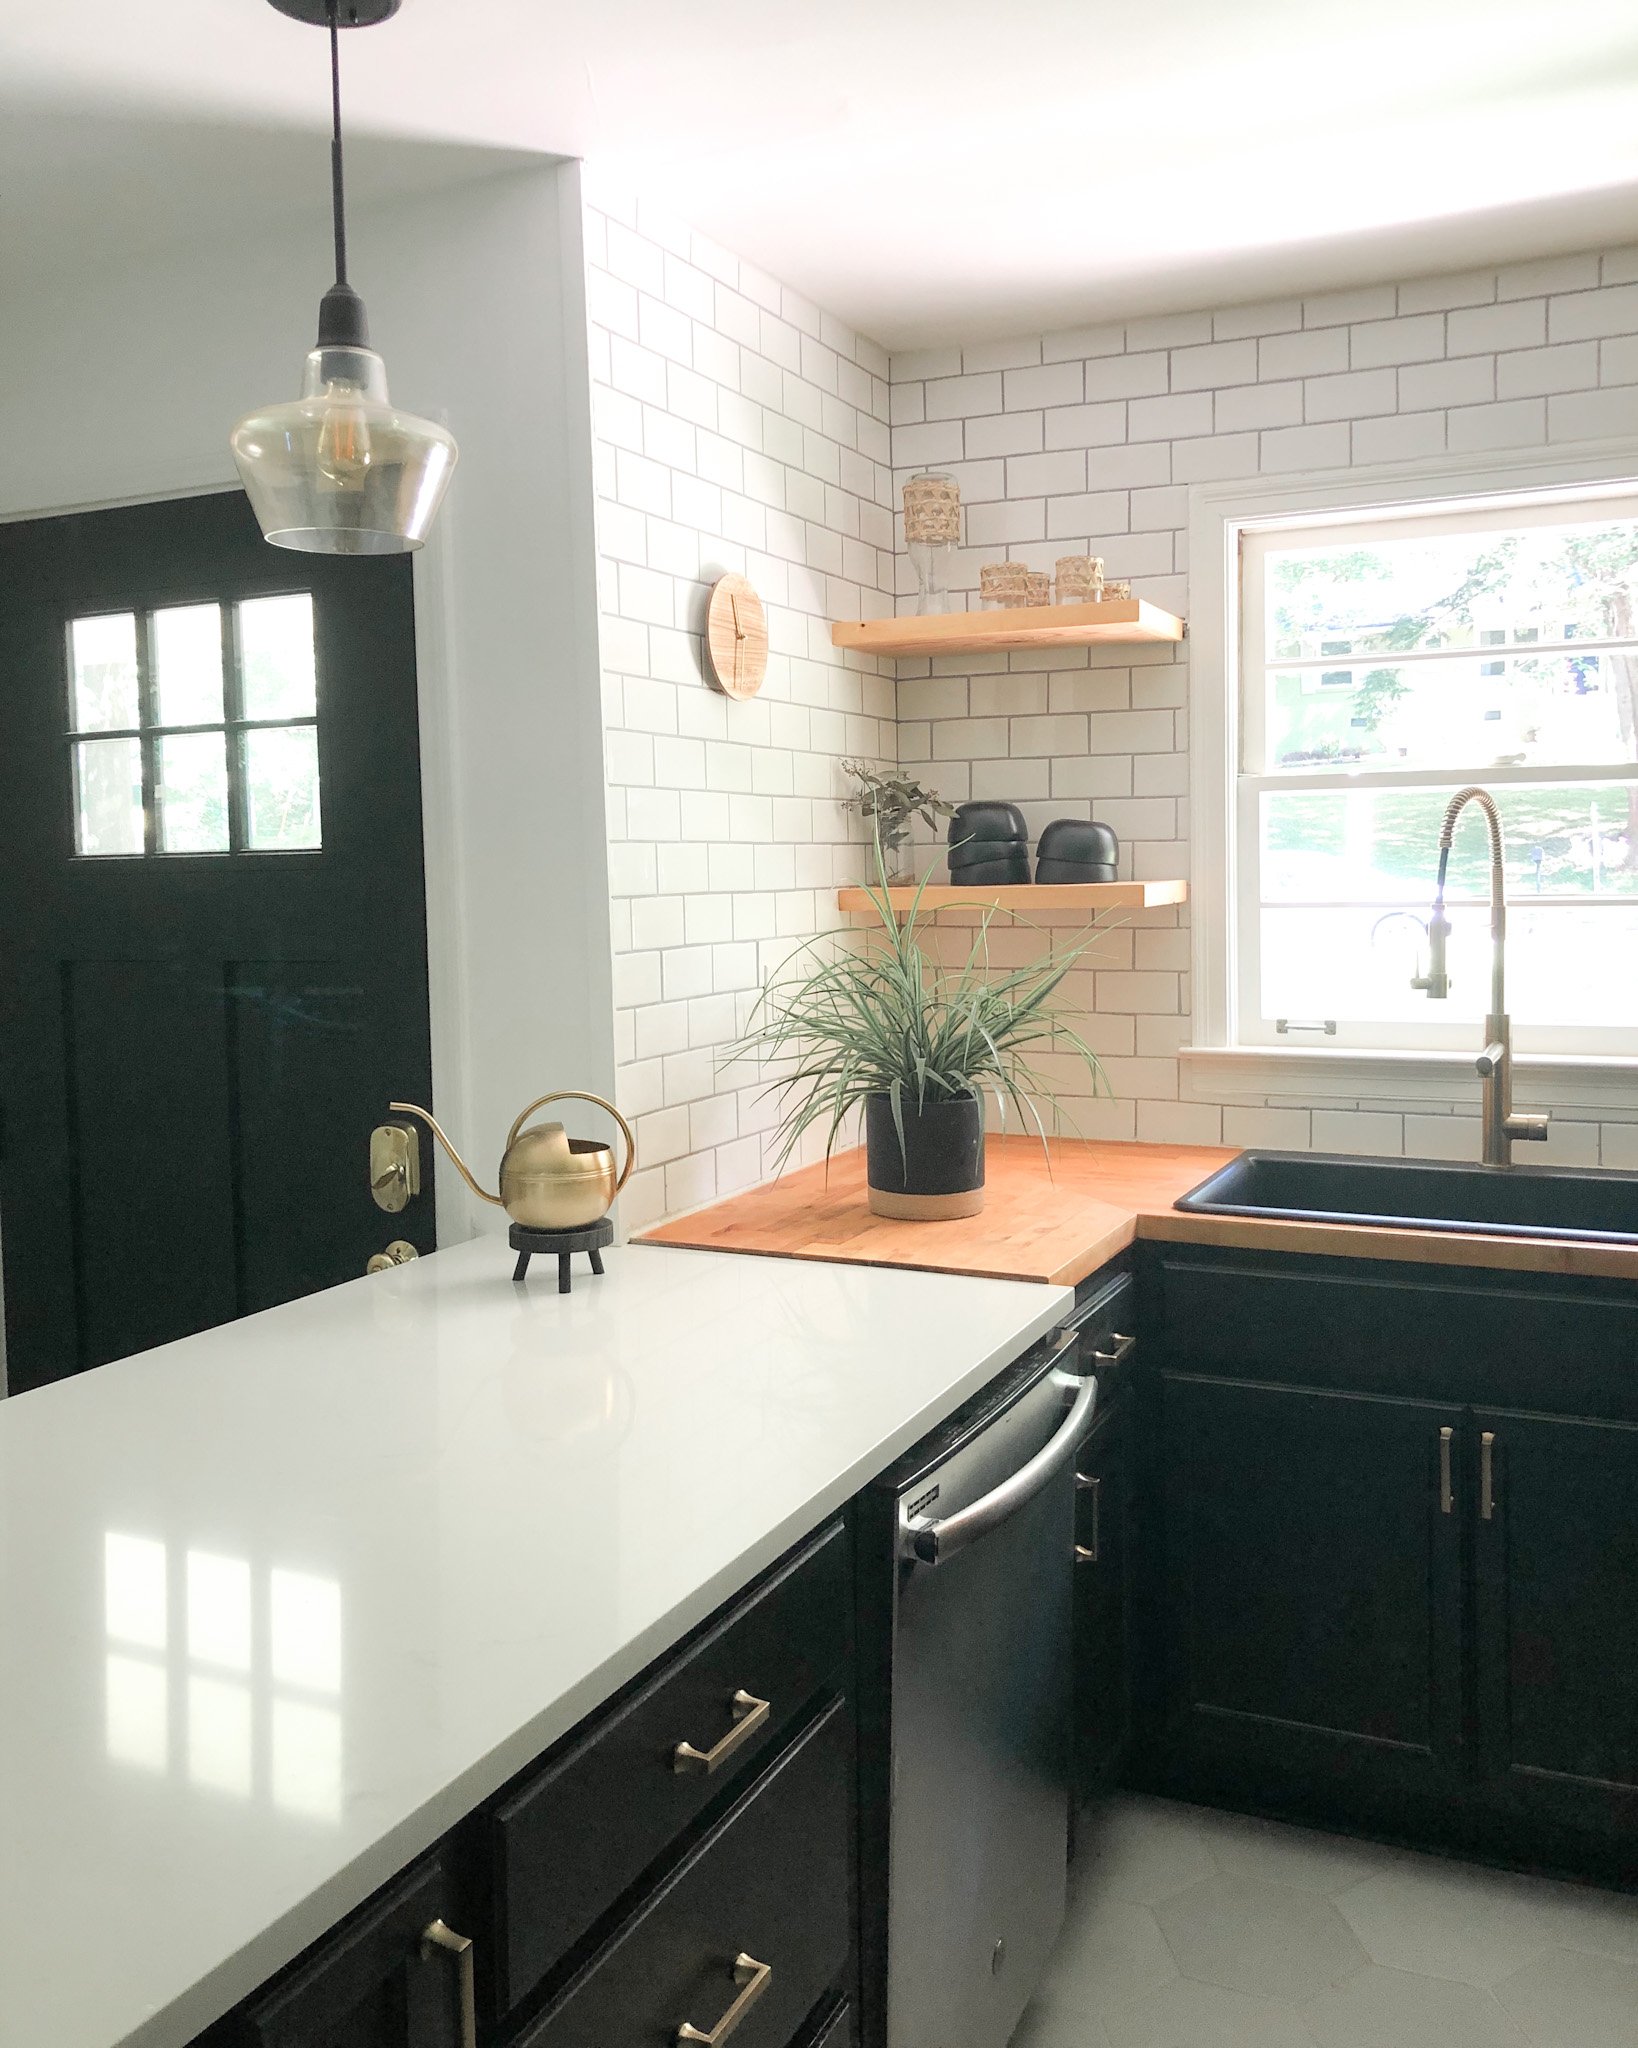
Because the kitchen was galley-style, it immediately reminded me of those smaller cafes I’d visited in Paris during our vacations there. So it was absolutely important for me to incorporate that bistro-European aesthetic while keeping the layout of the kitchen and utilizing the space appropriately.


I started with knocking out the walls, and creating a 14-foot island with a quartz countertop. This makes the kitchen feel like the perfect spot to hangout, drink lattes and eat crepes. I added velvet and brass barstools, and hexagon floor tile to play up this vibe!

The Contrast
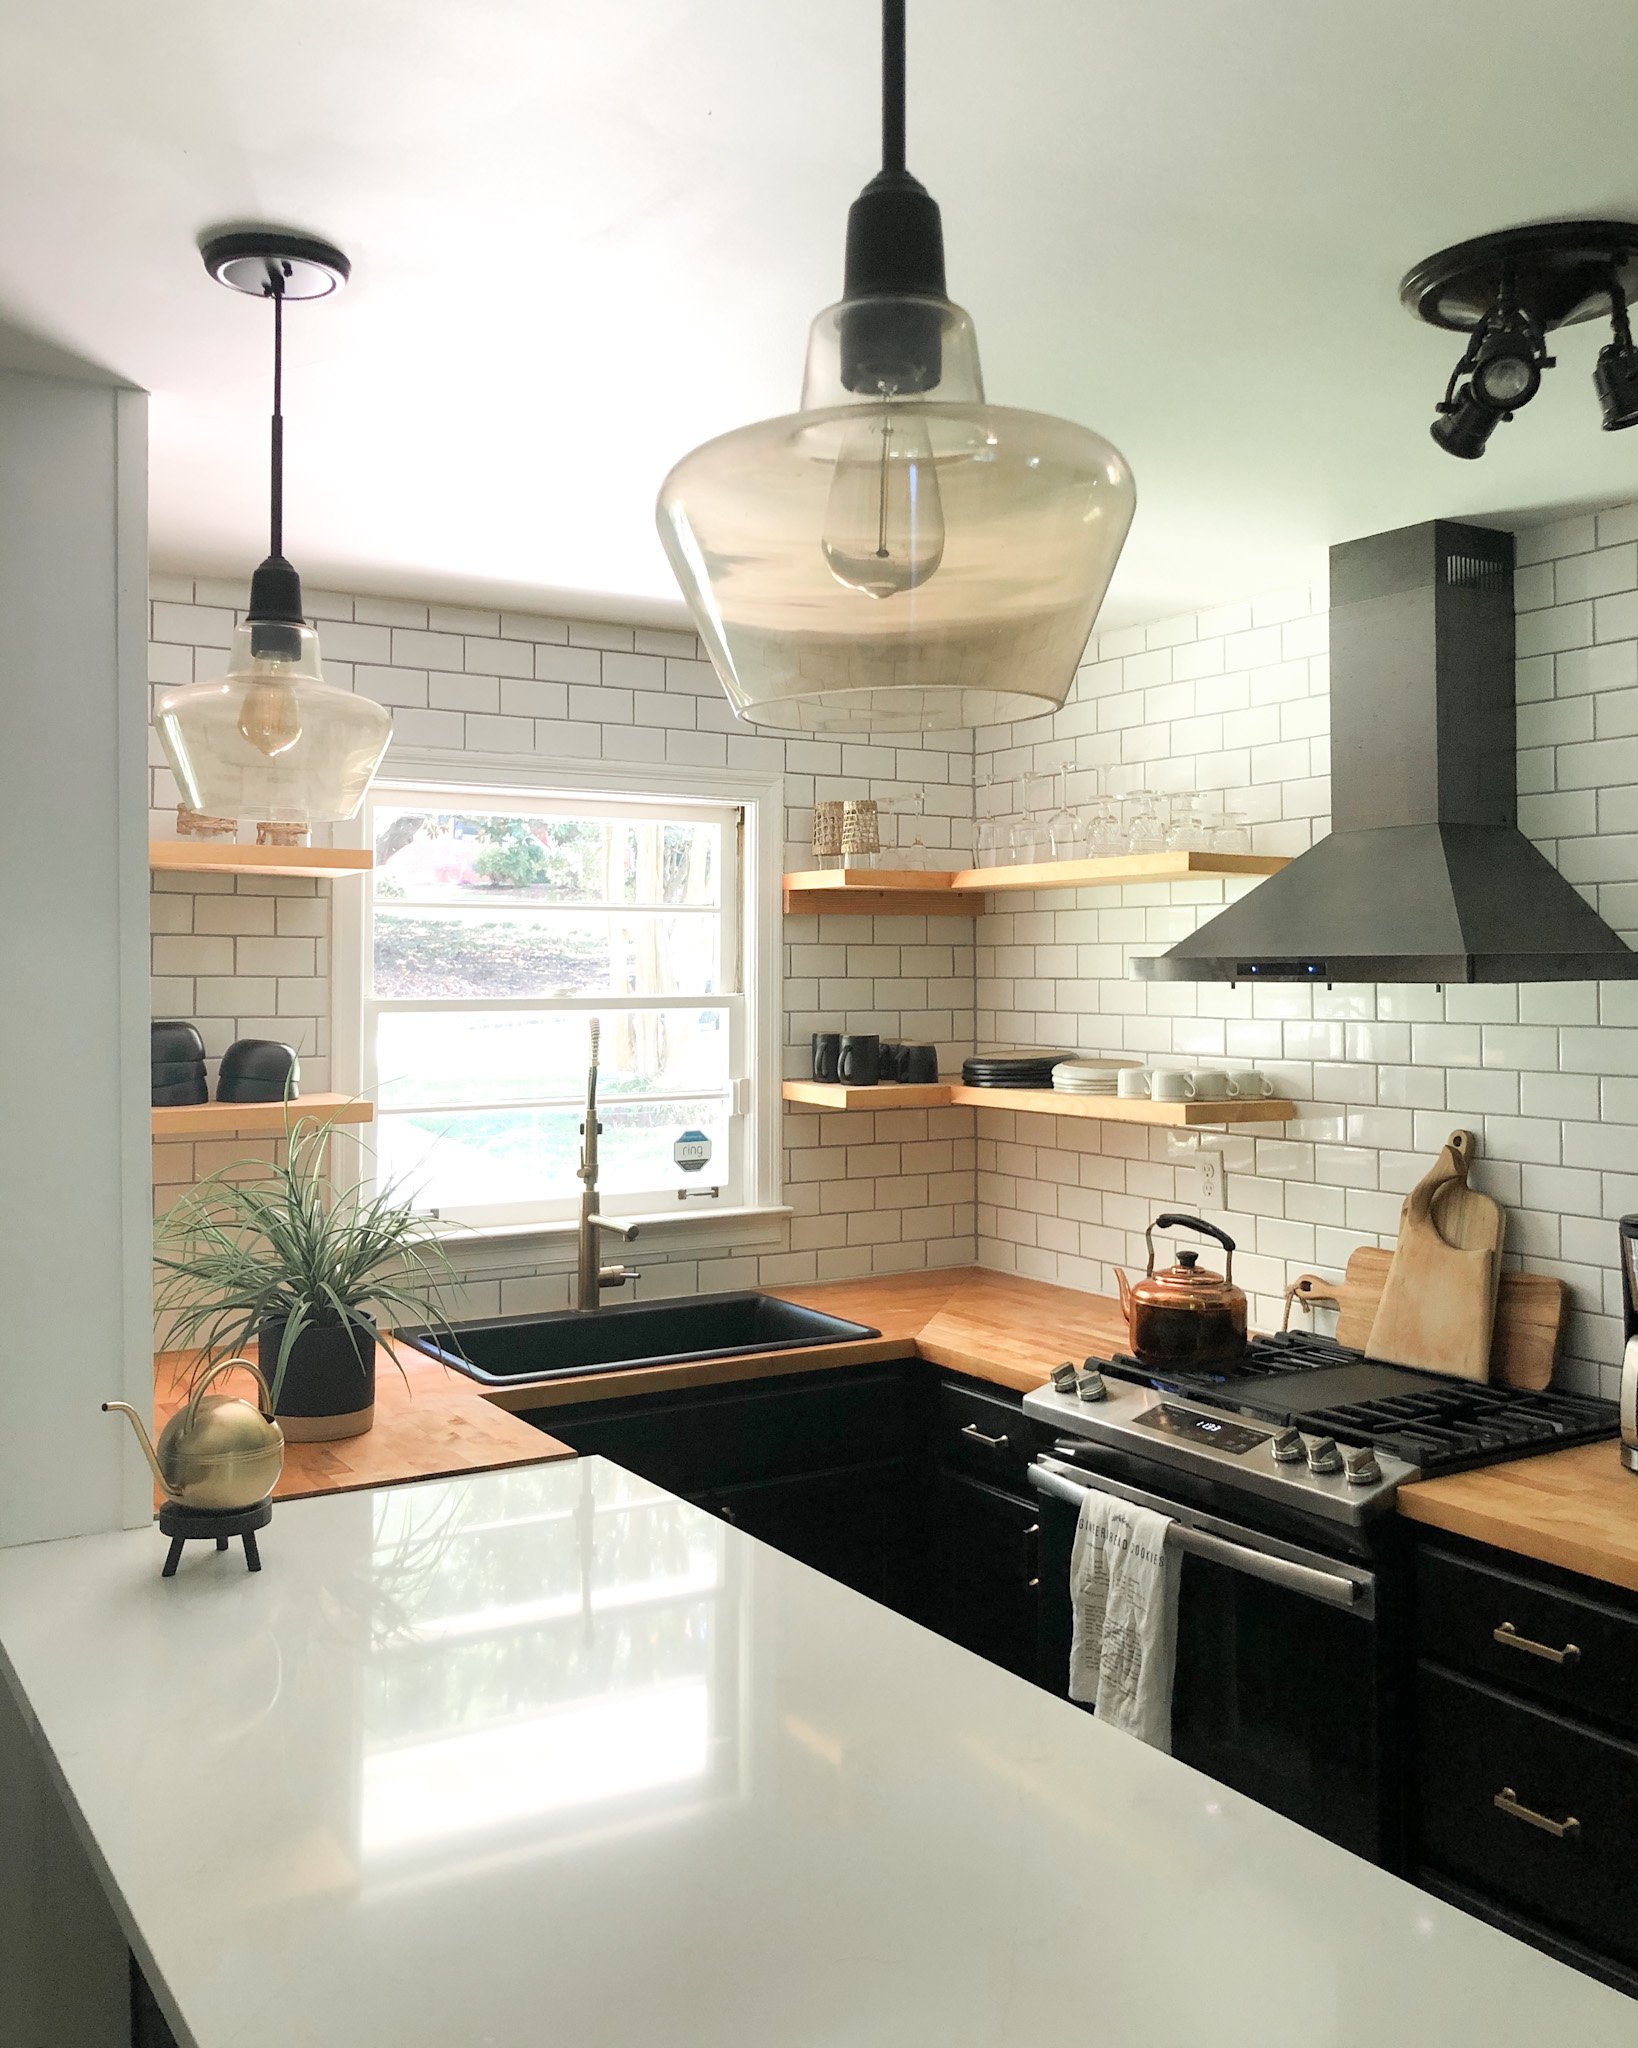
If you know me, you know just how much I love contrast! I wanted the kitchen to feel open and airy, but I also wanted it to feel extra moody and sophisticated (like Paris), so I painted our cabinets black, chose a black gas stove and range hood to pop against the subway tile. I decided to go with floating shelves up top, to open up the space. I added counter-to-ceiling subway tile to elongate the walls, and chose butcher-block to contrast the quartz countertop.
Texture, Texture, Texture
I love playing with textures! I decided on wood shelves against the tiled backsplash, and weaved accessories like dish coasters to go along with our bowls and plates. There are textured vintage wine and cocktail glasses incorporated into the design as well, this gives it a boutique and eclectic feel.

Lounging
My ultimate goal was to create a cozy space that would inspire conversation. Having the bar set-up makes it so enticing to lounge and chat with friends over a cup of joe or tea. It was one of our favorite places to sit in the house.

When guests were over, our sink and faucet helped us to rinse cups, bowls, and plates quick and easy; pop them into our dishwasher, and never miss a beat during our fun conversations. I also loved the warm mid-century-style lighting we chose, this style drop pedant sets the Parisian mood just right.

Ajai’s Kitchen AFTER Remodel Began

Ajai’s kitchen BEFORE Remodel
The Journey
We spent $25k to update this kitchen, put in some sweat equity, and budgeted on greenery and foliage. We tiled the backsplash, painted the cabinets, and stained the butcher-block ourselves, and added a faux fiddle leaf fig . It was worth every moment, and we absolutely enjoyed the journey.
I hope you enjoyed this read and I hope it inspires you.
Xo,
Ajai

Minimal and Sustainable Gift Wrapping Ideas
This year, my goal is to reuse all of the items I currently have to wrap presents. I'm trying my best to get into a practice of repurposing and living more sustainably. Here are some ways I'll be sustainably gift- wrapping and decorating for this holiday season.

This year, my goal is to reuse all of the items I currently have to wrap presents. I'm trying my best to get into a practice of repurposing and living more sustainably. Here are some ways I'll be sustainably gift- wrapping and decorating for this holiday season:

REUSING SHIPPING BOXES FROM DELIVERIES
I'll be saving all of my Amazon boxes to wrap my presents this year. With a baby on the way, we created an Amazon registry and had all of the gifts sent to us. We had deliveries that entailed us receiving 2-3 boxes a day - so many boxes that would normally just go to waste.


USING DRIED FOLIAGE
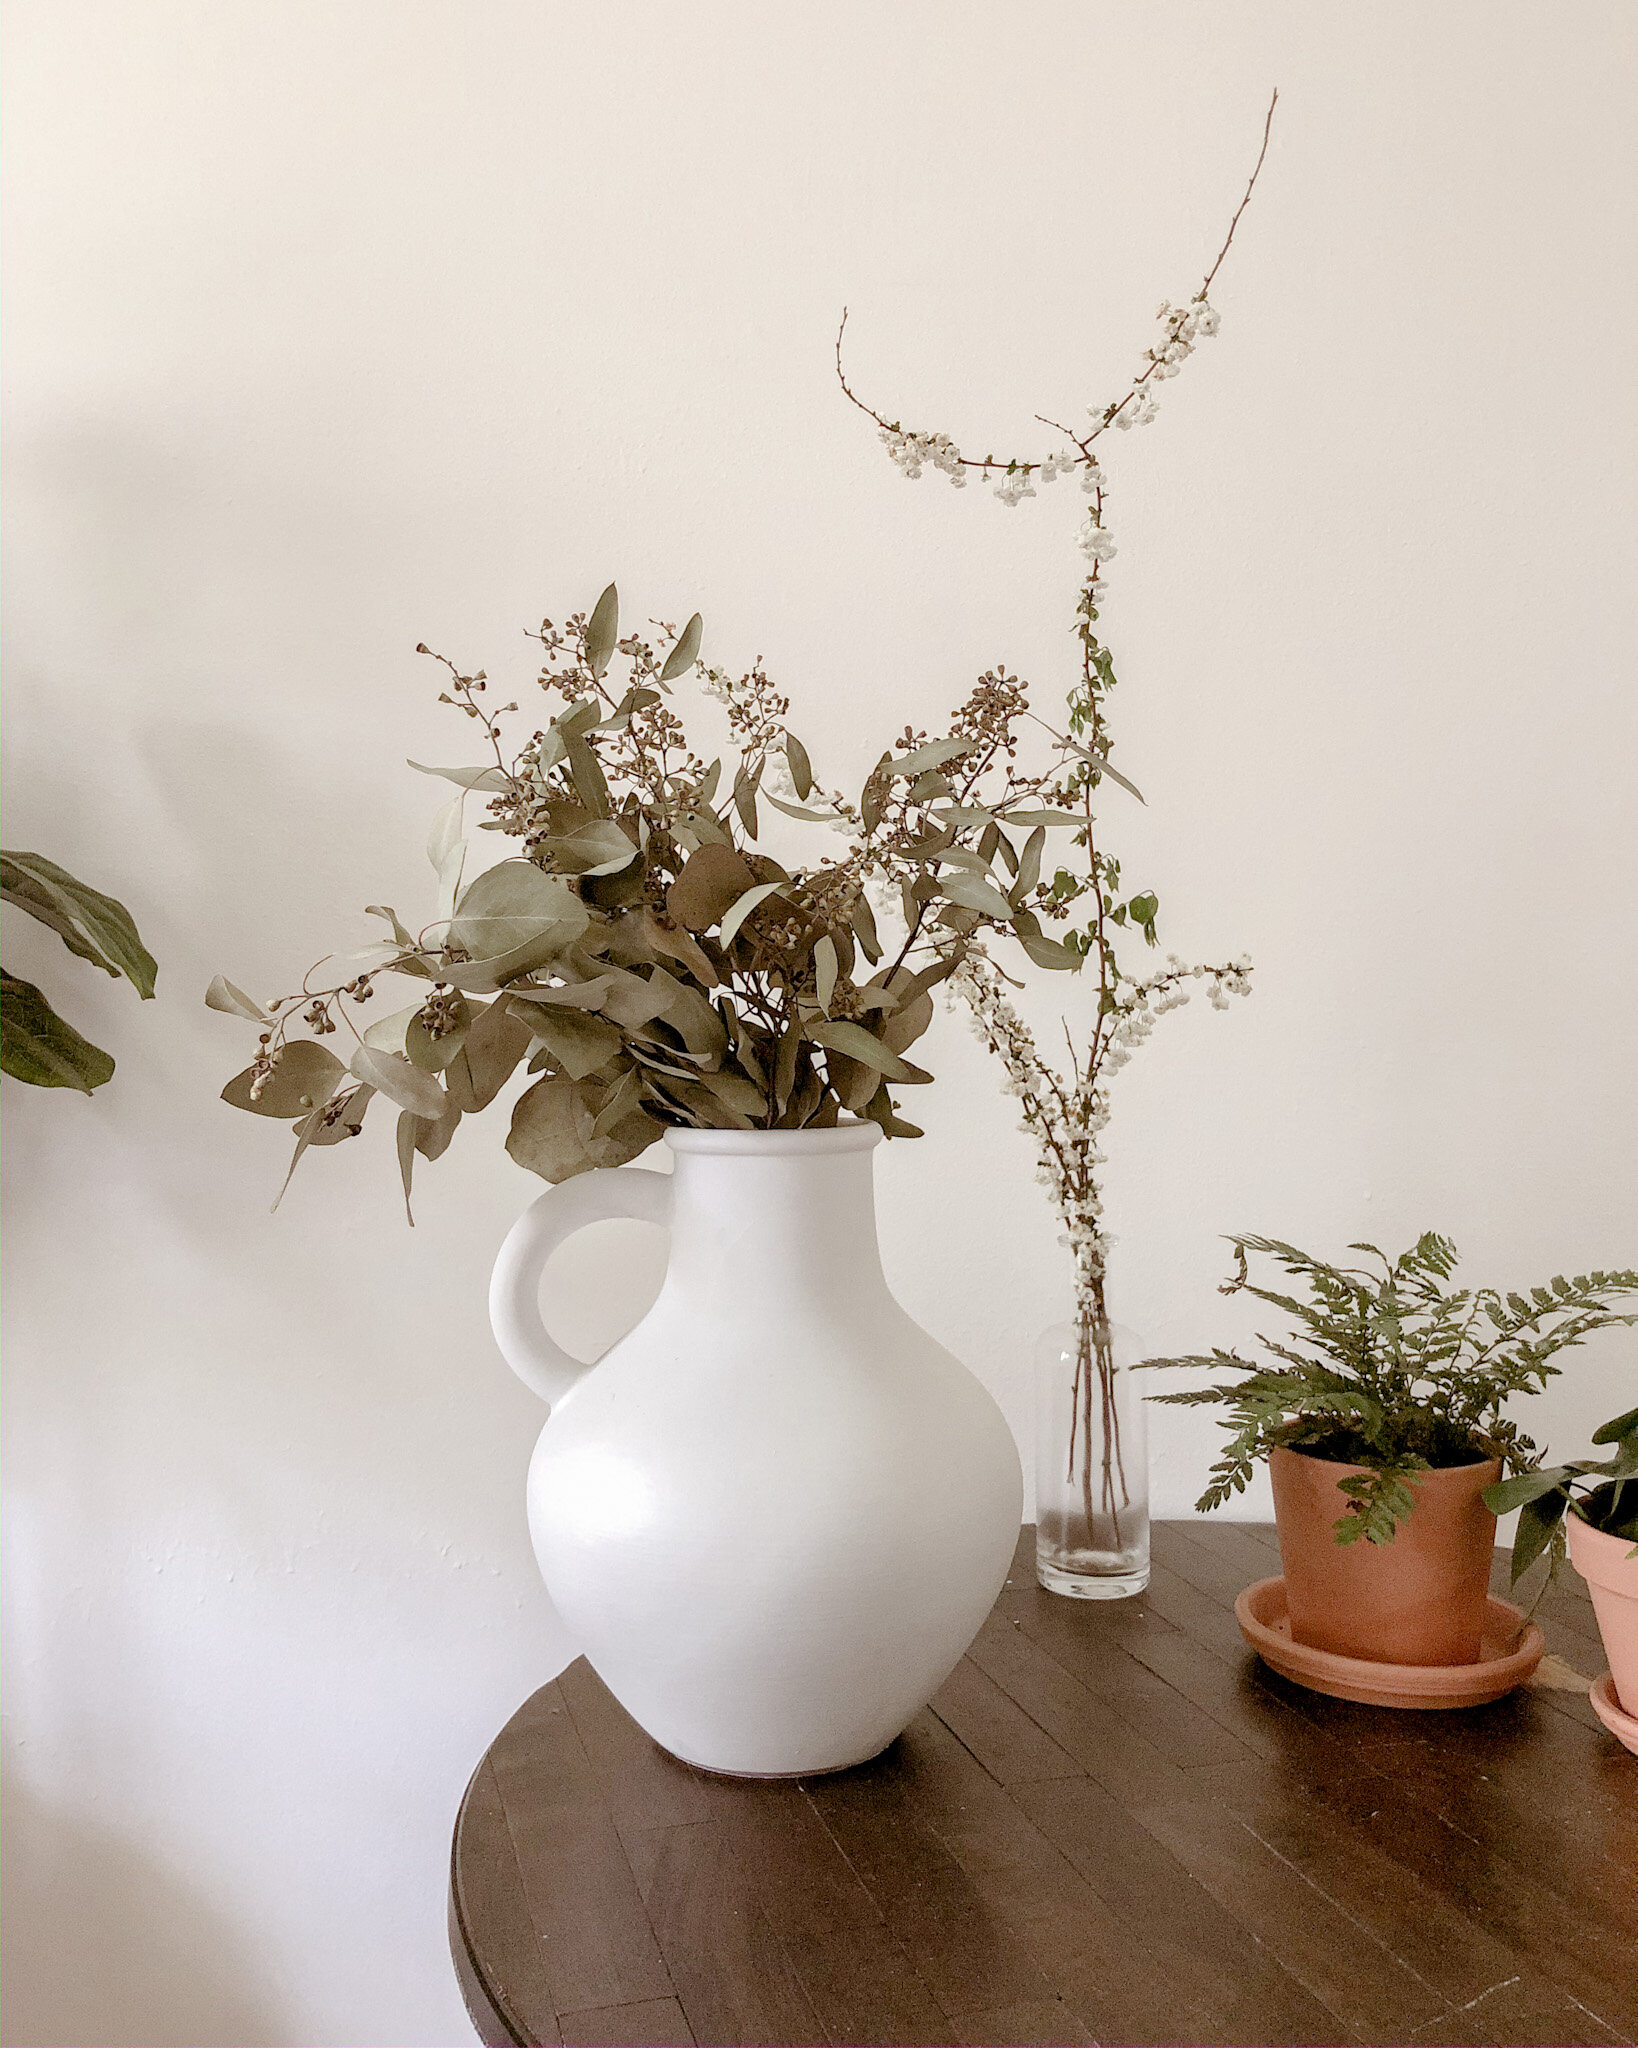
I'll be using natural decorations to embellish my gifts this year. Like foliage from my grandfather's yard (he has plenty of eucalyptus growing in his yard) and drying fruits to decorate our tree. It's so simple to find foliage in a garden or local park (like branches on the ground). My husband recently went over to a Christmas tree lot and asked if we could have the leftover trimmings that had been cut from the Christmas trees - we used these trimmings to wrap gifts and even added them to a few of our white vase; placing them on our our bedroom nightstands and living room credenza.


MAKE USE OF FABRIC (NAPKINS)
I love using fabric to wrap gifts. This ensures the receiver can reuse things like napkins and blankets for their original function. These sorts of holiday wrapped gifts show very beautifully as well.


USE KRAFT PAPER
Kraft paper is also a versatile item. Paper without all of the holiday designs can be used year-round and for several purposes. Along with a beautifully displayed gift wrap-design, this paper has high strength and great durability. Kraft paper is also a very inexpensive way to have an appealing, minimal, and elegant gift display.


EMBELLISH YOUR PRESENTS WITH JUTE TWINE AND RIBBON
If you’re like me (a craft queen) you’ve got plenty of jute twine laying around, along with ribbon to reuse and add beautiful designs to your holiday gifts.

There you have it! quick and easy ways to wrap gifts sustainably this holiday season!
Happy designing!
Xo,
Ajai

Creating my dream living room
Now, I’ve always been a fan of home… but now it means more to me than it ever has. Since the pandemic hit and we’ve all been advised to spend the majority of our time at home, I’ve been dreaming about my perfect living room.

Everyone has that one room they feel defines their home. Some people take great pride in their kitchen space and believe it is the heart of the home… that's what real estate appraisers believe anyway. Some people believe the bedroom is the sanctuary and most important space, and some even believe that bathrooms make the home. Now me, I believe the living room is the heart of the home. It’s where we spend the majority of our time, thus its name - living room. It’s the most lived in space in the home - is it not?
Now, I’ve always been a fan of home… but now it means more to me than it ever has. Since the pandemic hit and we’ve all been advised to spend the majority of our time at home, I’ve been dreaming about my perfect living room. With that, I’ve worked my tail off to create a living room where I feel centered, like I’m on vacation, and in a magazine at the same time. I’ve dreamt of a place where I can be relaxed and inspired.

A dream or reality?
I had decided it was time to make this dream a reality. I began by spending long hours going through photos I took when we visited Europe: Paris, Madrid, Lisbon, Dusseldorf, and Rome. I scoured Pinterest for inspiration, and even listened to music to help me imagine the energy of the room I’d be creating. I found myself playing Sade and old Parisian songs over and over again, and then it hit me… I’ll choose one item, and design my entire living room around this one piece. This piece would need to embody my vision for our living room space as a whole. I needed this piece to say, coastal, Parisian, vacation, sophisticated, and hygge.


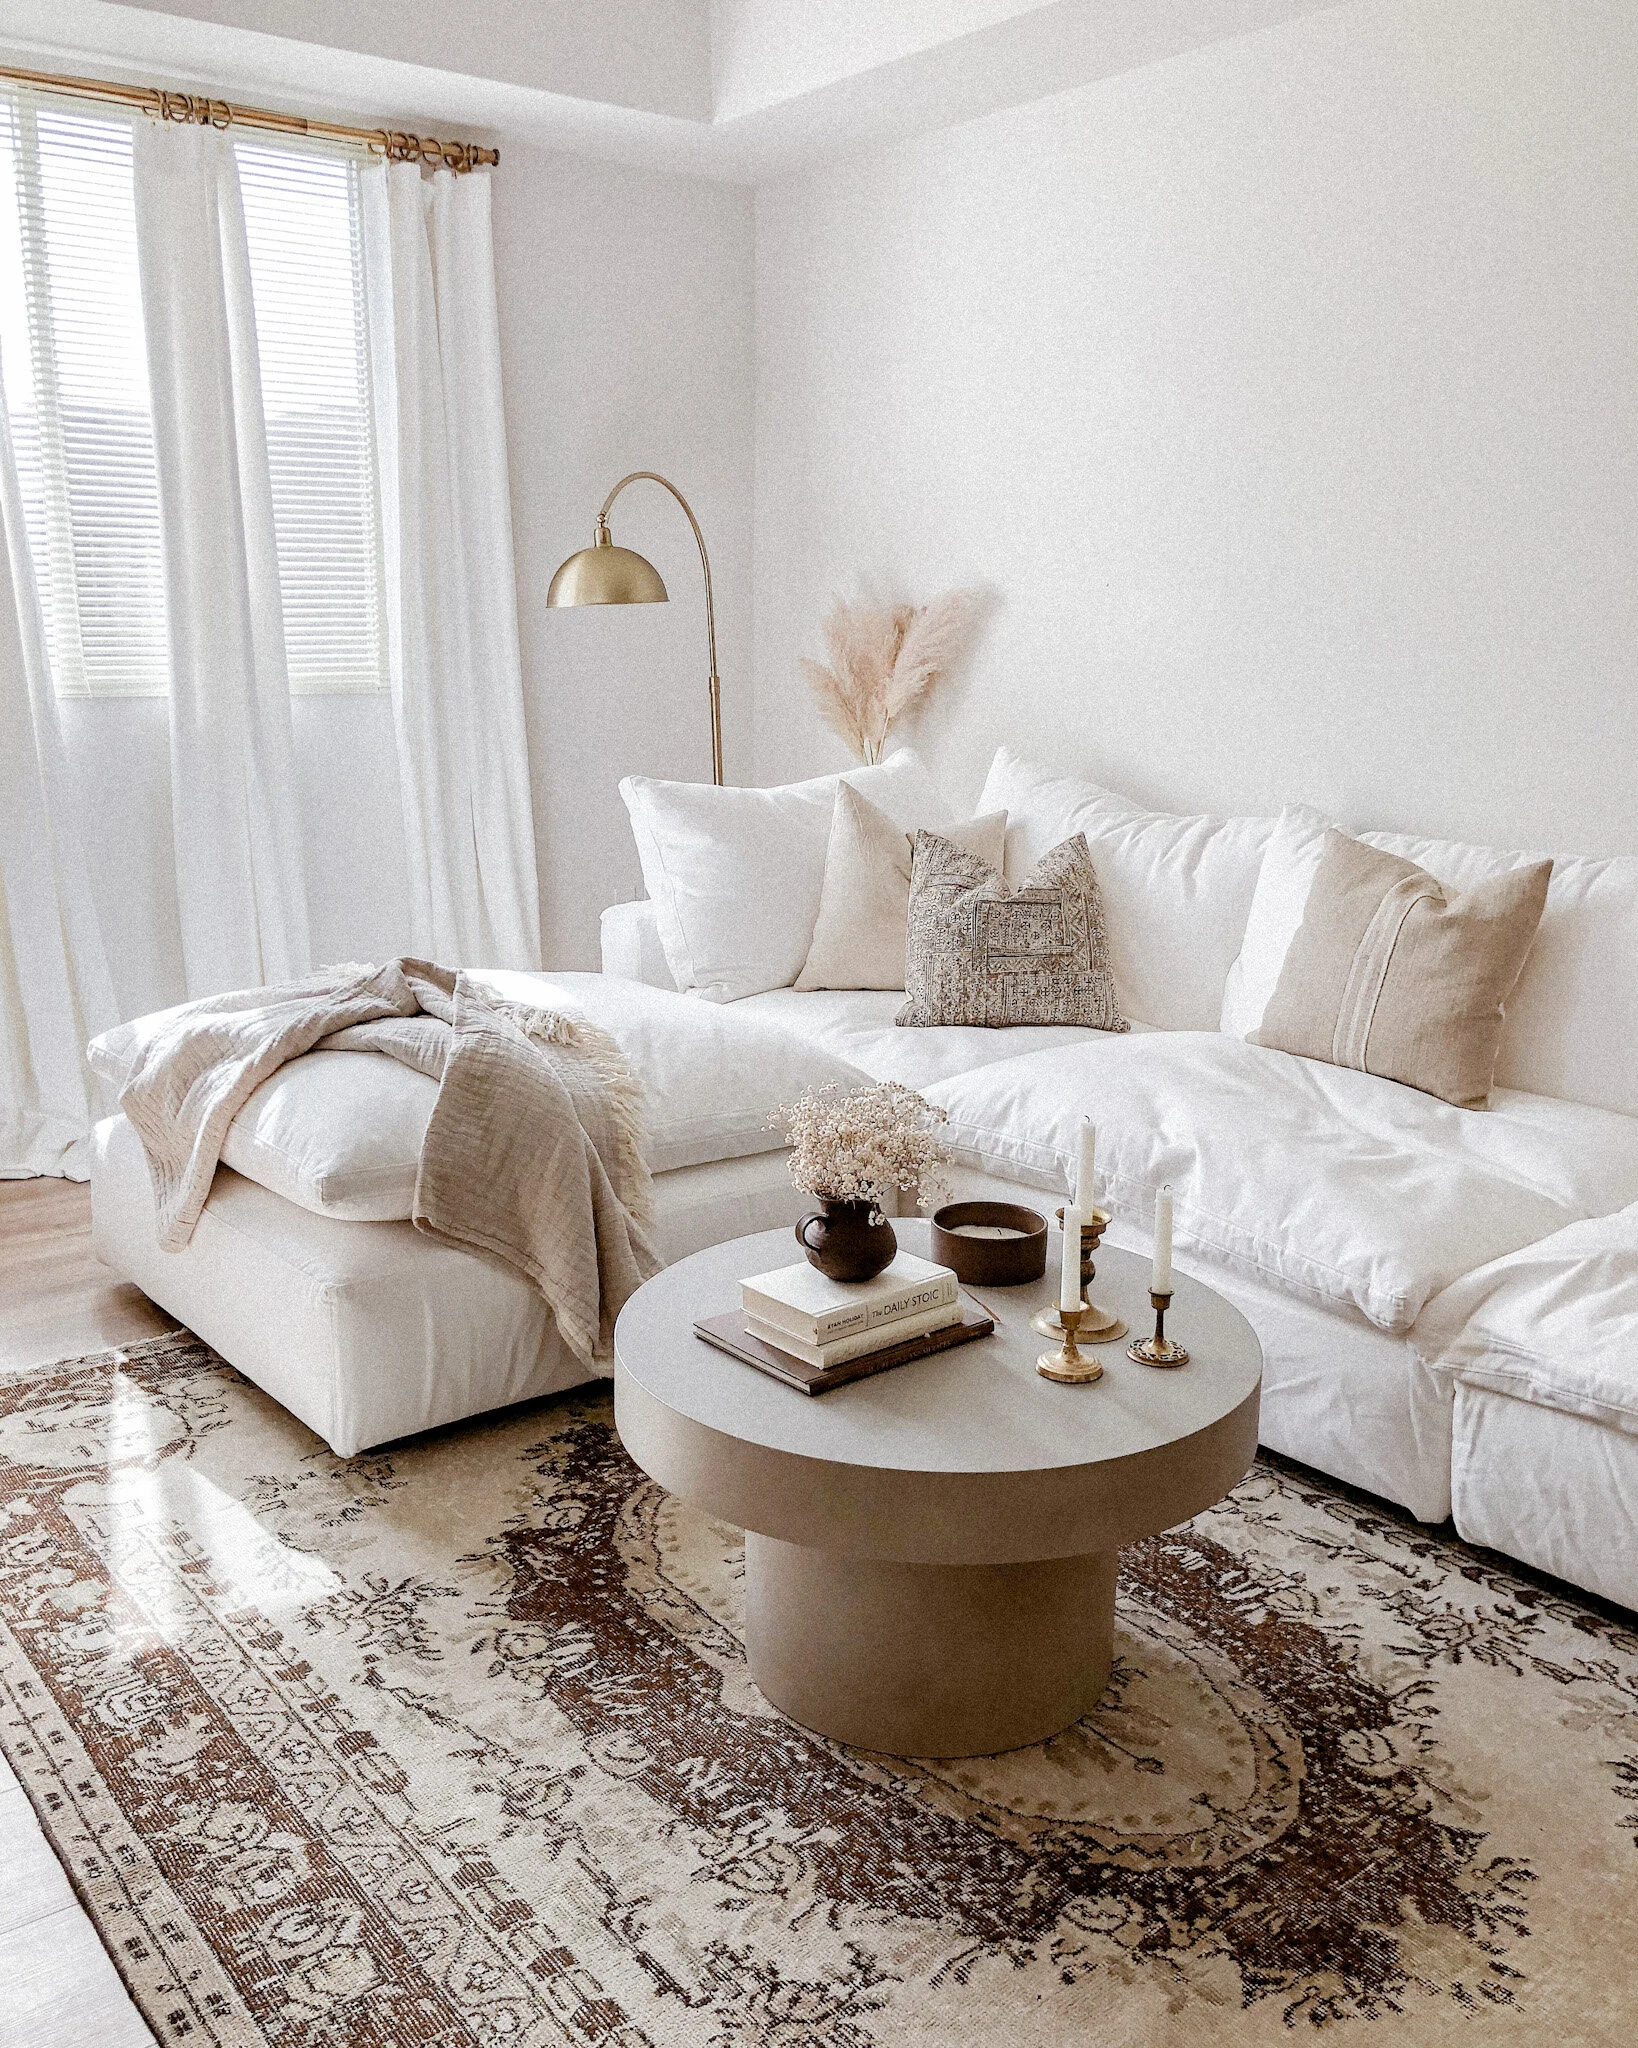
My sofa as a focal point
From the very moment I saw my sofa and ottoman, I knew we belonged together. With its down-filled cushions and bed-like depth, it called to me. I walked over, and fell into it. This sofa had been the coziest and softest thing I’d encountered in quite some time… it was almost as if it hugged me as I disappeared into it. This sofa and ottoman was everything I’d been looking for: coastal, Parisian, vacation, sophisticated, and hygge. It was love at first sight. The only thing was, I had to wait 12 weeks to get it, but patience is a virtue right? Well, 12 weeks came and went, and my sofa arrived to our home a few days ago. To be quite honest, I can’t stop looking at it. She’s a real beauty.

The rug of my dreams
I spotted this vintage area rug on Etsy about six months ago, and before you all ask, the shop has been closed (I know, so sad). The seller was amazing (she was friendly and her turnaround was extremely quick). For these reasons, I went a little crazy with purchasing the majority of her vintage rugs and ended up putting them all in storage. I knew I’d be able to grab these beauties one day, and that they’d play a major role in some of my home designs. I fell in love with vintage rugs years ago, and the love for them has only grown 10 times over.

Vignettes
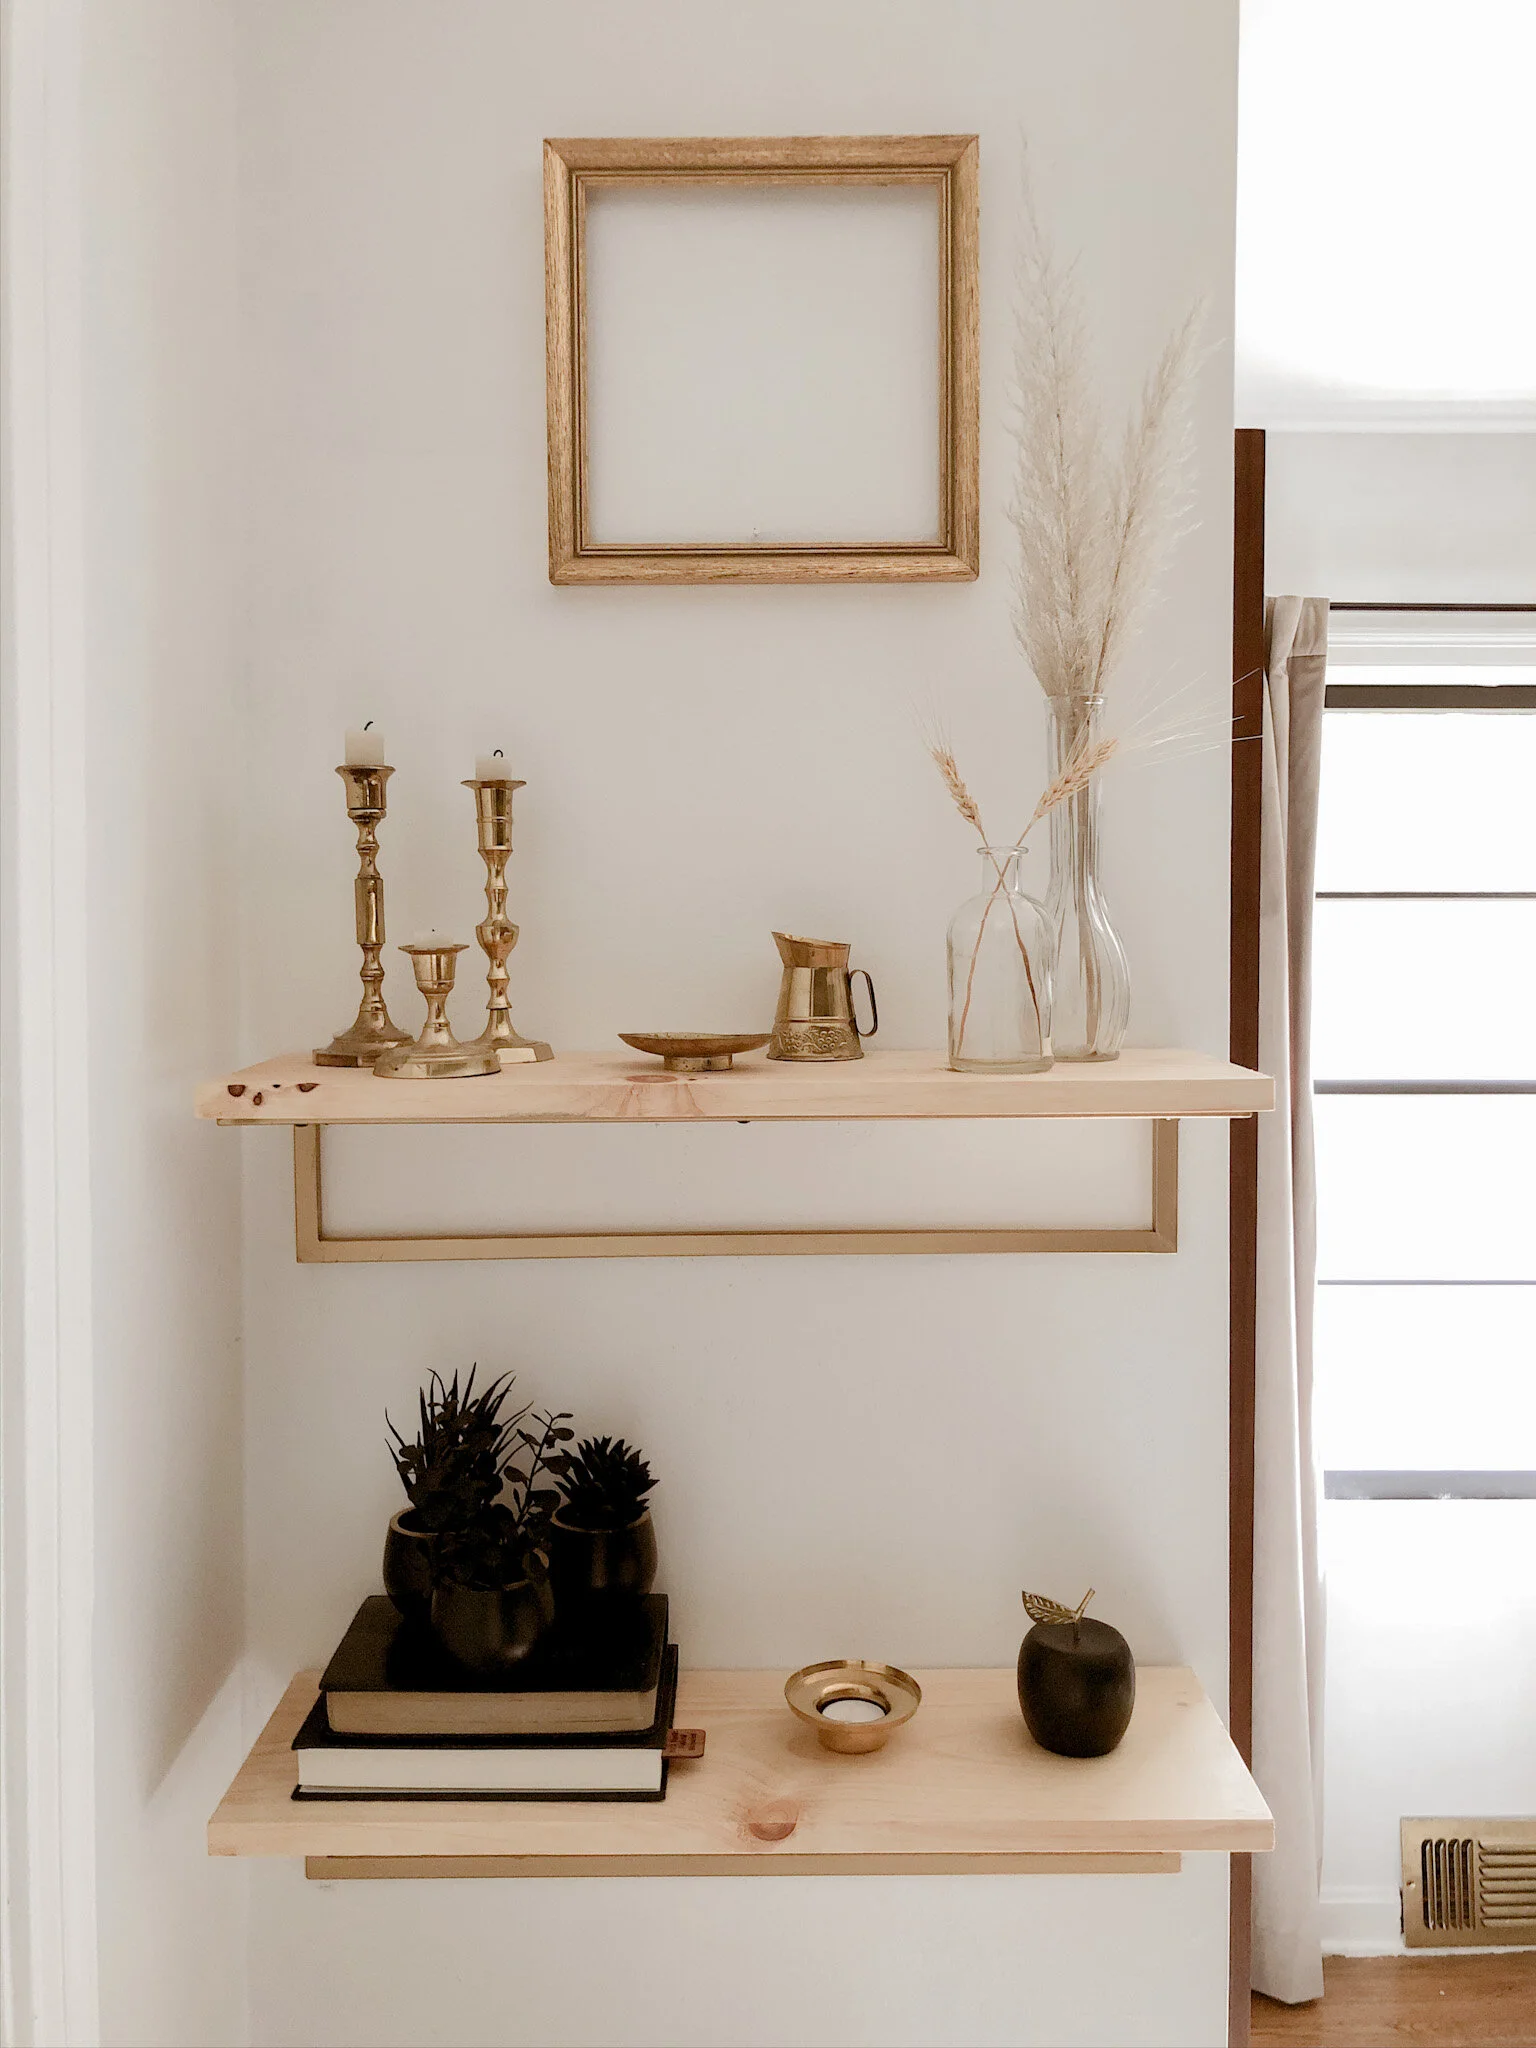
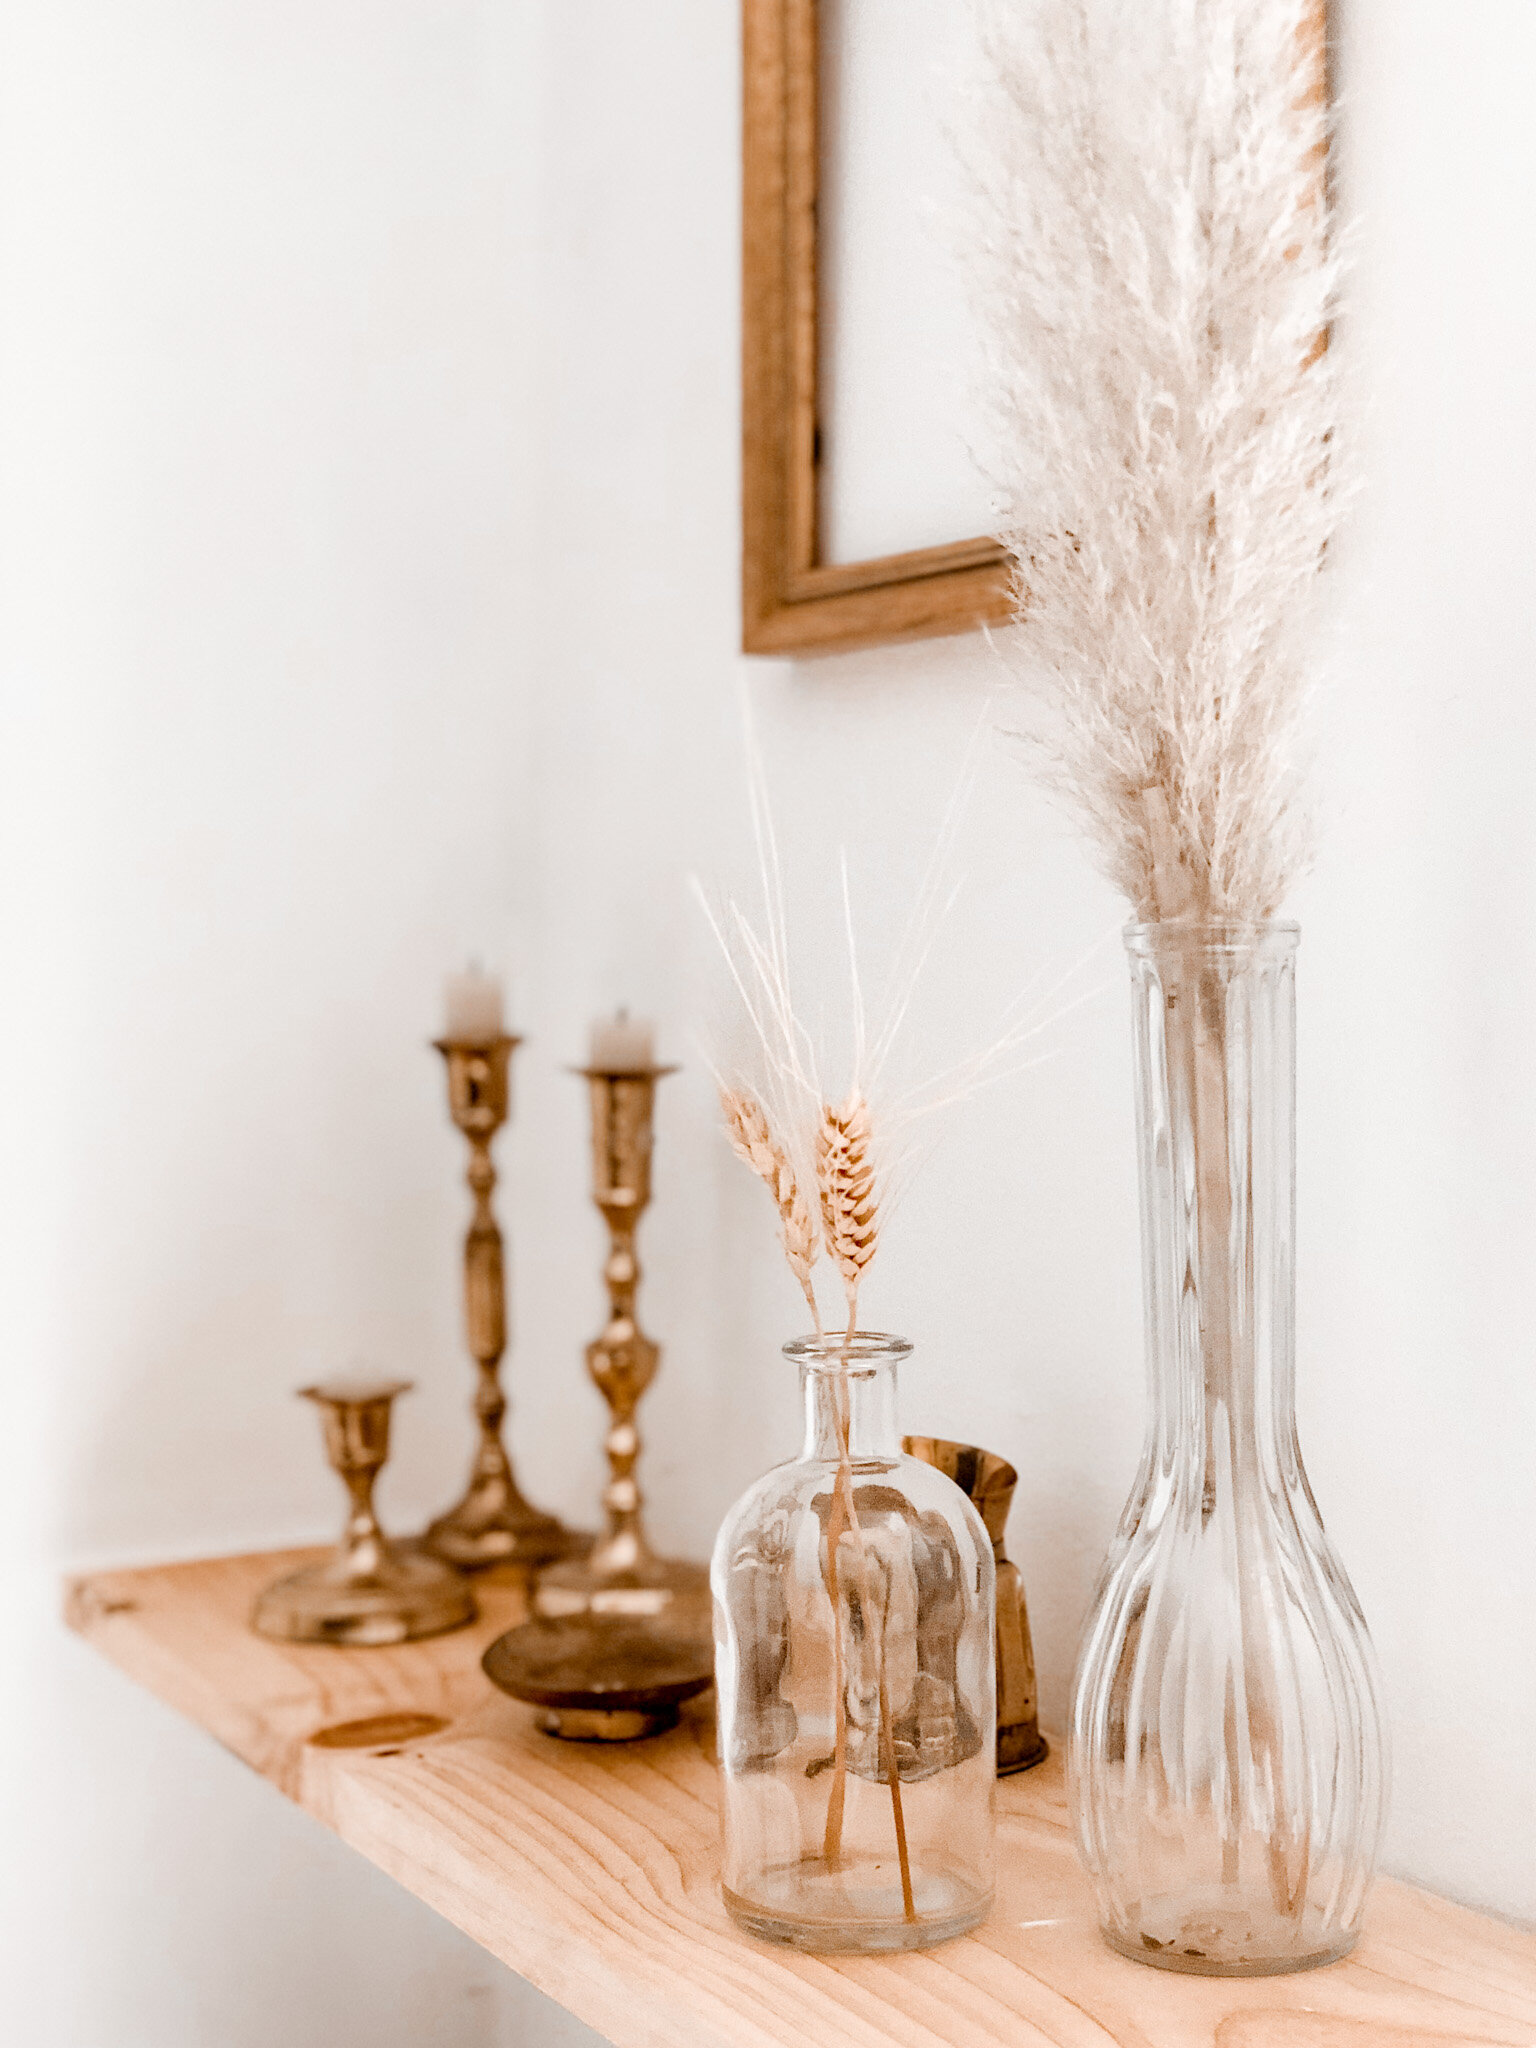
Now you all know how much I love a good vignette (I live for them). So it’s only right that I’d create a few throughout this space. I purchased my candle tapers from Jo and June, and found the rest of my items during a few thrift runs. I love mixing old with new, and thrifting gives me the opportunity to grab items that have story and at a reasonable cost. The babies breath is dried, and something I move around the house periodically. I was also happy I could incorporate the DIY end table I made a few months back (I love the texture this piece provides to the space). I wanted to bring in a few abstract items, and my coffee table and gold floor lamp were a good fit. Last, but most certainly not least are my pampas grass, drapes, rod, ring clips, and throw blanket and pillows. They really help to ground the space, and also provide much texture. Just a few more items, and my dream living room will be complete.


Just a few more items, and my dream living room is complete
We’ve only been in our new apartment for three weeks, and I’d say the space is coming along well. We do however need a few other items to complete our living room. I’ve been sourcing paintings to go above the sofa, in addition to wall sconces (plugin sconces preferably, which has made the sconce hunt a bit more tricky). I’m excited to to show the final reveal of the living room (whenever that is), but it does beckon the question, is a living room ever complete?

My mom’s living room reveal: Collaboration with Mitzi
We’ve finally finished the living room and thanks to Mitzi, we’ve got some beautiful lights that contributed to my mom’s glamorous midcentury and minimal design concept. I’m so happy to post the before and after photos of this space, and share the beautiful lighting that made this transformation possible.

My mom’s new mid-century meets minimalist-glammed up living room.
Hey there!
If you don’t know by now, I’ve been assisting with re-designing spaces in my mother’s home in exchange for room and board. This totaled seven months of free rent (and we know how expensive it is to live in Los Angeles). Though my husband and I have moved out since then (into an apartment in the meantime) we’re still heading over during the weekends to help my parents complete projects.
We’ve finally finished the living room and thanks to Mitzi, we’ve got some beautiful lights that contributed to my mom’s glamorous midcentury and minimal design concept. I’m so happy to post the before and after photos of this space, and share the beautiful lighting that made this transformation possible.

BEFORE photo of my mom’s dining room.

AFTER photo of my mom’s dining room, featuring Belinda Pendent.
The Belinda Pendent
The great thing about drop pendents are the versatility they bring to spaces. These pendents gave us so many options as it pertains to variations, while still offering functionality. We decided to play around with this variation by hanging three pendents at different heights over the dining table. What we loved about the Belinda Pendent was the cylinder shape and double-layering of glass. They really added a layer of elegance and sophistication that played a major role in maintaining a mid-century glammed space in contrast to the rustic shiplap wall.

Mitzi Belinda Pendent featured.
The Belinda Sconce
We used the Belinda Sconce as ambient lighting in the living room space. These sconces provide a warm comfort in the room drawing people into the space when lit. Along with the many movie nights that will take place in this space (my mom loves The Lord Of The Rings and The Hobbit and plans to have viewing parties for these movies) the location of the lighting also offers my mother the option of task lighting, as she can sit underneath either sconce and burry her nose in a good fantasy book.

Mitzi Belinda Sconce Featured.

Mitzi Belinda Sconce Featured.

Mitzi Belinda Sconces Featured in my mom’s living room reveal.
The Ariana Sconce
The Ariana Sconce was one my favorite and by far the most asked about lighting accessory via my instagram. This glass shade beauty effortlessly drops and rises smoothly (even wave-like) from a single base. We even had the option of mounting it horizontally however, we went the vertical route - as it felt right for the space. When putting together the mood board for this space, I was looking for an abstract fixture that would coincide well with the smooth shape of the nightstand, and the Ariana Sconce did just that.

Mitzi Ariana Sconce featured in my bedroom reveal.

Mitzi Ariana Sconce featured in my bedroom reveal.

Mitzi Ariana Sconces featured in my bedroom reveal.
There are so many choices when it comes to selecting the right lighting for a space, as the styles are endless. Mitzi provides an array of “well-designed, well-made, and well-priced lighting.” Their lighting offered the glamour each one of these spaces needed, and it was a pleasure to collaborate with such an amazing team. Also, did I mention Mitzi is LEED certified? It doesn’t get any better than saving the planet while having a beautiful space - I’d say it’s a win win!

What my bed linens mean to me: My collaboration with The Citizenry
I partnered with The Citizenry because I too believe our homes should be a reflection of who we truly are. Like them, I’ve always kept these three very important aspects in mind when curating my home spaces.

“We believe our homes should be reflections of the journeys we take. Our personal spaces deserve designs with a soul, a story, and a purpose.” - The Citizenry
Everyone should come home to a space that makes them feel, happy, comfortable, and special. This is the reason I named my blog “True Home.” I believe the best designs are the spaces that truly reflect the people who live in them. I partnered with The Citizenry because I too believe our homes should be a reflection of who we truly are. Like them, I’ve always kept these three very important aspects in mind when curating my home spaces, and the spaces of others: soul, story, and purpose. It took me all week long (running around like a chicken with my head cut off, desperate to find the perfect bed sheets) to remember exactly the reasons I design, and working with them during this collaboration served as a perfect reminder.
BEDDING FOR THE SOUL
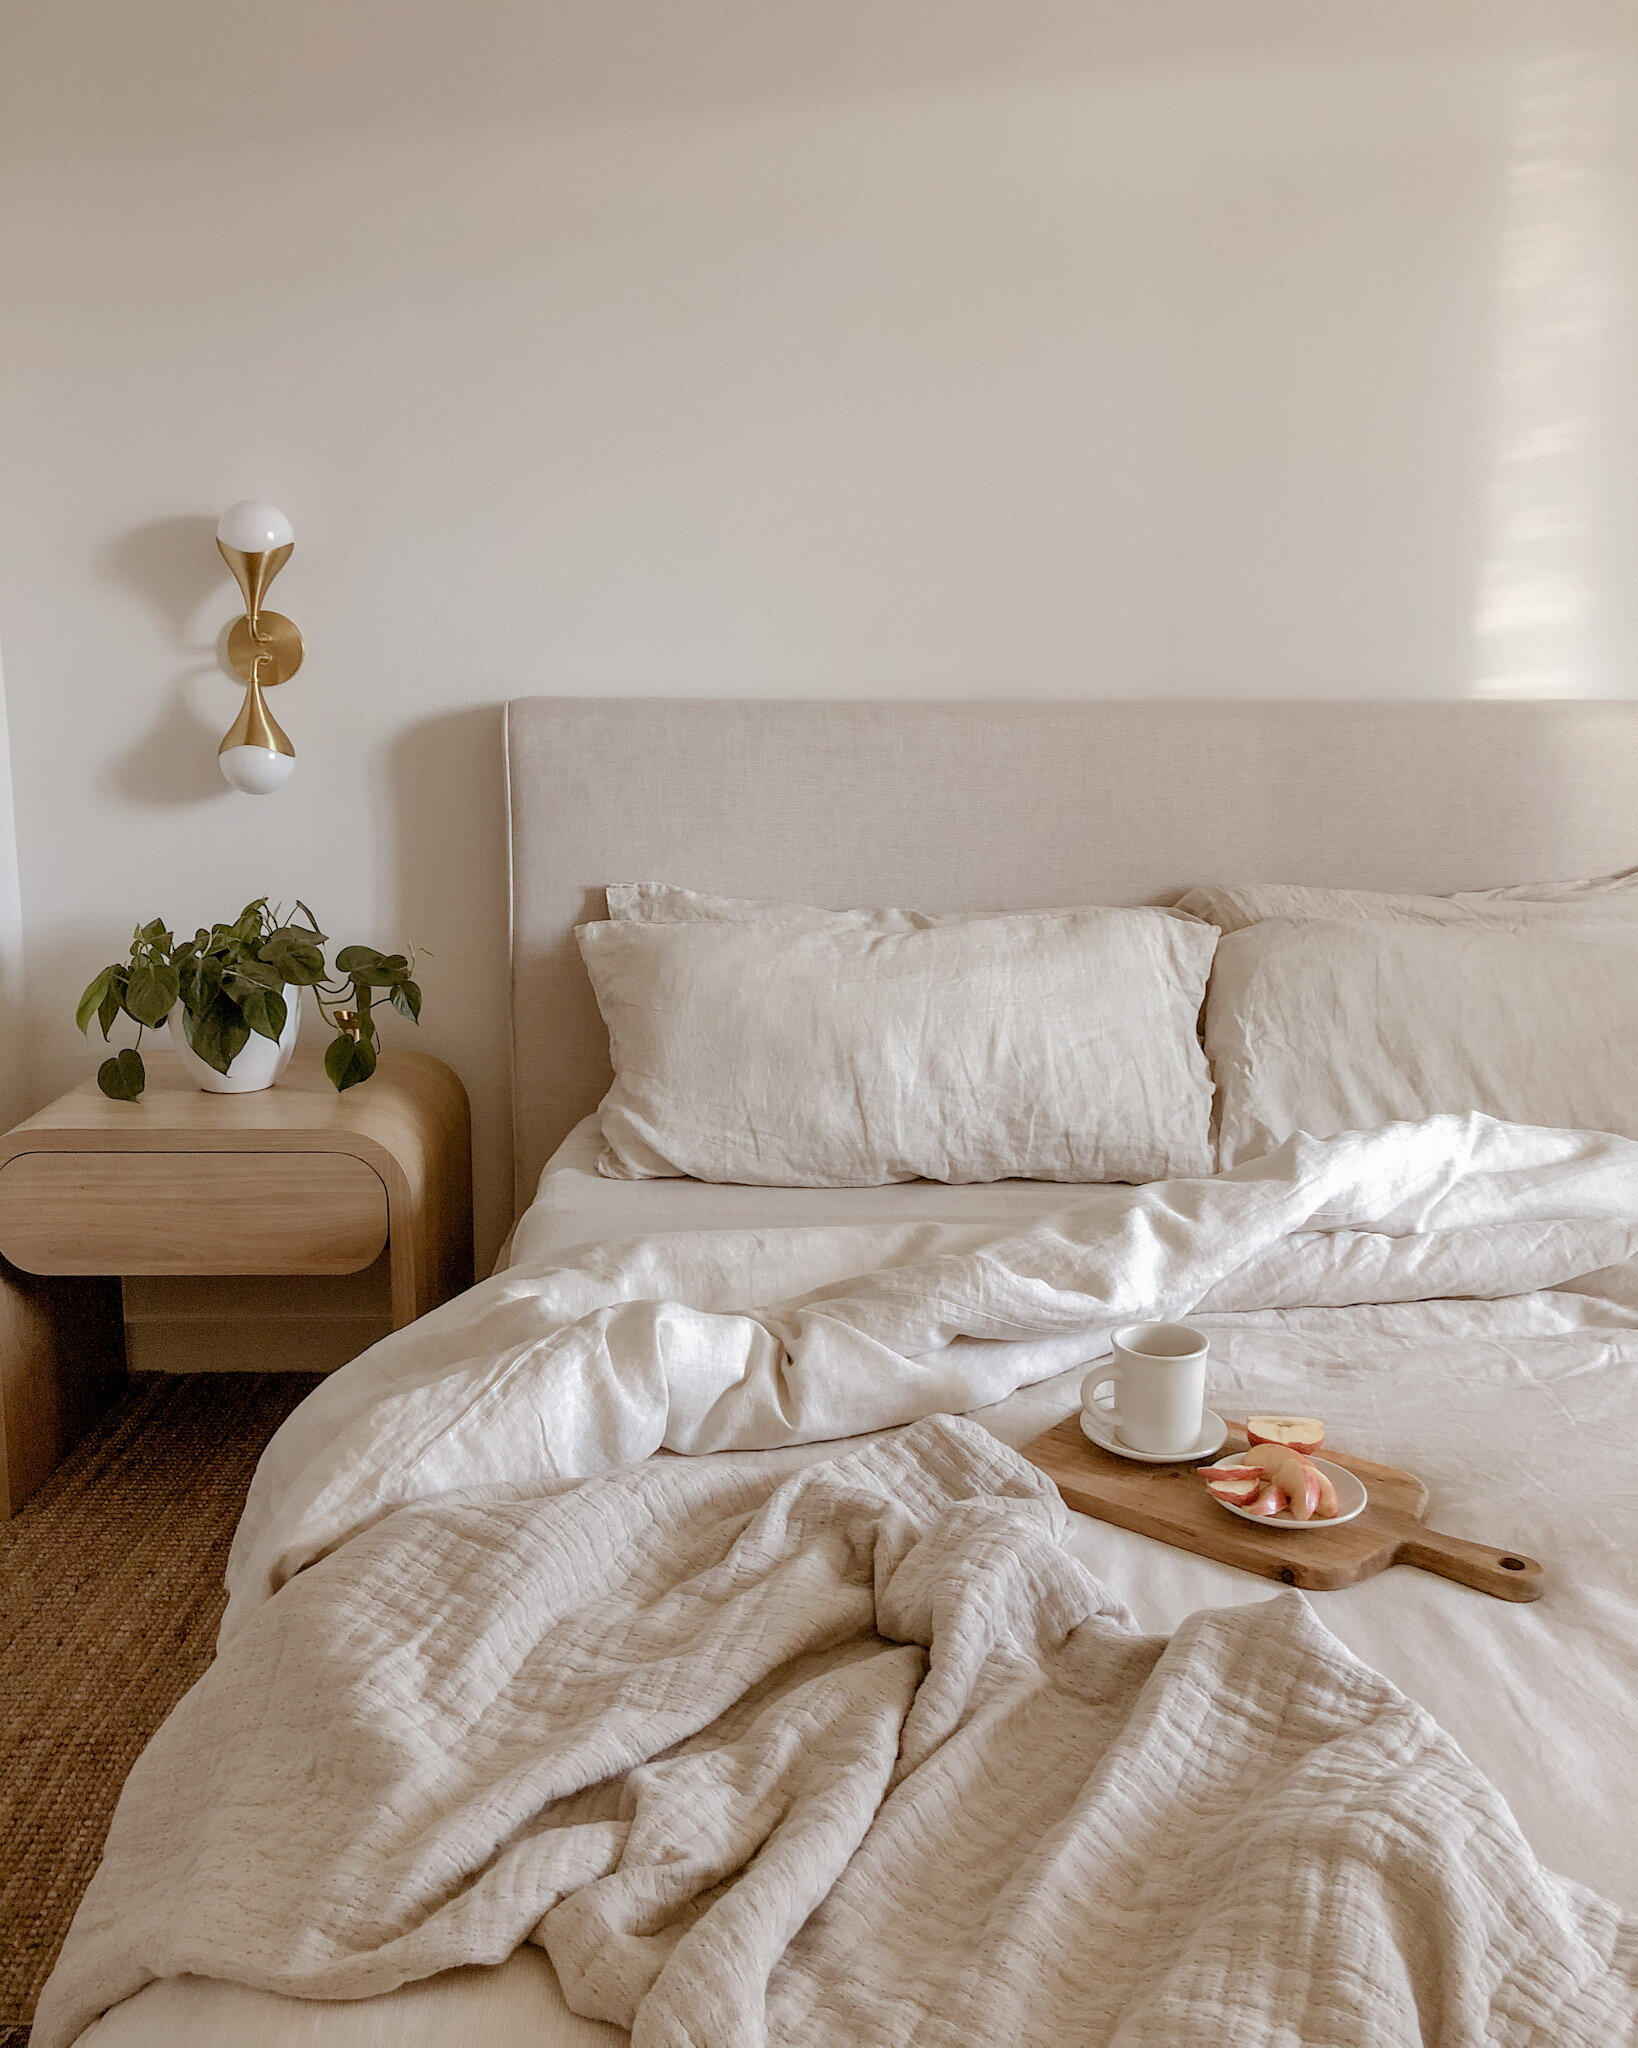
My soul longs for peace, warmth and stability, and what else should a bedroom be besides peaceful? We (as a people) have been through so much over the past months, and we deserve a calm and safe place to lay our heads. This is why choosing to partner with The Citizenry on their bed bundle was an easy choice. Choosing the perfect color palette for my bedroom was important in creating just the calm I was looking for and the colors they offer in bedding are right up my alley, as they provide an array of neutral and natural color palettes. Our minds process colors and allow for a certain reaction, and this sand striped color in stonewashed linen offers relaxation. Like other browns, the sand stripe evokes warmth and security. It also gives a sense of earthy stability similar to many members of the brown family.


BEDDING WITH A STORY
I don't know about you, but I can surely appreciate a piece with a good story behind it. I like to know that the items that live in my home come from a place filled with artisans, designers, and dreamers. I want the pieces in my home to have been created with care, and to feel like it was created especially for me. This is why handmade goods are my favorite. My bed bundle was crafted in Portugal and the fabric is so luxurious, it's customary for the sheets to be given as a wedding present. How special is that? It makes me feel so good to know my bedding was touched by a real person who put love into them, and the process of making them involves their life experience, culture, and upbringing. When laying in these, you can truly feel the love, the joy, the craftsmanship.


BEDDING WITH A PURPOSE
I want to come home to a place that doesn't feel overwhelming and too complex. Their linen bedding is organic and offers a laid back and effortless yet luxurious appeal. This is exactly what I strive for as it relates to my bed (my sanctuary). It is truly the softest fabric you’ll touch, and it’s only gotten softer with every wash. To top it off, they are made sustainably and in a fair-trade environment. If you’d like to sample and experience this fabric for yourself, I’d suggest you test it out for yourself and order your own LINEN FABRIC SWATCHES.

On that note, I’d love to leave you with a little something to give you insight on what it is to be a creator, designer, and/ or craftsman, and hope that it inspires you to continue on encouraging these very important makers.
When buying from a creative, you’re buying more than just an object.
You’re buying hundreds of hours of failures and experimentation.
You are buying days, weeks and moments of frustration,
You are buying moments of pure joy.
You aren’t just buying a thing.
You are buying a piece of heart;
Part of a soul,
A moment of someone’s life.
Most importantly, you are buying that creative more time to do something they love.
Lying peacefully in my bed linens,
Ajai

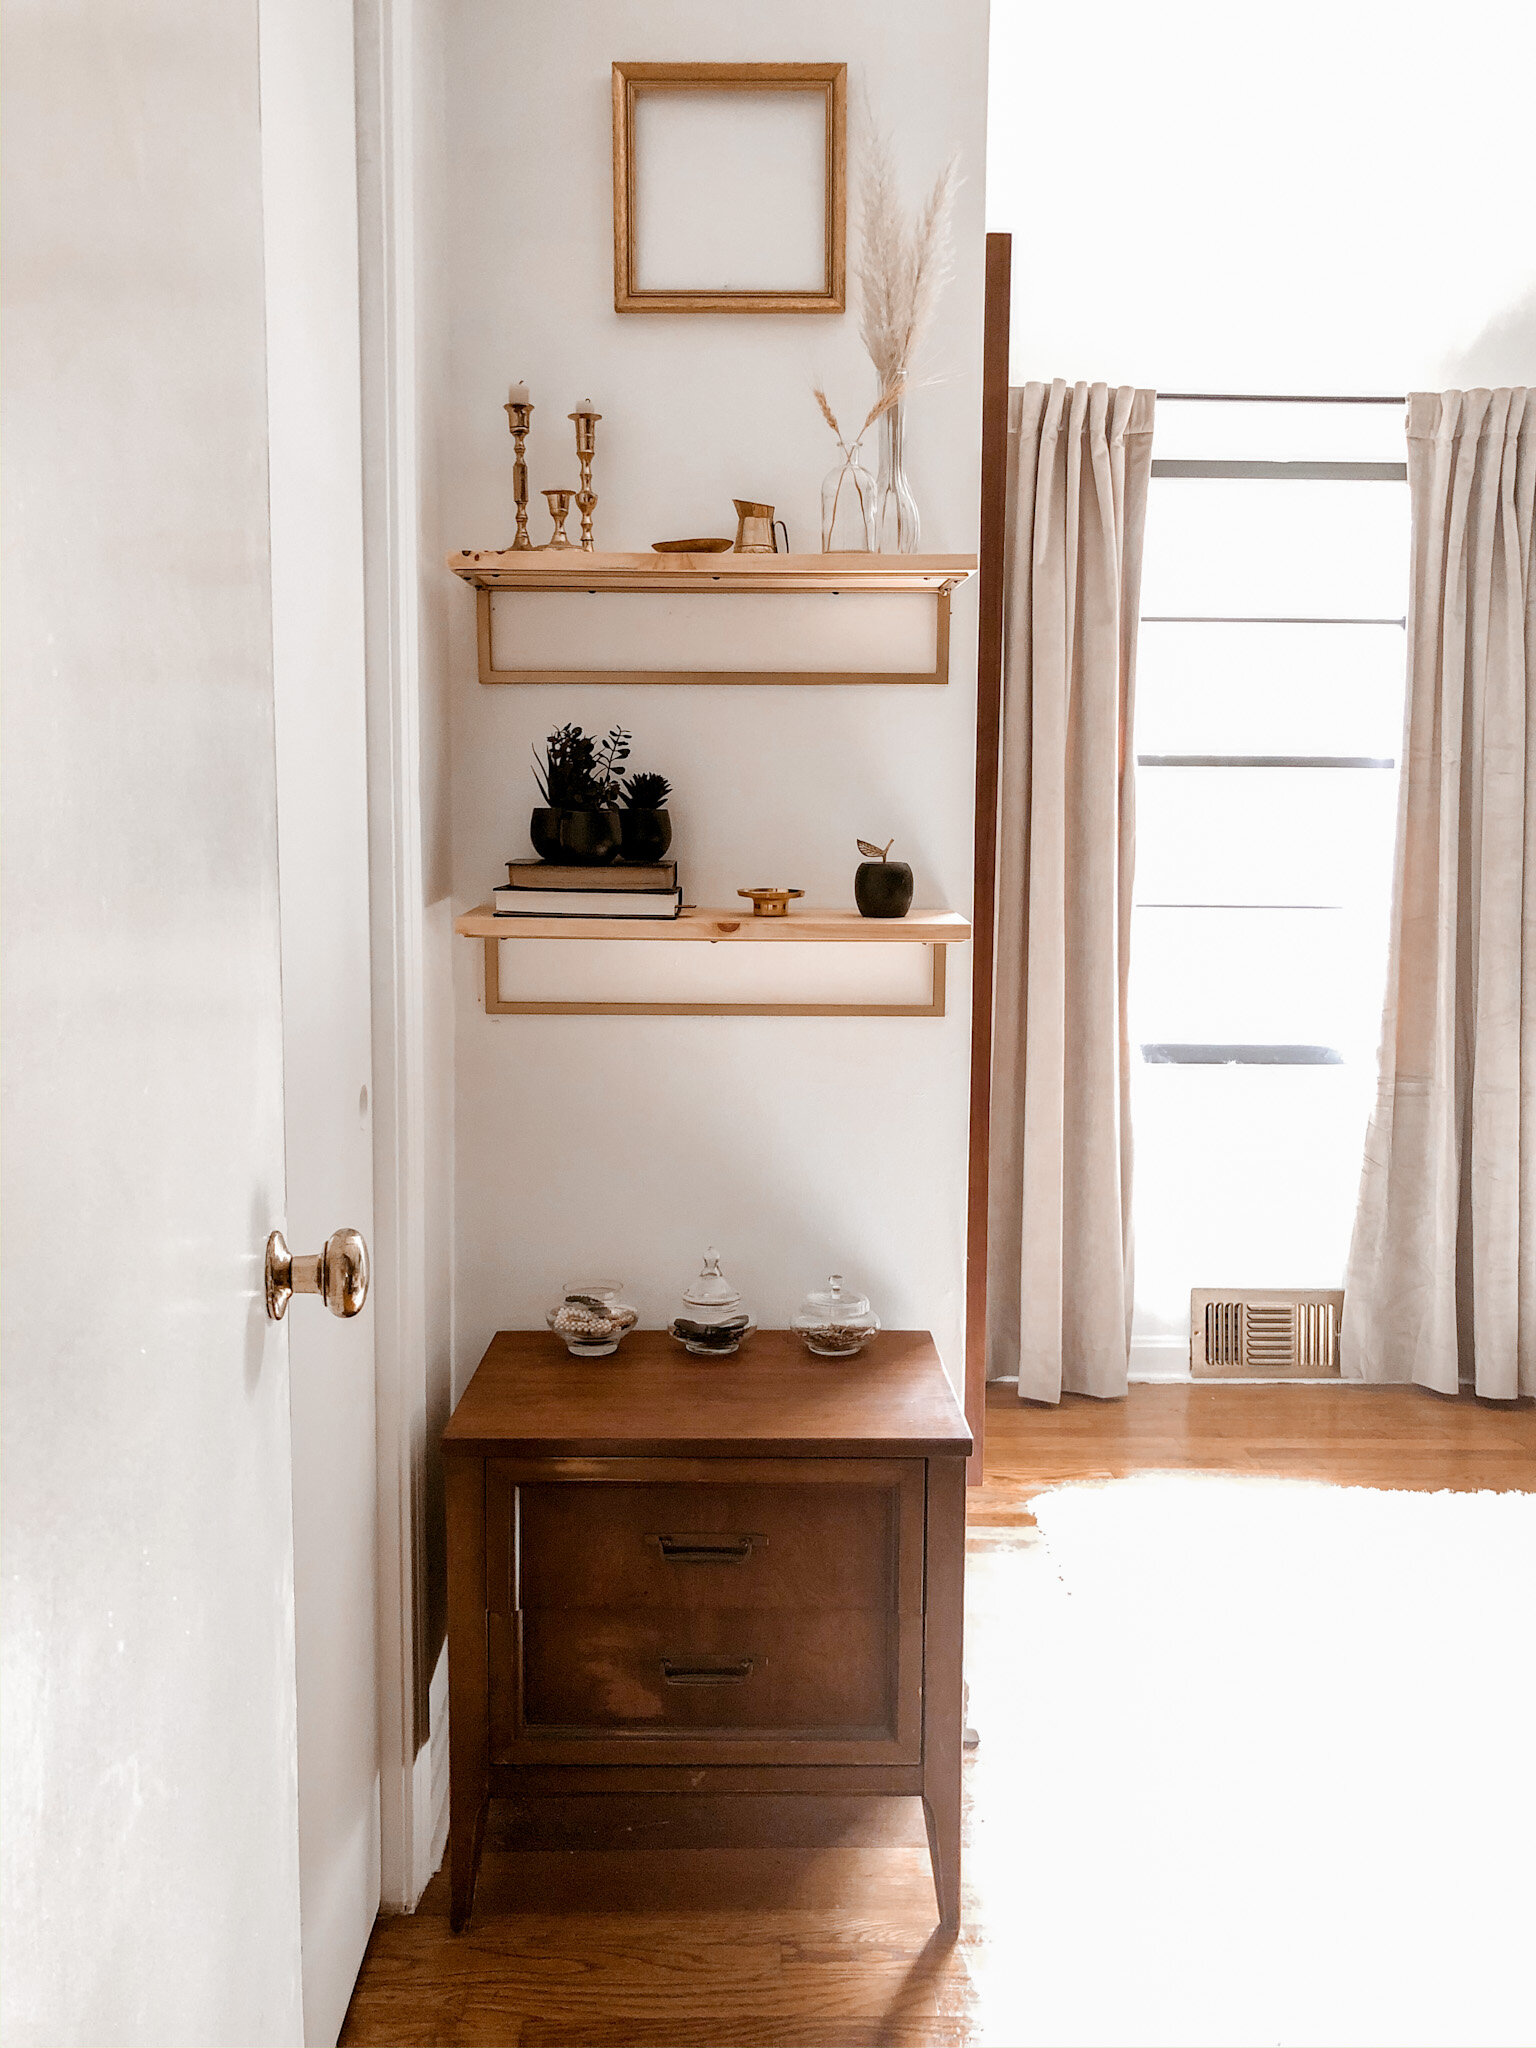
A Little Nursery Inspo
Here I am, 26 weeks pregnant, and still have not solidified our nursery.
I know there are so many decisions to make as it relates to design and functionality, but it wouldn’t be honest if I said I had it all figured out. I’m doing so much research on the nursery do’s and don’ts, and have been learning so much.

Here I am, 26 weeks pregnant, and still have not solidified our nursery.
I know there are so many decisions to make as it relates to design and functionality, but it wouldn’t be honest if I said I had it all figured out. I’m doing so much research on the nursery do’s and don’ts, and have been learning so much. I plan to summarize this knowledge in a future blog post, but wanted to share the design I put together for our BIG reveal in the meantime. I love walking by this little vignette. It encourages and excites me for motherhood. I hope it inspires you as well. Please feel free to comment with any nursery tips you have, I’m all ears!
P.S. I know not to ever hang anything over the crib. This setup including the babies breath was strictly for the announcement.


Designing For Peace of Mind : An Intentional Office Space

What is intentional living to you?
For me, intentional living is defined as deliberately designing a space to satisfy my needs and the needs of others living in my home.
Like many others, the past six months have been stressful and anxious for my husband and I, and my goal was to combat these feelings by designing a tranquil and relaxing office space.

Living in high stress times
This time of year, my husband’s job prepares for a large conference, where they train thousands of customers - and this time, the event is being held from the homes of many employees. This is where intentional design comes in to play.
My goal was to ensure that my husband was comfortable and stress free during this time, and the remainder of this work-from-home period. This lead me to a specific design materials and color palette.

The Meaning of Colors
Did you know colors evoke feelings? For instance, I chose to spray paint the color of the table legs white, to evoke the feeling of light, cleanliness, and success. I incorporated neutral hues like taupes and browns for the barrel chair, large candle, table lamp, and vase, because these tones give a feeling of being calm and grounded. Feelings that are a necessity in a work space. I also sourced a vintage rug from Etsy, also rich in neutrals.


Warmth and light
My husband and I tend to work long hours, and this looks like working into the night sometimes. This is why lighting like the wooden table lamp, is important for our workspace. I also wanted to incorporate a drop pendant light that would specifically highlight the area of the desk where the computer would be, and could illuminate my husband as he takes his Zoom meetings and trainings into the late evening.
I wanted to avoid calling out an electrician, so I purchased a puck light to glue in place of the light bulb. I frosted the glass of the drop pendant with a white spray paint, then mounted the drop pendant to the ceiling. The puck lights give off a warm lighting, and the knitted throw blanket makes it convenient to get through the colder evenings, further making our workspace feel relaxing, calm, and warm.
For a video tutorial of this DIY drop pendant, you can visit my Instagram story highlight titled “Drop Pendant.”

Styling as a Minimalist
In my home, I practice minimalistic design, and have found it’s benefit as it pertains to mental health comes in handy. In my home, it’s important for us to have a clear space (rid of clutter) in order to think clearly. We also do well with having inspirational things in sight, so I added a picture frame with our baby’s first ultrasound images, books like “Down To Earth,” “This Is Home,” and “Home Body,” (all very good reads) reminding us of intentional and simple living.
The barrel chair was chosen for its breathable linen fabric, back support, and oval shape, which hugs us and makes us feel comforted throughout day. The wooden file cabinet gives us storage, and contributes to the warm and relaxing color palette. I added a wooden vase, and pampas grass for a beautiful aesthetic, and to keep the space feeling uplifting and creative.
Scents in the workspace
There is real power in smells, and certain scents can really help to get through a workday. I find that I write much better when I have a fig scent burning near by. For this reason, I keep a few soy candles assorted on our work desk.
The large brown candle is a fireside scent consisting of sandlewood, woodsy, and clove. The smaller ceramic candles are poppy and fig; these scents leave our space smelling of earth, fruit, and flower.

Colors, light, visuals, and scents; all things that heavily determine success in our workspace. Being sure to design with those elements in mind, was a necessity for me. We are quite happy working in this space, and mentally ready to take on any all work that presents itself. This is our way of working from home, intentionally.

How we updated our bathroom on a $250 budget

The $250 Budget
When we moved into our house we had to update both of our bathrooms in a hurry! Neither one of the bathroom’s toilets or sinks were water compliant (up to code) therefore, we could not have the water or gas turned on. This left us with a small budget, needing to update two bathrooms! After updating the larger bathroom, we were left with $250 to remodel the half-bath. Below is a before photo of what we were working with.

Getting Started
To get started, we thought it would make the most sense to immediately swap out the toilet and sink, as they were the primary reason we could not have the water and gas turned on. We found a traditional toilet and vanity during a BOGO deal! We bought the toilet for our full bath and got a toilet free, and bought a vanity for our full bath and got one free. We used the free toilet and sink for our half bath.
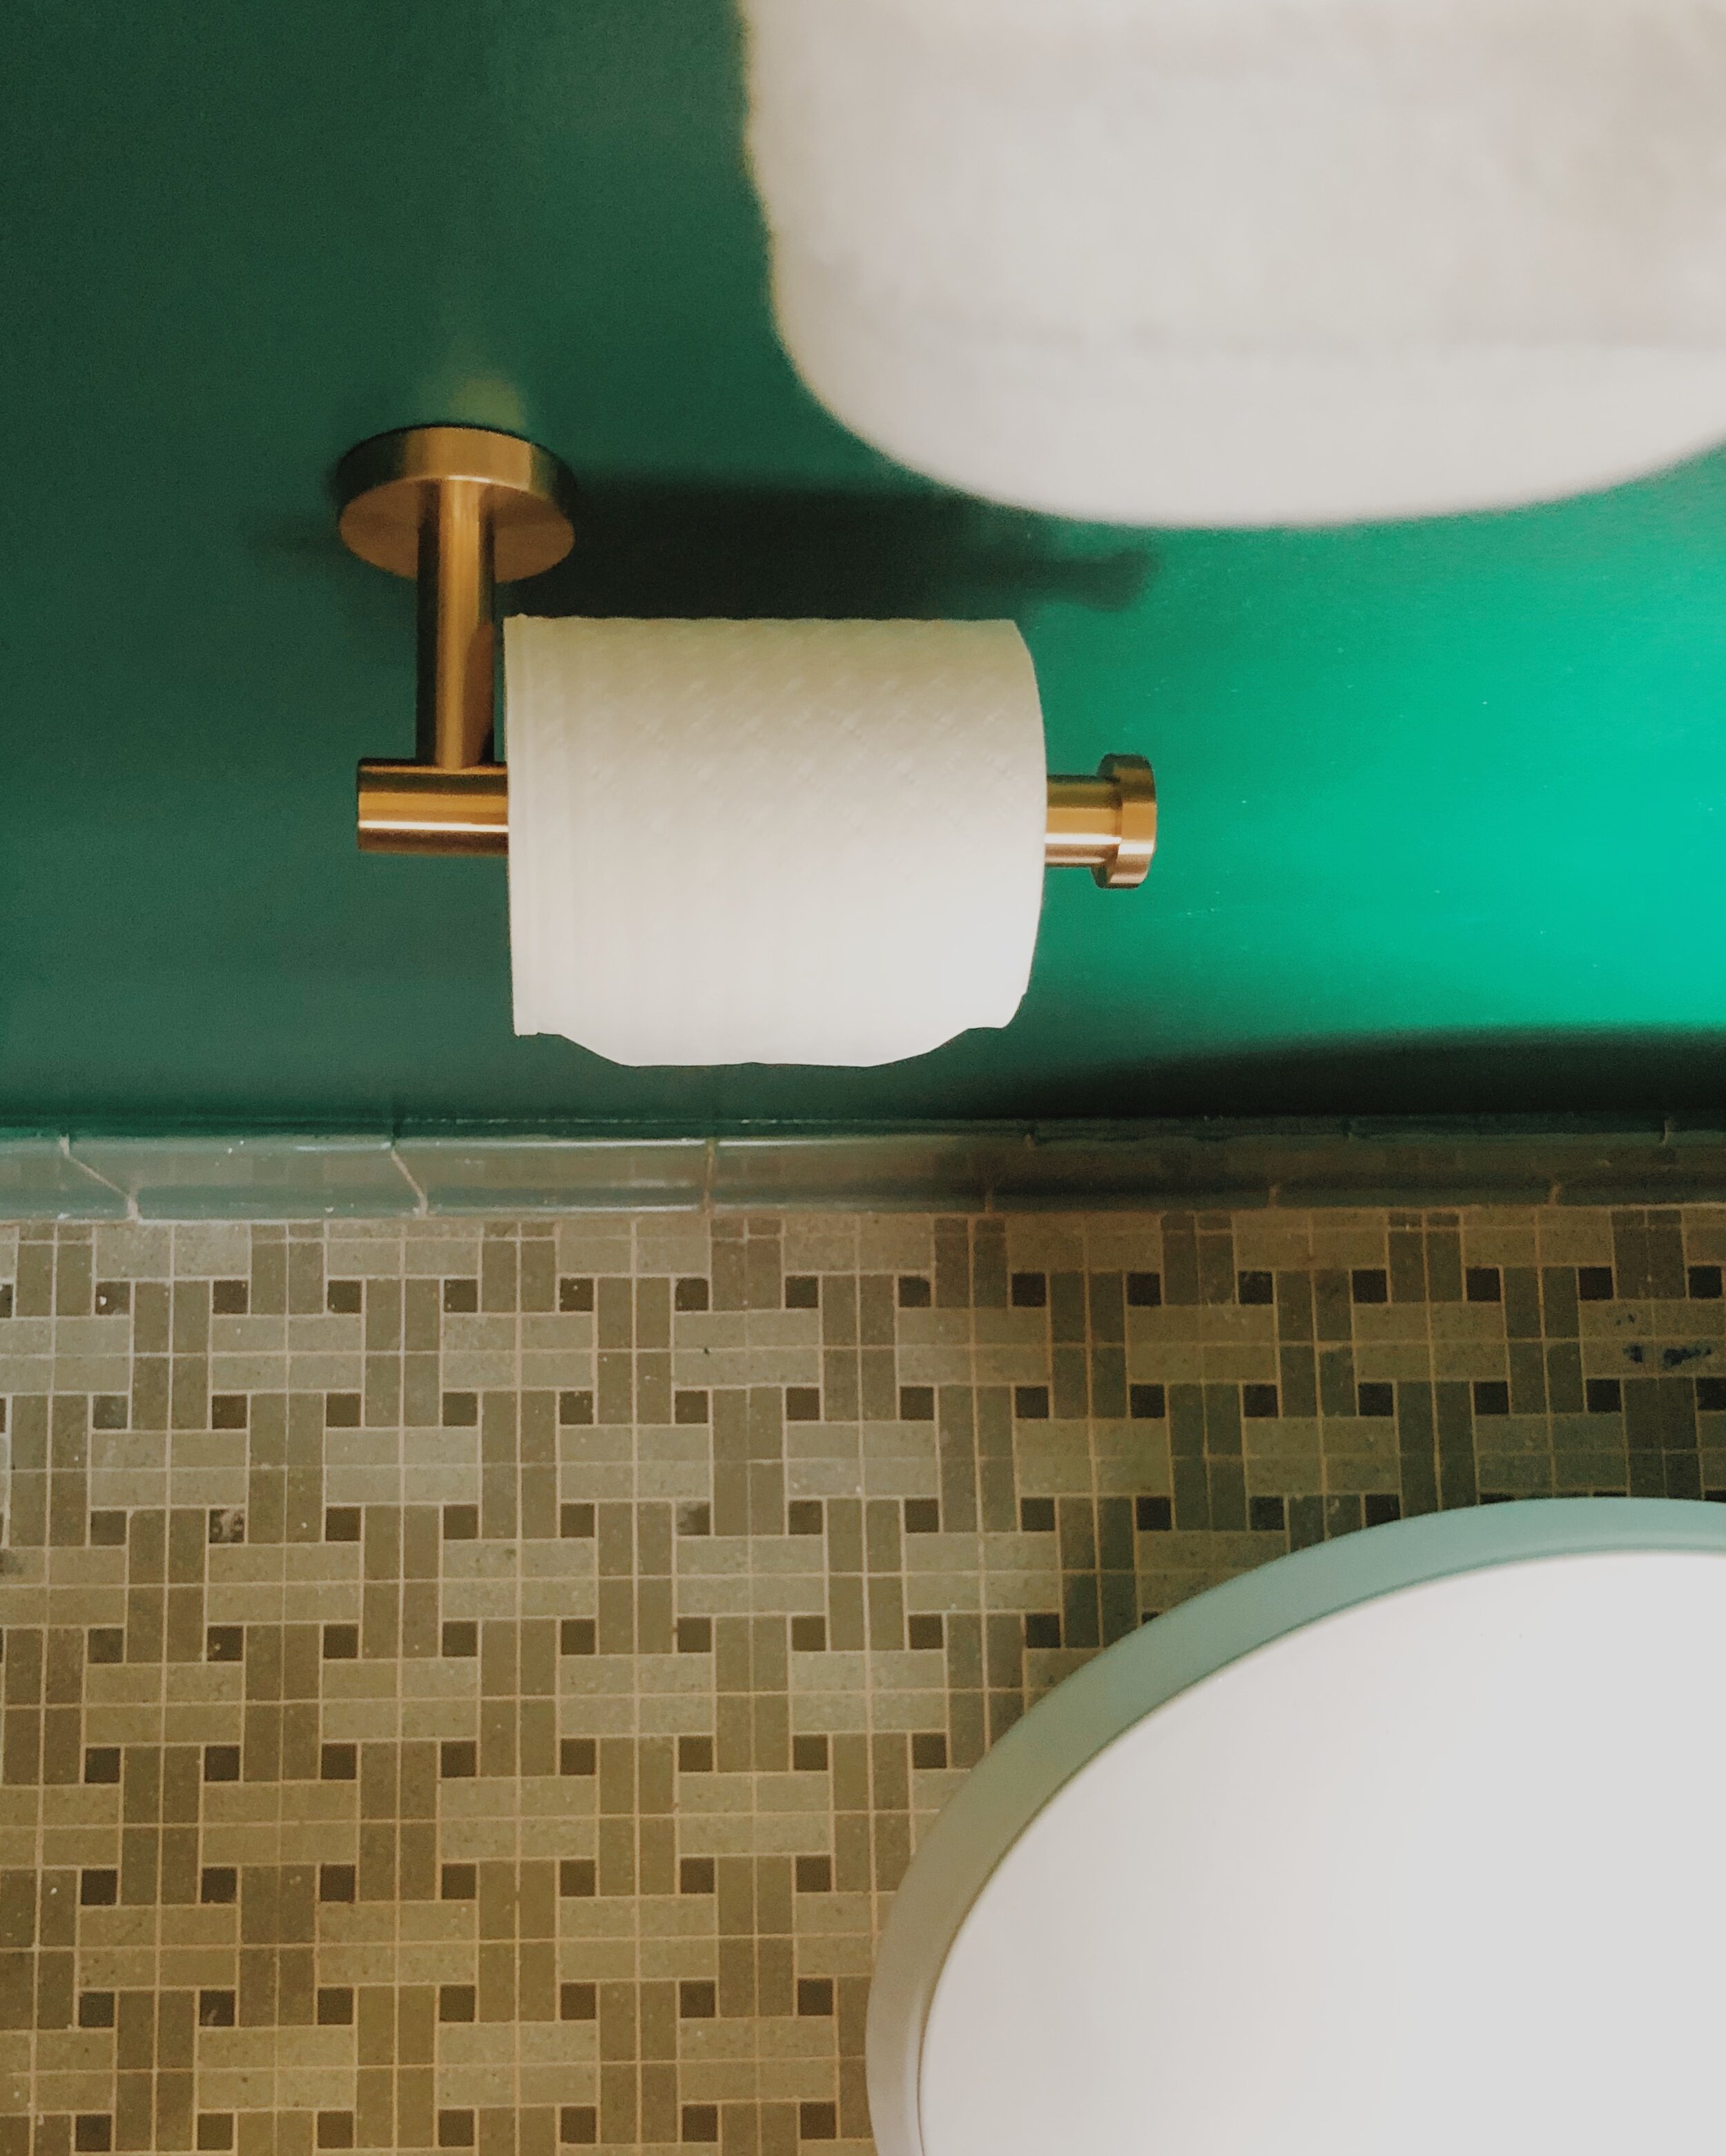
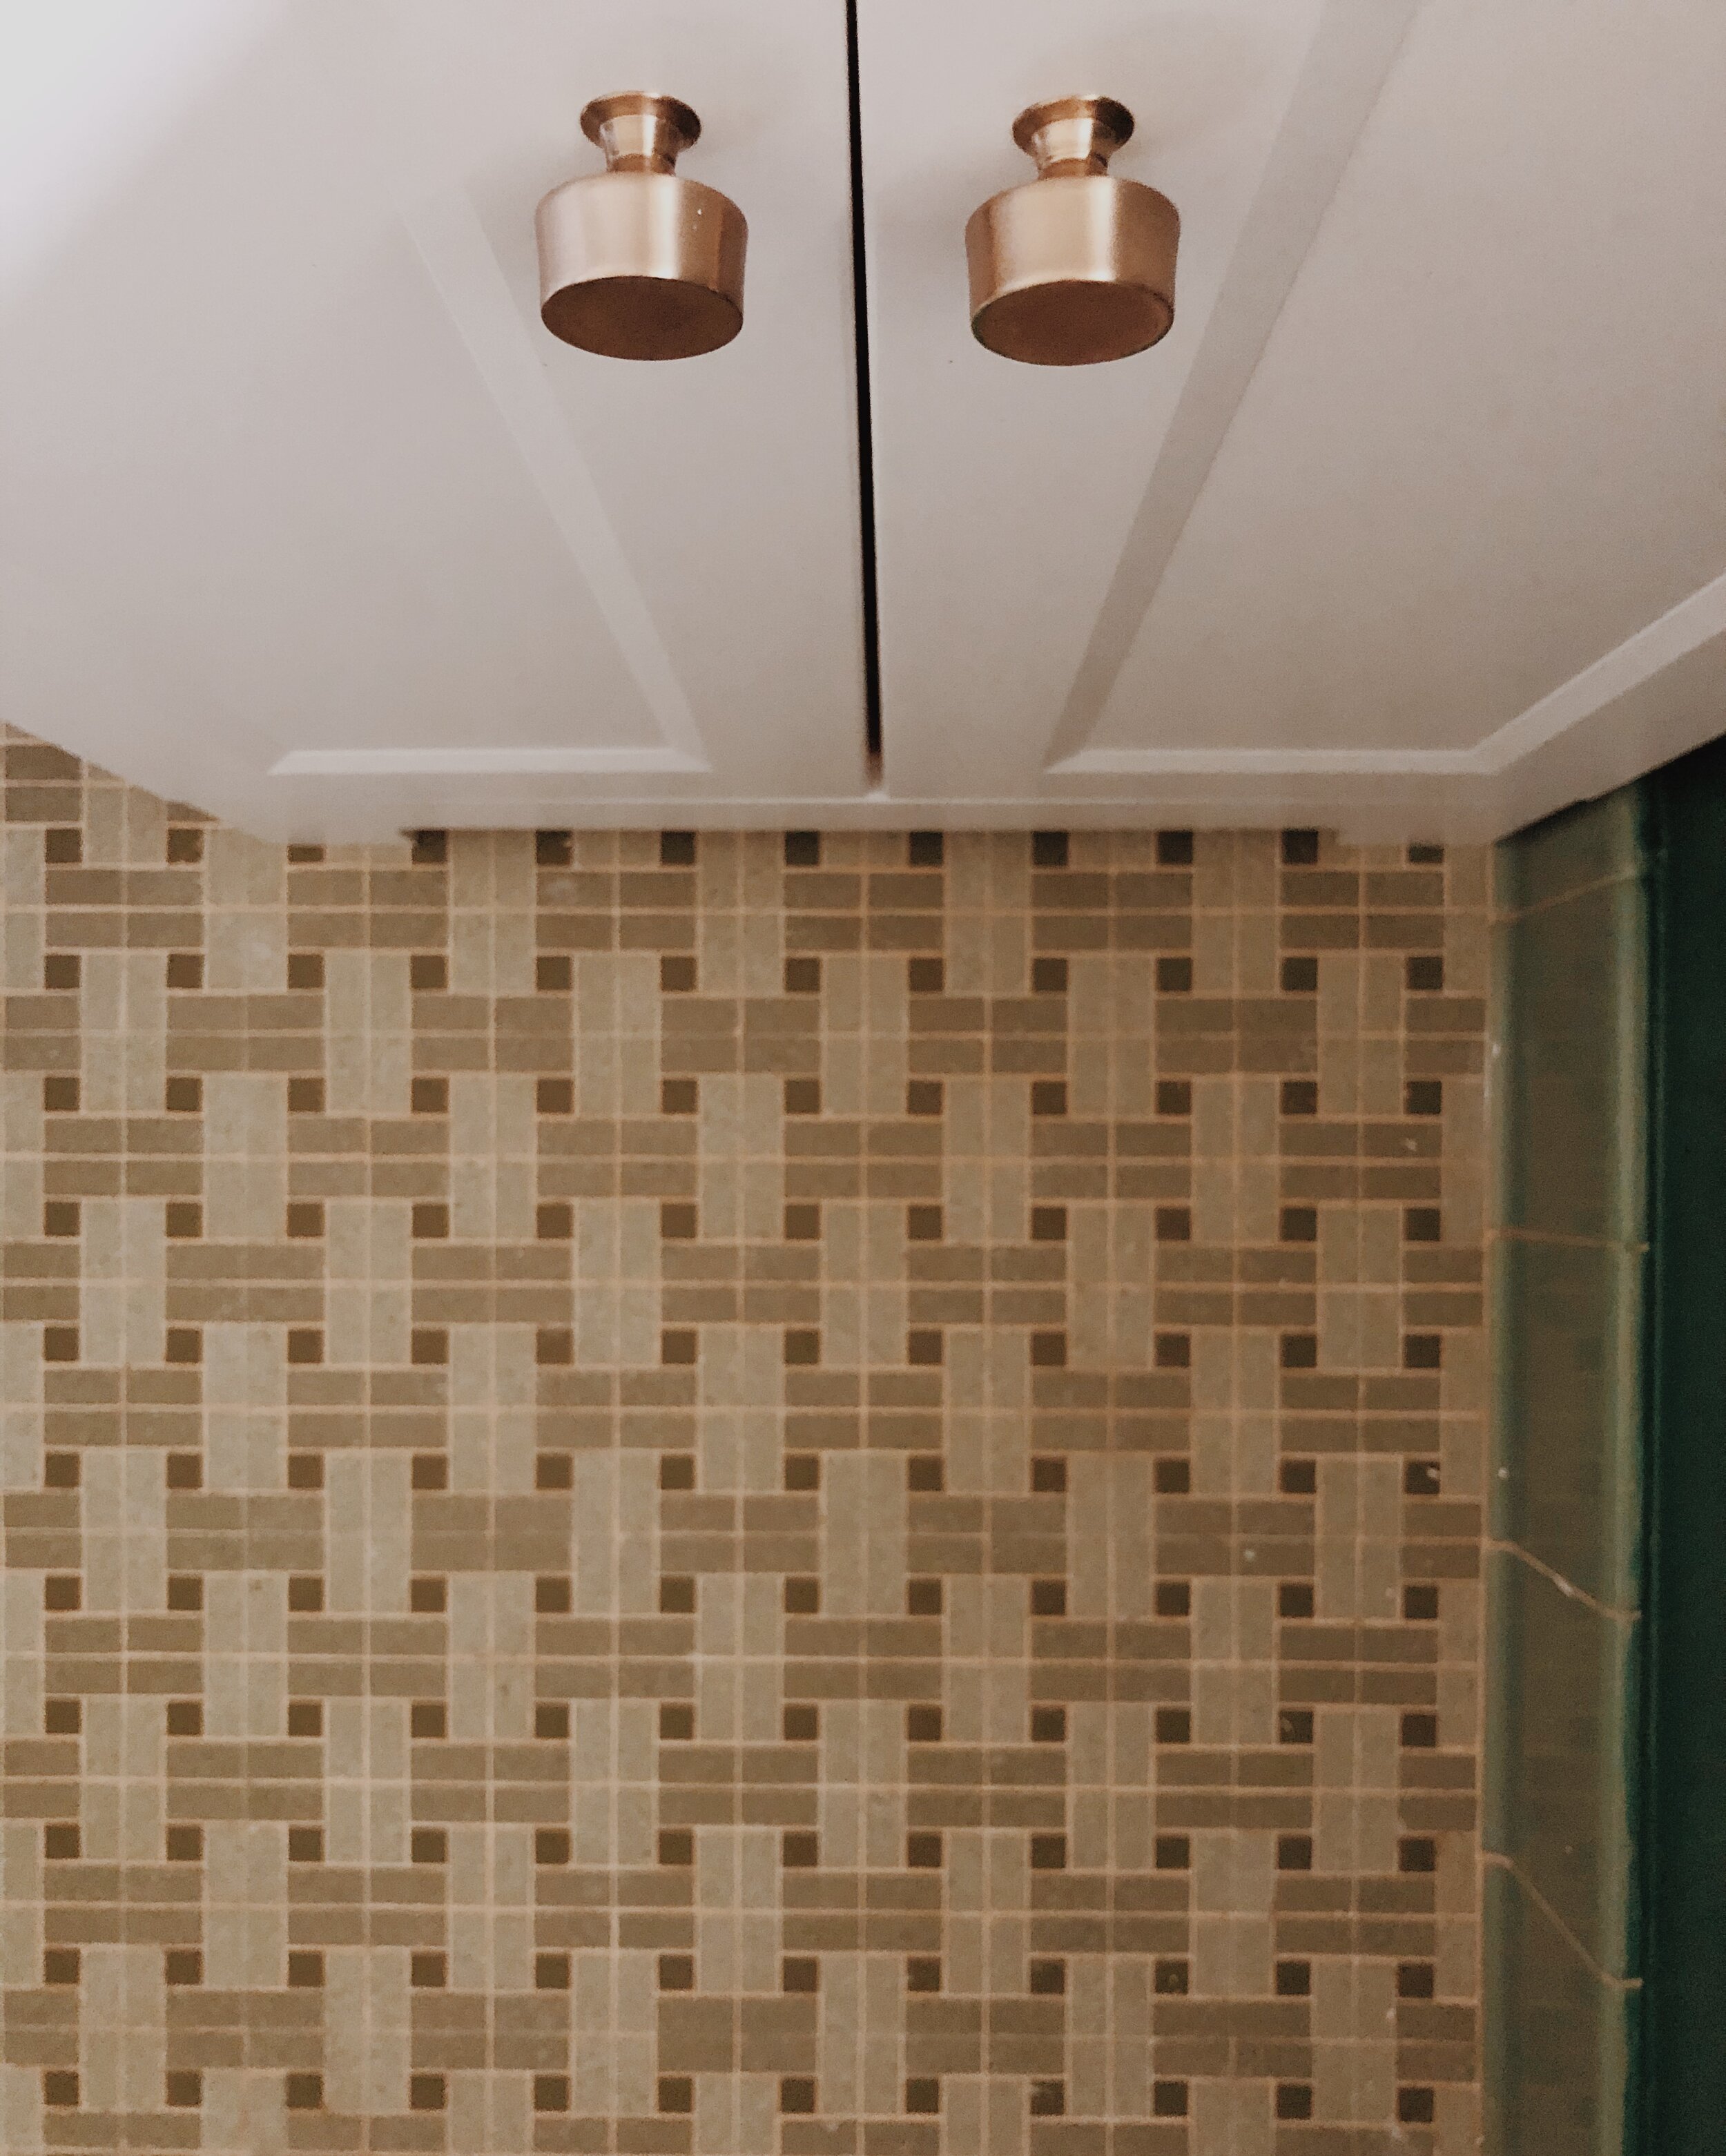
We also purchased different vanity knobs, a brass faucet, and sconce to go along with our design concept.

Design Concept
We decided on “vintage and quaint” for our design concept. This meant we would keep our older tile and use it as an inspiration for the new design! This lead us to choosing a paint color that would compliment the already existing floor tile.
Sweat Equity
We wanted to do all of our own work in this space, because we knew we’d get more bang for our buck. So we did all of our own patch work after removing the existing medicine cabinet and hardware.
We even swapped out the vanity and toilet on our own.

Mounting hardware first
From there, we mounted the new hardware, as it’s important to do this before starting any painting. Creating the holes for hardware like, toilet paper and towel holders, vanity mirrors, shelves and sconces, allowed us to get everything leveled and in the right spot. We removed the finishing hardware pieces once we had the correct positioning.

Time for Paint
Next, we prepped for paint! We used a laser-level to create a division line with painter’s tape. We decided to paint the top half of the bathroom white, and the bottom half Behr’s Billiard Green. This way we only had to purchase a small amount of paint and were able to use some left-over white paint we already had. After the paint dried, we removed the painter’s tape and added in the hardware. We replaced the original vanity knobs with new knobs, to achieve the quaint feel we desired for the space.

Styling
When it came to styling our bathroom, we decided to only purchase the functional pieces that were a necessity. We bought a marble soap dispenser, toothbrush holder, and a marble canister jar. We already had an extra Glassy Baby hanging around the house, and it happened to match well with the paint color, so we incorporated it into the design. The plants, soap, and toilet paper were also essential items that we already had - and made sense to style into the space.

The end result
There you have it! That’s how we designed our half bath for just $250. It was so important for us to make budget-friendly decisions when updating our bathroom. This way, we could splurge in the areas where it really counted - like our kitchen renovation for instance!

Parisian Kitchen Renovation: How I brought a touch of Paris to this Atlanta, Georgia Kitchen:We Saved over $100k on Our House, All Thanks To The Kitchen

Finding our House
Last July, my husband and I purchased out first home! We were driving through the cutest Atlanta neighborhood, and spotted a “for sale by owner” sign. From the looks of it, we could tell it was a fixer-upper, but that was right up our alley! The house was in a great location, and we were willing to put in the work we needed to get a deal on the house. That “work,” ended up being the kitchen.
We Saved over $100k on Our House - All Thanks To The Kitchen
We were able to save a little over $100 thousand on the house due to the poor condition of the kitchen. There were critter infestations, plumbing problems, and electrical issues, but the moment I stepped in to the kitchen, I could see its potential and knew exactly how I wanted to design the space.

A Galley Style Kitchen
Because the kitchen was galley-style, it immediately reminded me of the smaller cafes I’d visited in Paris during our vacations there. So it was absolutely important for me to incorporate that bistro-European aesthetic while keeping the layout of the kitchen and utilizing the space appropriately.
I started with knocking out the walls, and creating a 14 foot island with a quartz countertop. This makes the kitchen feel like the perfect spot to hangout, drink lattes and eat crepes! I added velvet and brass barstools, and hexagon floor tile to play up this vibe!

The Contrast
If you know me, you know just how much I love contrast! I wanted the kitchen to feel open and airy, but I also wanted it to feel extra moody and sophisticated (like Paris), so I painted our cabinets black, chose a black gas stove and range hood to pop against the subway tile. I decided to go with floating shelves up top, to open up the space. I added counter-to-ceiling subway tile to elongate the walls, and chose butcher-block to contrast the quartz countertop.

Texture, Texture, Texture
I love playing with textures! I decided on wood shelves against the tiled backsplash, and weaved accessories like dish coasters to go along with our bowls and plates. There are textured vintage wine and cocktail glasses incorporated into the design as well, this gives it a boutique and eclectic feel.

Lounging
My ultimate goal was to create a cozy space that would inspire conversation. Having the bar set-up makes it so enticing to lounge and chat with friends over a cup of joe or tea. It’s one of our favorite places to sit in the house. When guests are over our sink and faucet help us to rinse cups, bowls, and plates quick and easy; pop them into our dishwasher, and never miss a beat during our fun conversations. I also love the warm mid-century-style lighting we chose, this style drop pedant sets the Parisian mood just right.

The Journey
We spent $25k to update this kitchen, put in some sweat equity, and budgeted on greenery and foliage. We tiled the backsplash, painted the cabinets, and stained the butcher-block ourselves, and added a faux fiddle leaf fig and some pampas grass to save a bit on greenery. It was worth every moment, and we have absolutely enjoyed the journey. We are selling our house the week, and are looking forward to our next kitchen design adventure!

Loft Project : DIY Details From My Collaboration With Sarah Randall - Project

This past weekend, I teamed up with DIYer Sarah Randall to transform her mother’s loft! The goal was to create a vignette-design that would inspire her mother throughout the workday. I wanted to bring life into the space to really get some creativity flowing.

Here is a before photo of the loft:

This was such a fun space to transform! Now to the DIY and design details!

Lets Talk Walls!
The idea was to create texture, and we did this by installing beadboard utilizing a nail gun. It took four of us to apply a custom cut with a table saw and jigsaw for the small window cut-out.
Per my favorite staple, we painted the feature wall with Behr “Pacific Dunes” in a matte finish.


DIY Brass Sconces
Here’s one of my favorite sconces to use when remodeling on a budget, and its only $33 at Home Depot! We thought it would create the perfect “pop” by adding these sconces, but we needed to paint the black middle portion of the sconce to give the custom all-brass look we desired. We did this by spray-painting the scones with Satin Bronze Spray Paint.
We were able to avoid hardwiring the sconces by placing small remote-controlled puck lights inside, and wanted to conceal the puck lights, so we frosted the glass globes with a Rustoleum spray paint.

Custom Art Installation
Here I installed my infamous budget-friendly, yet very expensive-looking custom art.
Quick history on this piece! I ran out of budget during a client-project, and needed to source a feature artpiece with only $40 left to spare. This is when I came up with the idea for this art-piece!
That said, it was the perfect piece to compliment our loft-vignette and made for a great conversational piece in this space. I’ll be releasing a DIY tutorial this Thursday via my DIY blog newsletter, so sign up here if you want first dibs on all of my how-tos!

Custom Bench
We built a custom bench for this space, and boy is it pretty! We used 6' 1x2x12 for the seat, 2x2 for the legs and supports, and 1x2 to attach the legs to the seat (the materials were purchased for less than $20). You can find the tutorial for this build on @builds_by_kristen’s Instagram by clicking here.

Finishing Touches
As for the finishing touches, we added a patterned jute rug from Lowe’s, and basket-weaved plants consisting of some of my favorites: a rubber plant, a fiddle leaf fig, and for a bit of romance and magic - plenty of pothos!

I am beyond pleased with how this space turned out, and working alongside Sarah was absolutely amazing! I’m so excited for the next DIY collaboration!

Jute Twine Installation: How To create expensive wall art on a budget: 12 Easy Steps
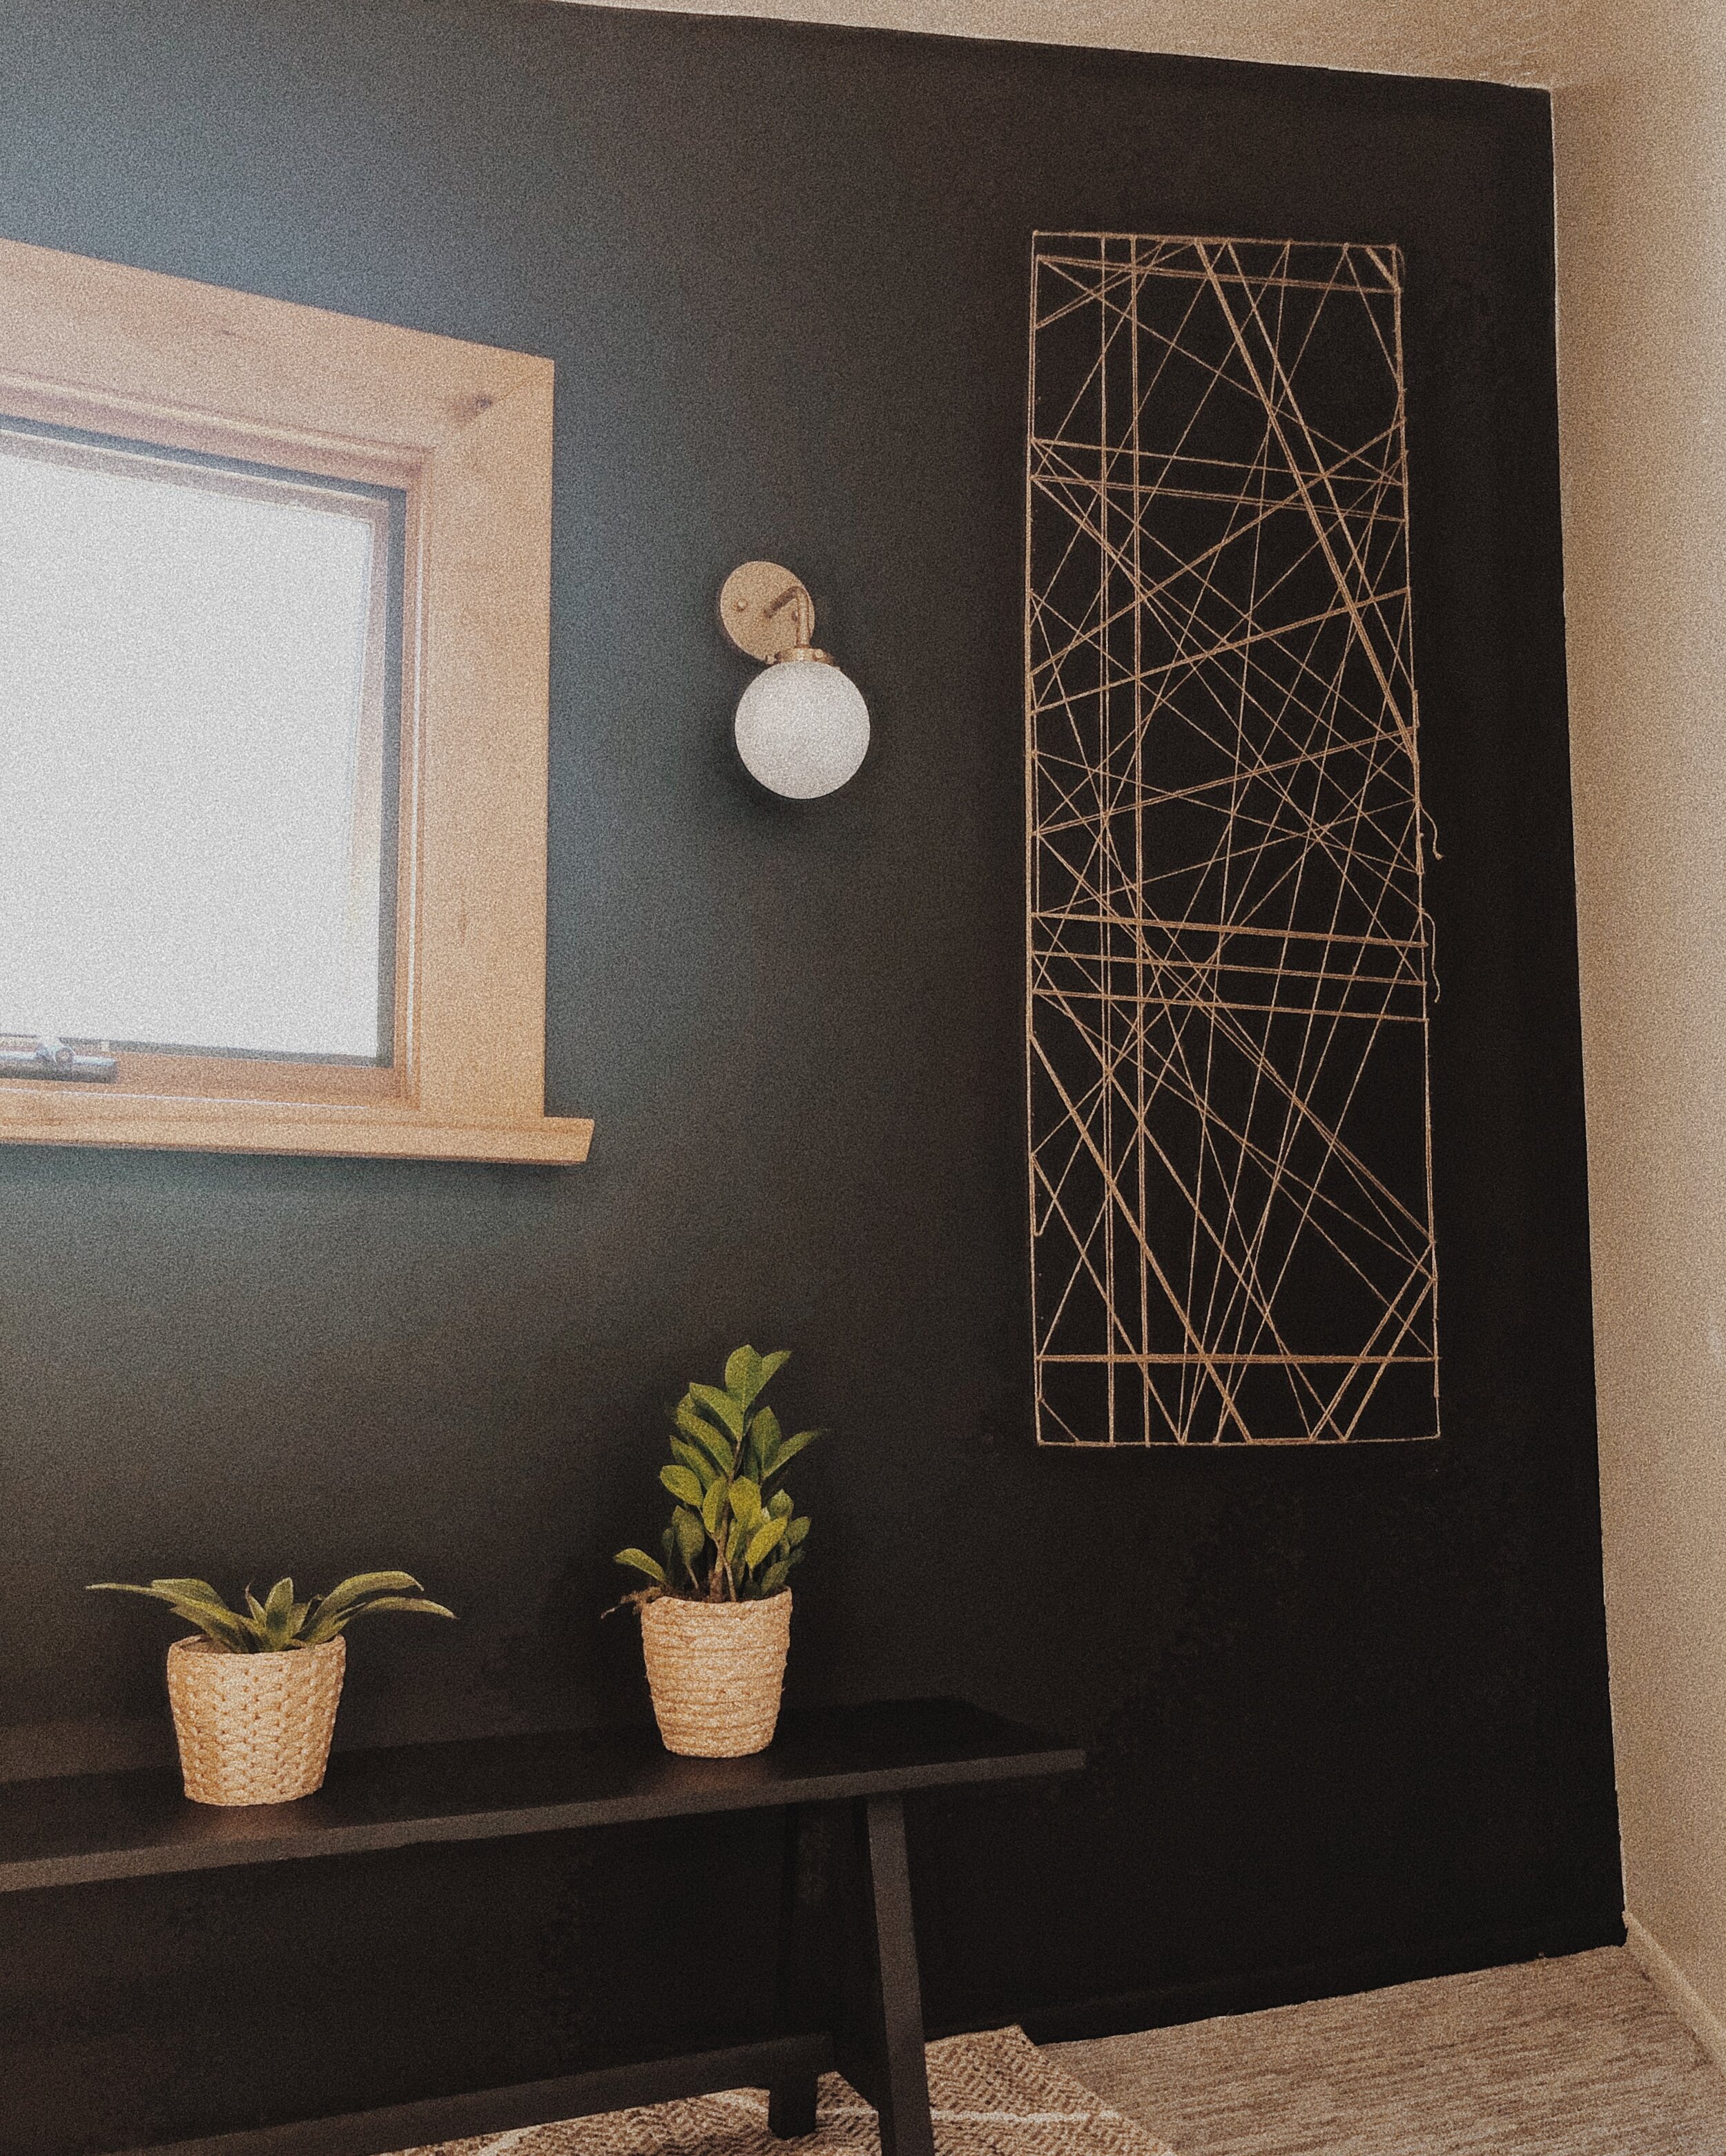
I’m so excited to finally be sharing this jute twine art installation with you! Here’s the story of how how it came to be: I ran out of budget during a client-project, and needed to source an art-piece for a feature wall, with only $40 left to spare. This is when I came up with the idea for this art-piece! It’s budget-friendly wall art with an expensive look!
Here’s what you’ll need:
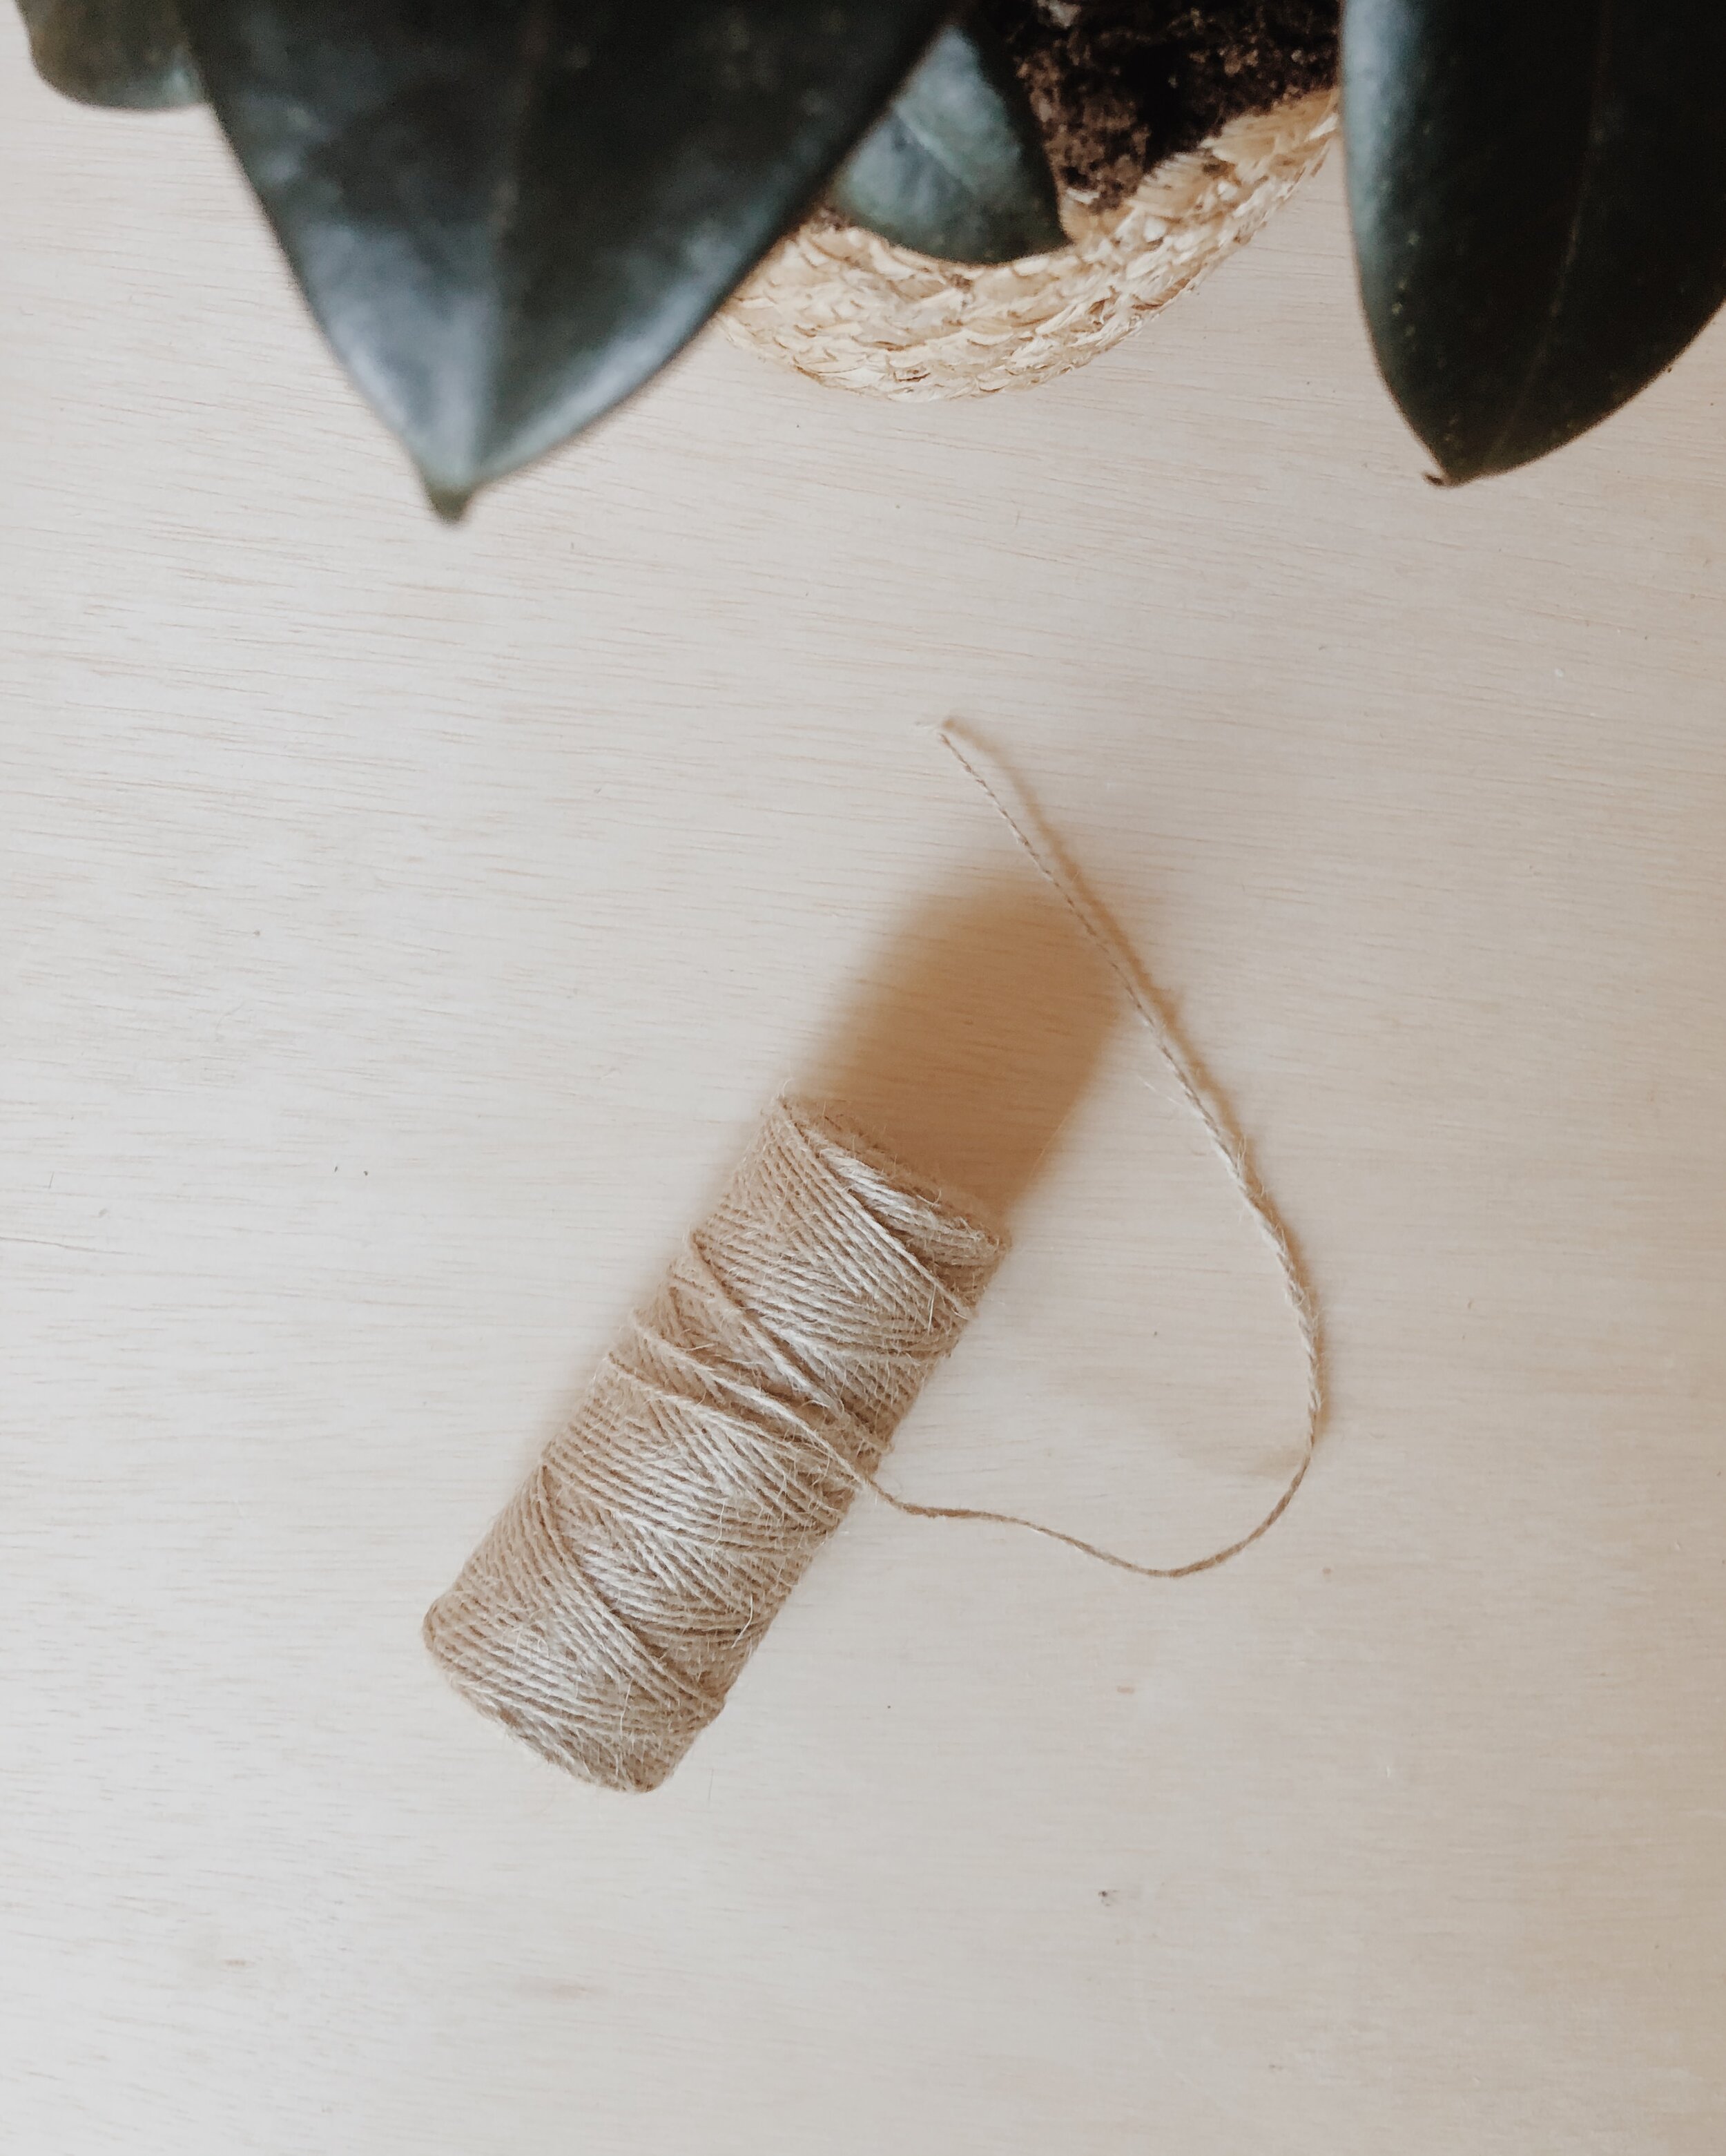
1.) Jute Twine
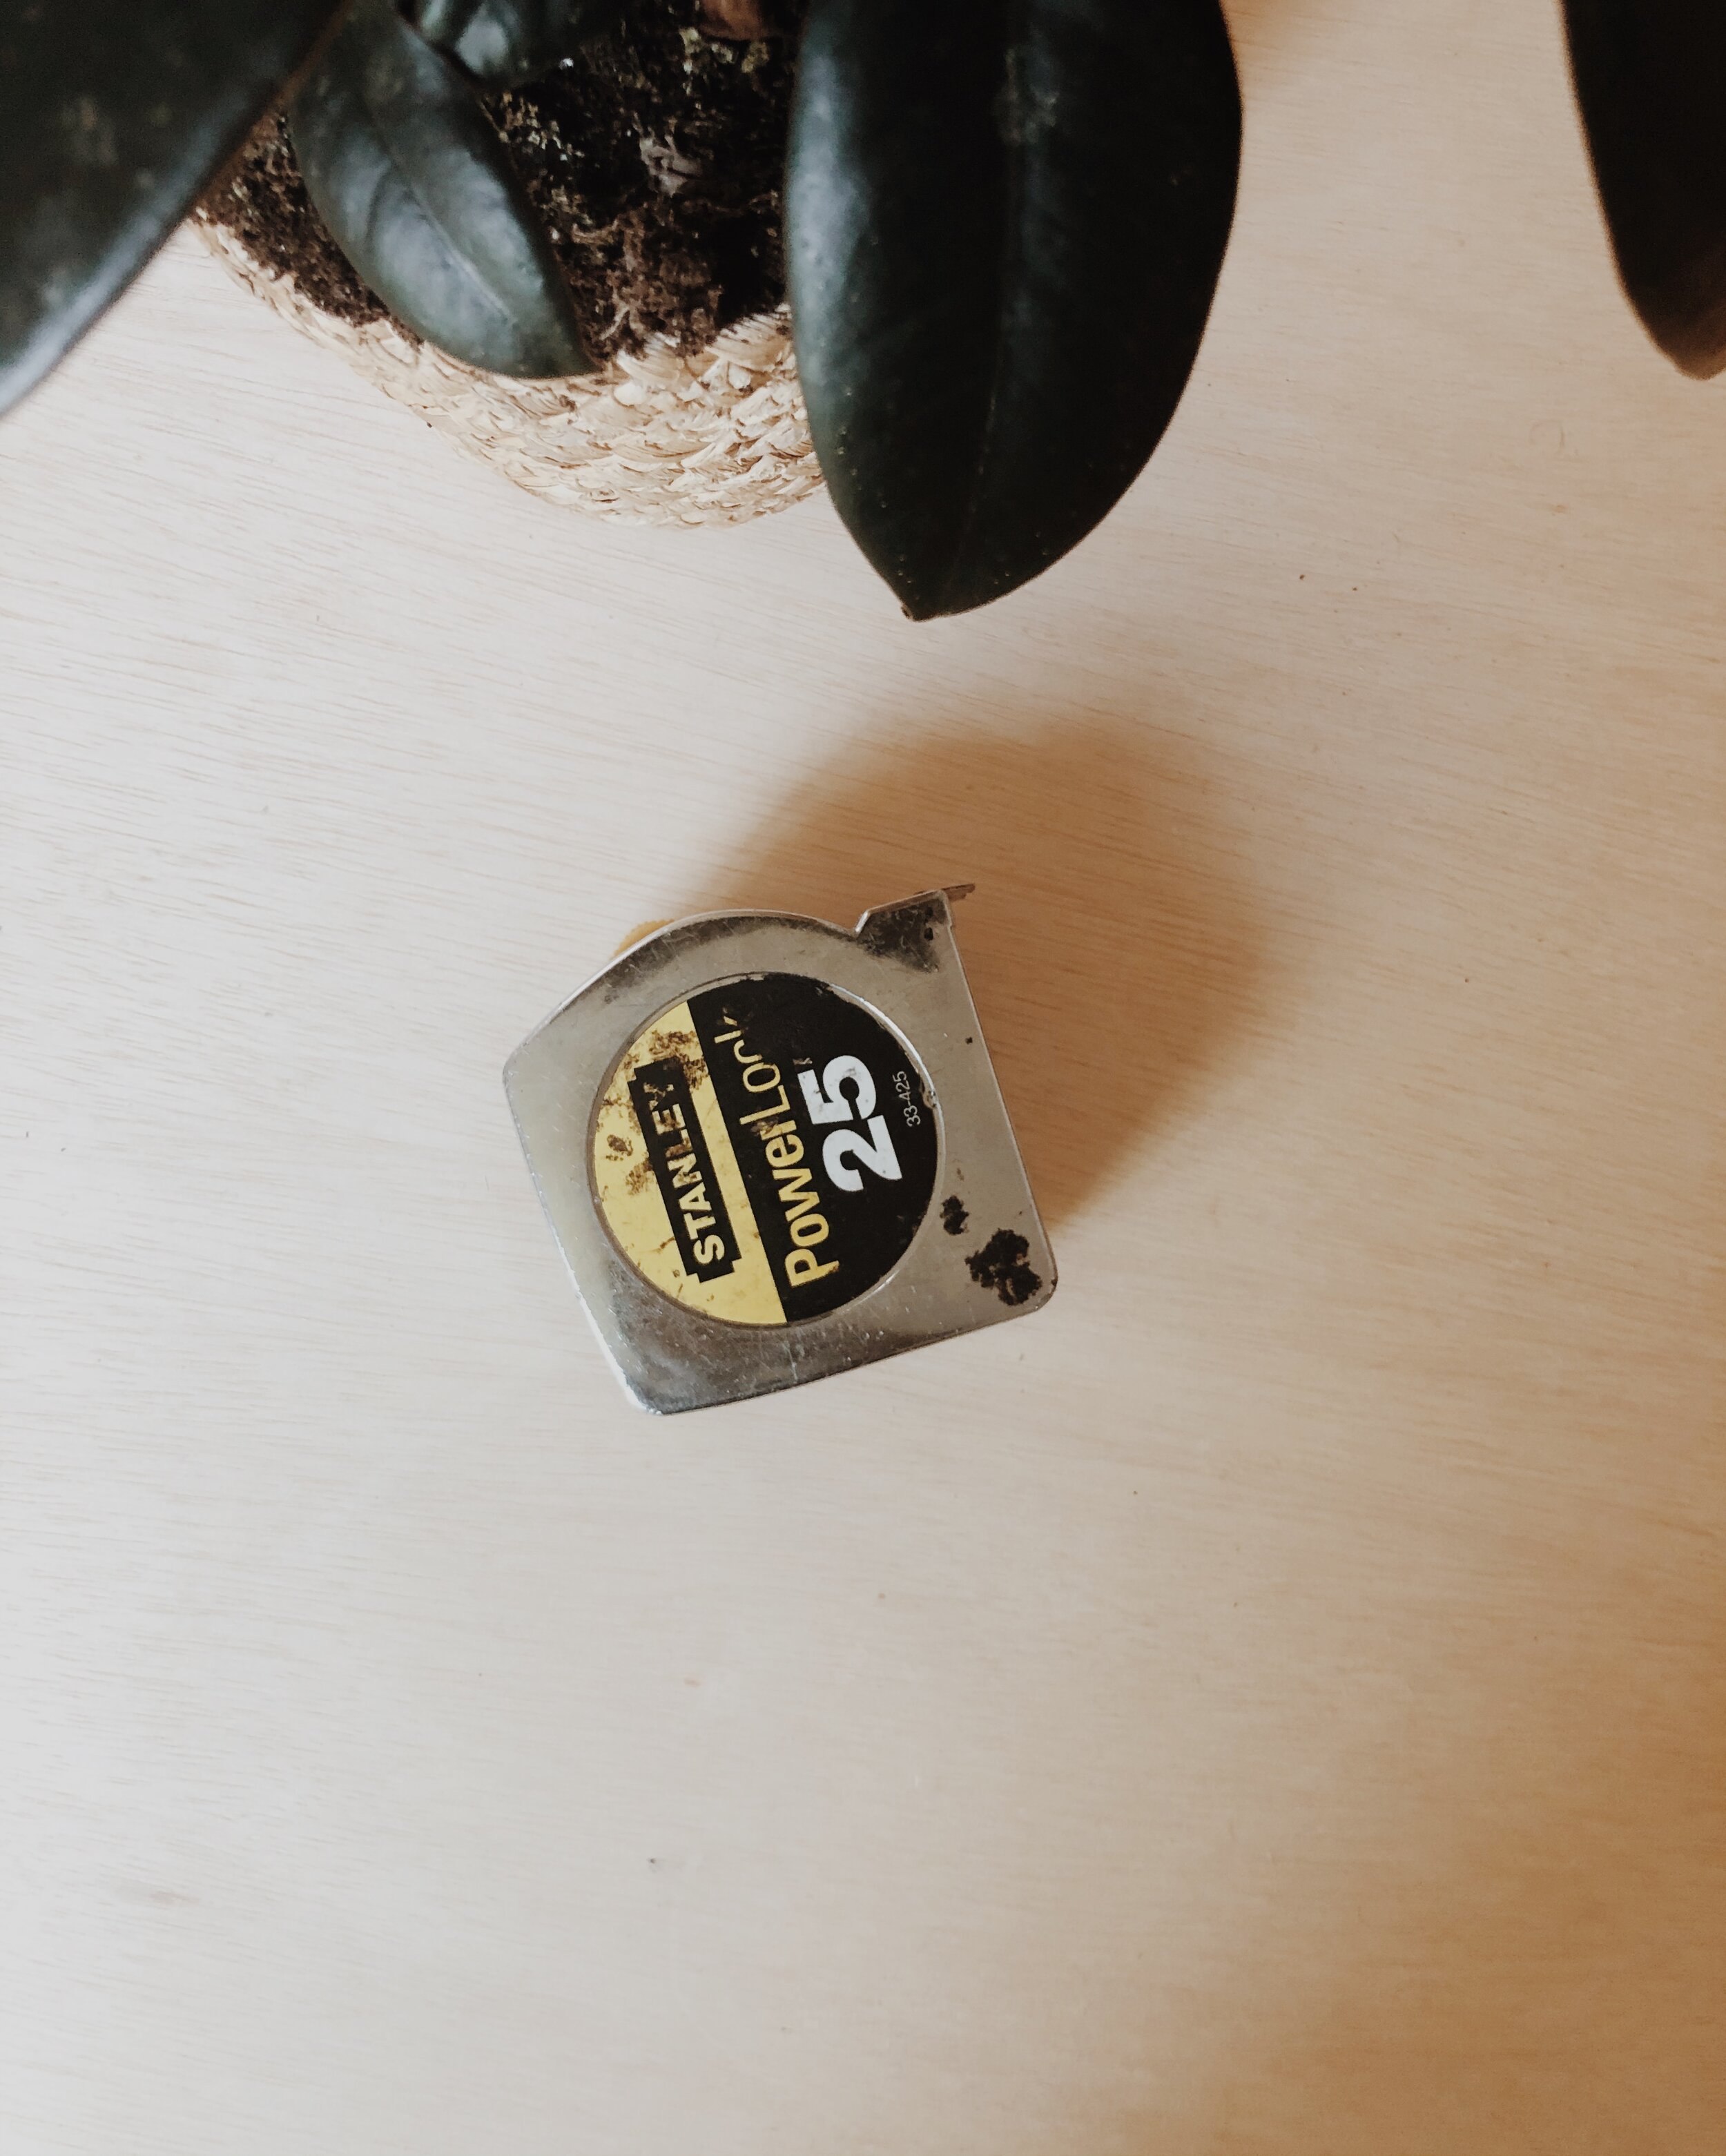
2.) Measuring Tape
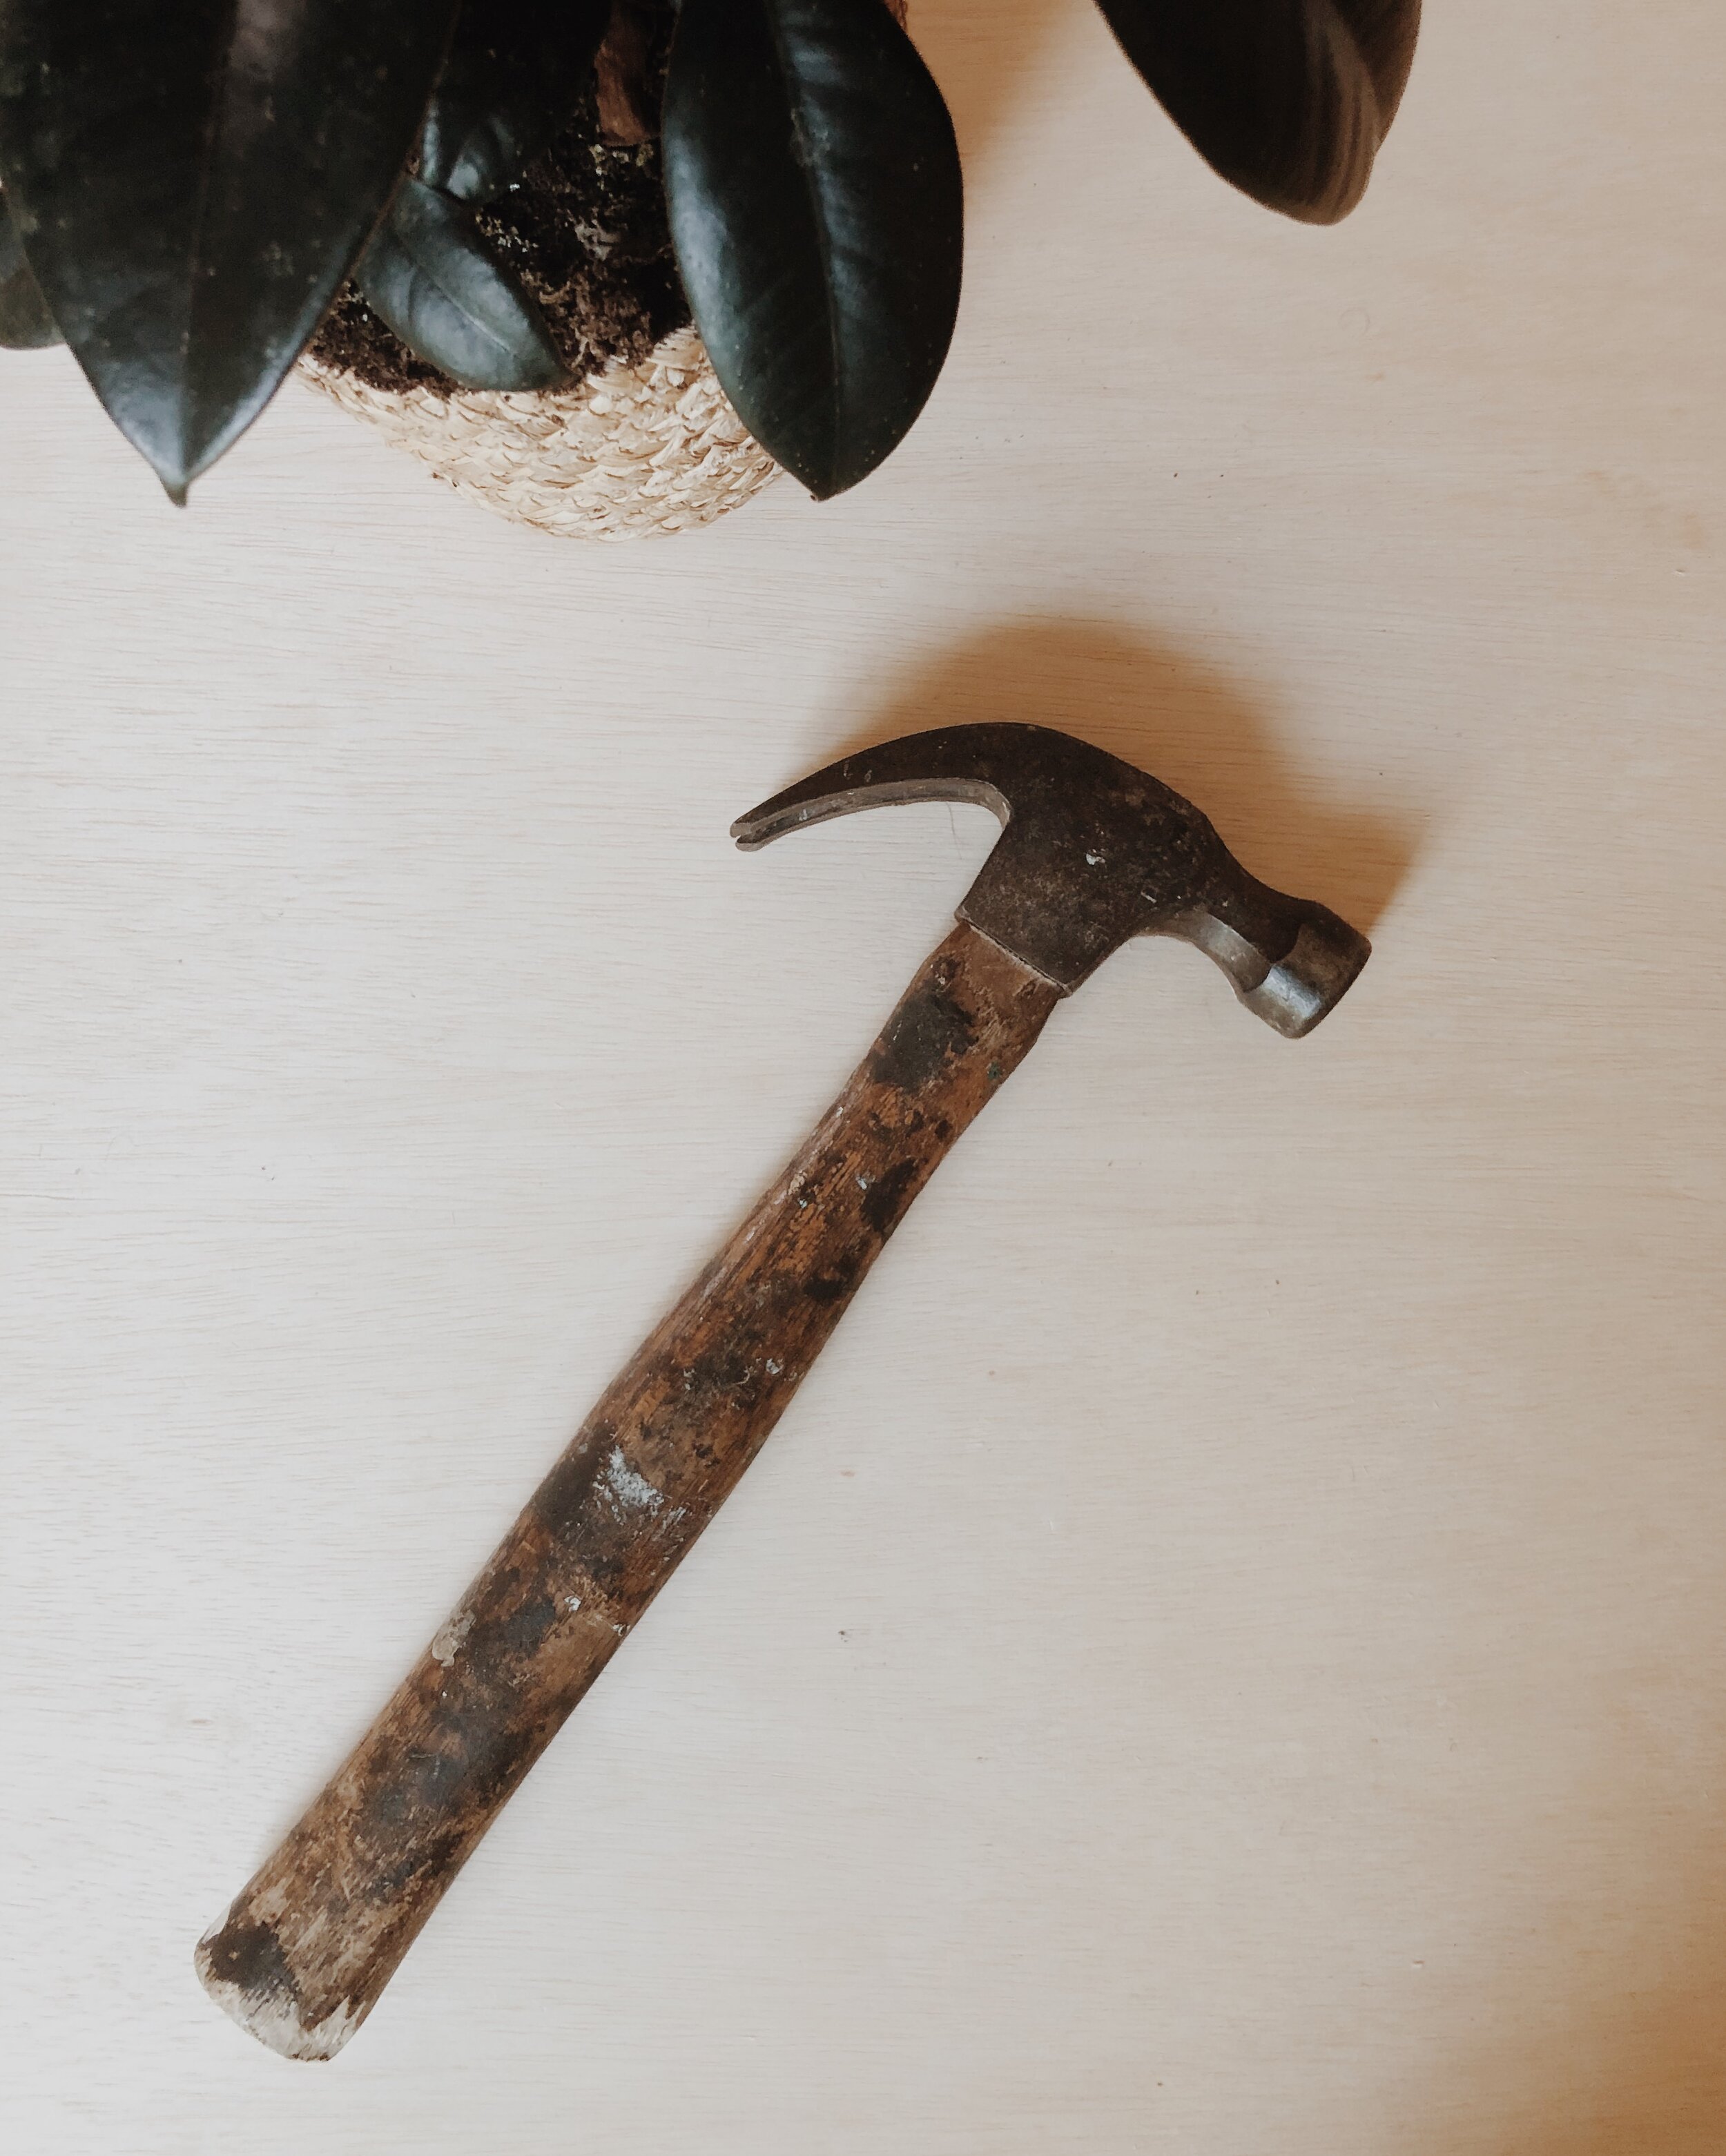
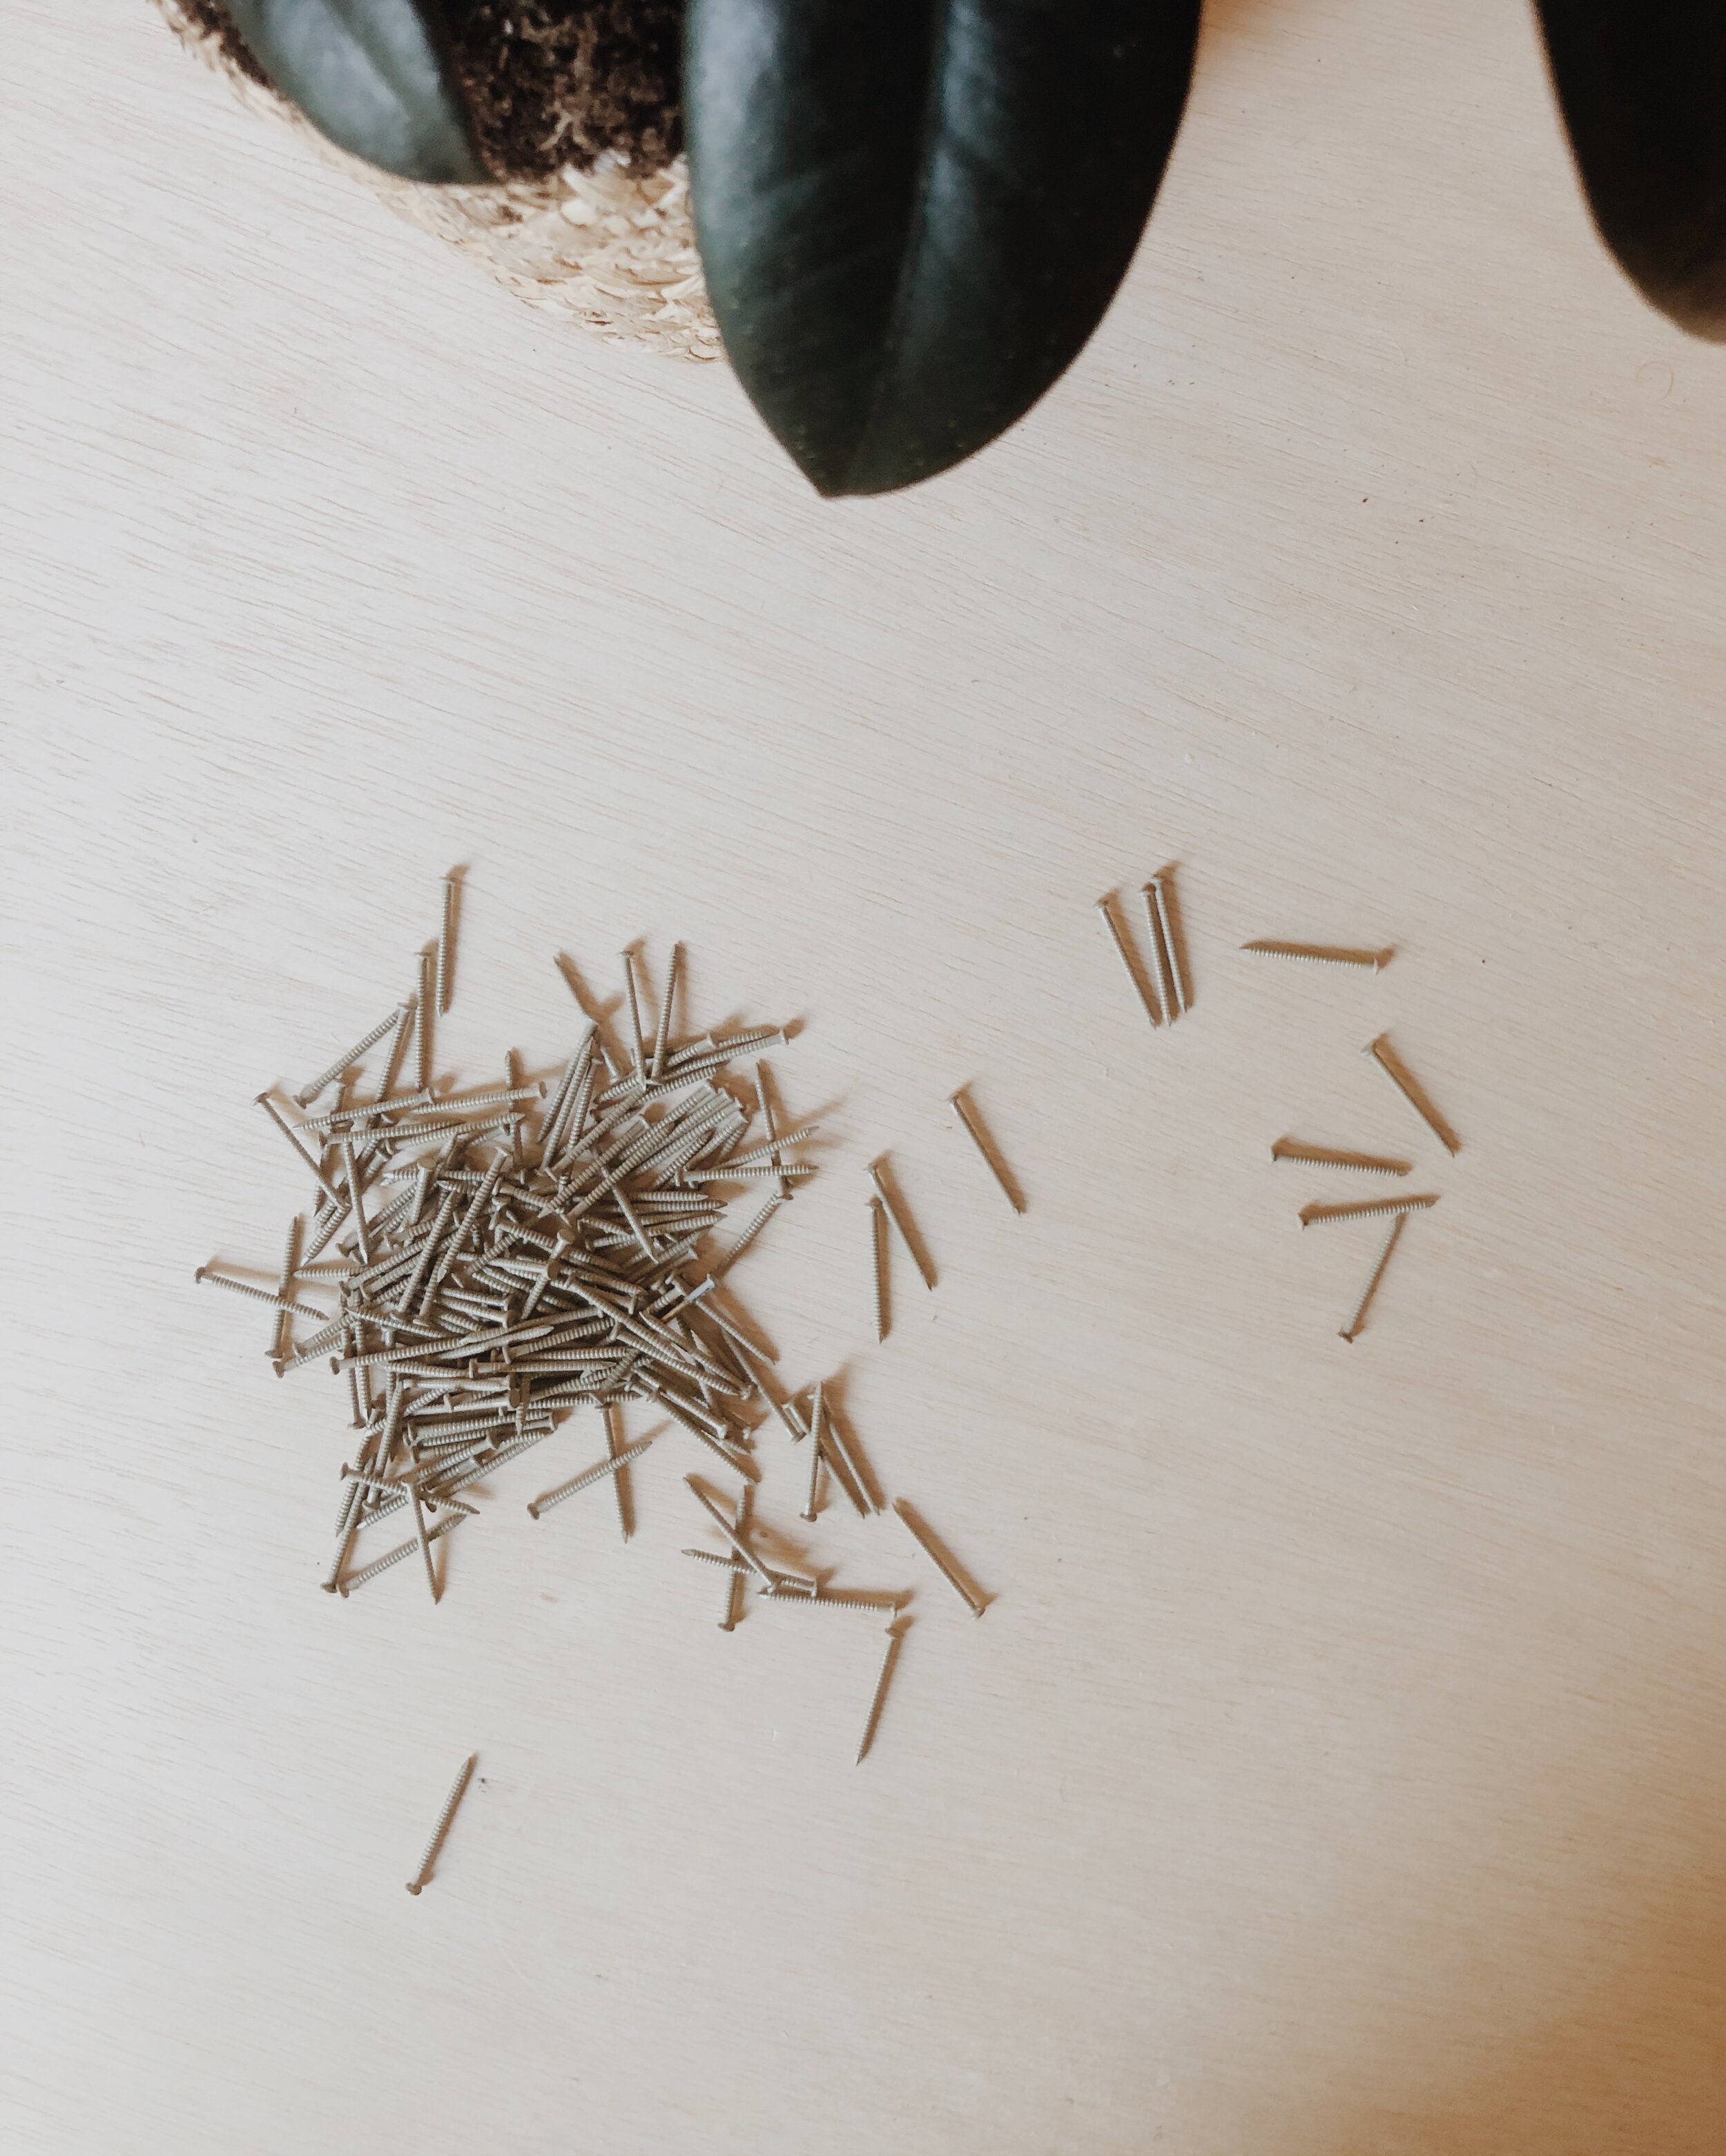
3.) Hammer
4.) Lots of Nails
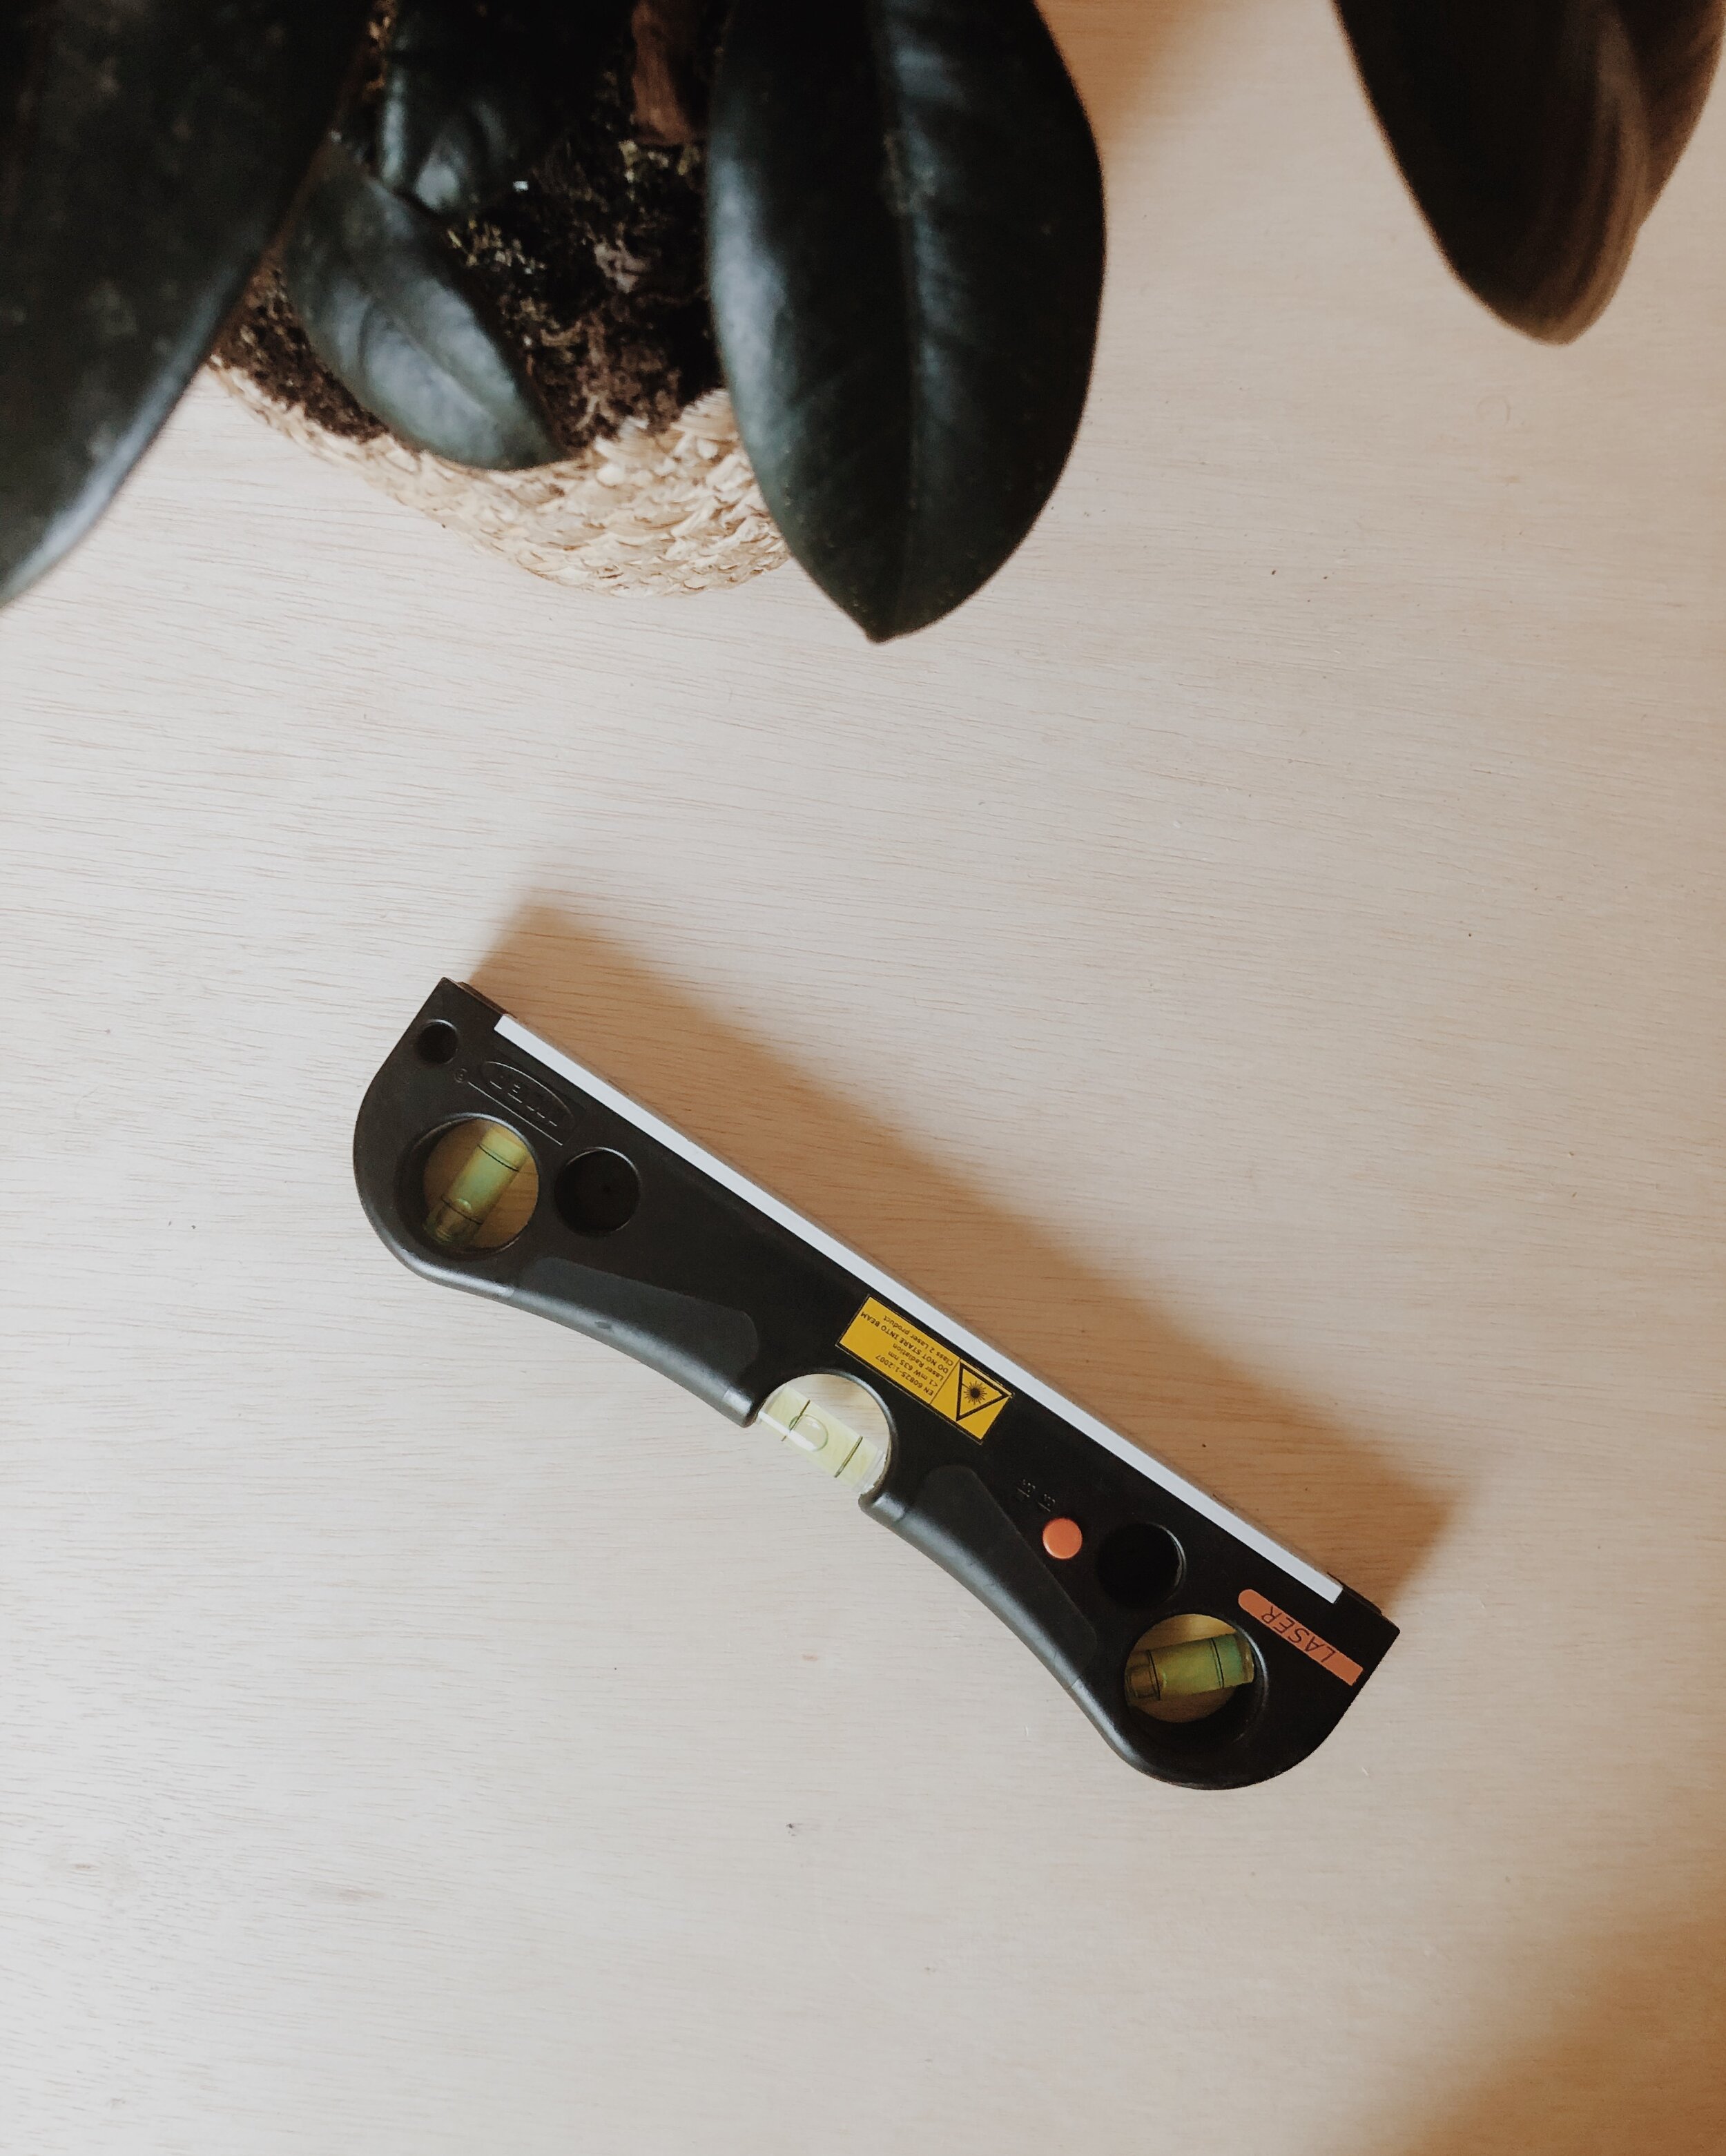
5.) A Level
6.) A Pen or Marker

STEP 1
Choose a space in your room to get an idea of how big you’d like to make the wall art. It’ll either be a square or a rectangle.
STEP 2
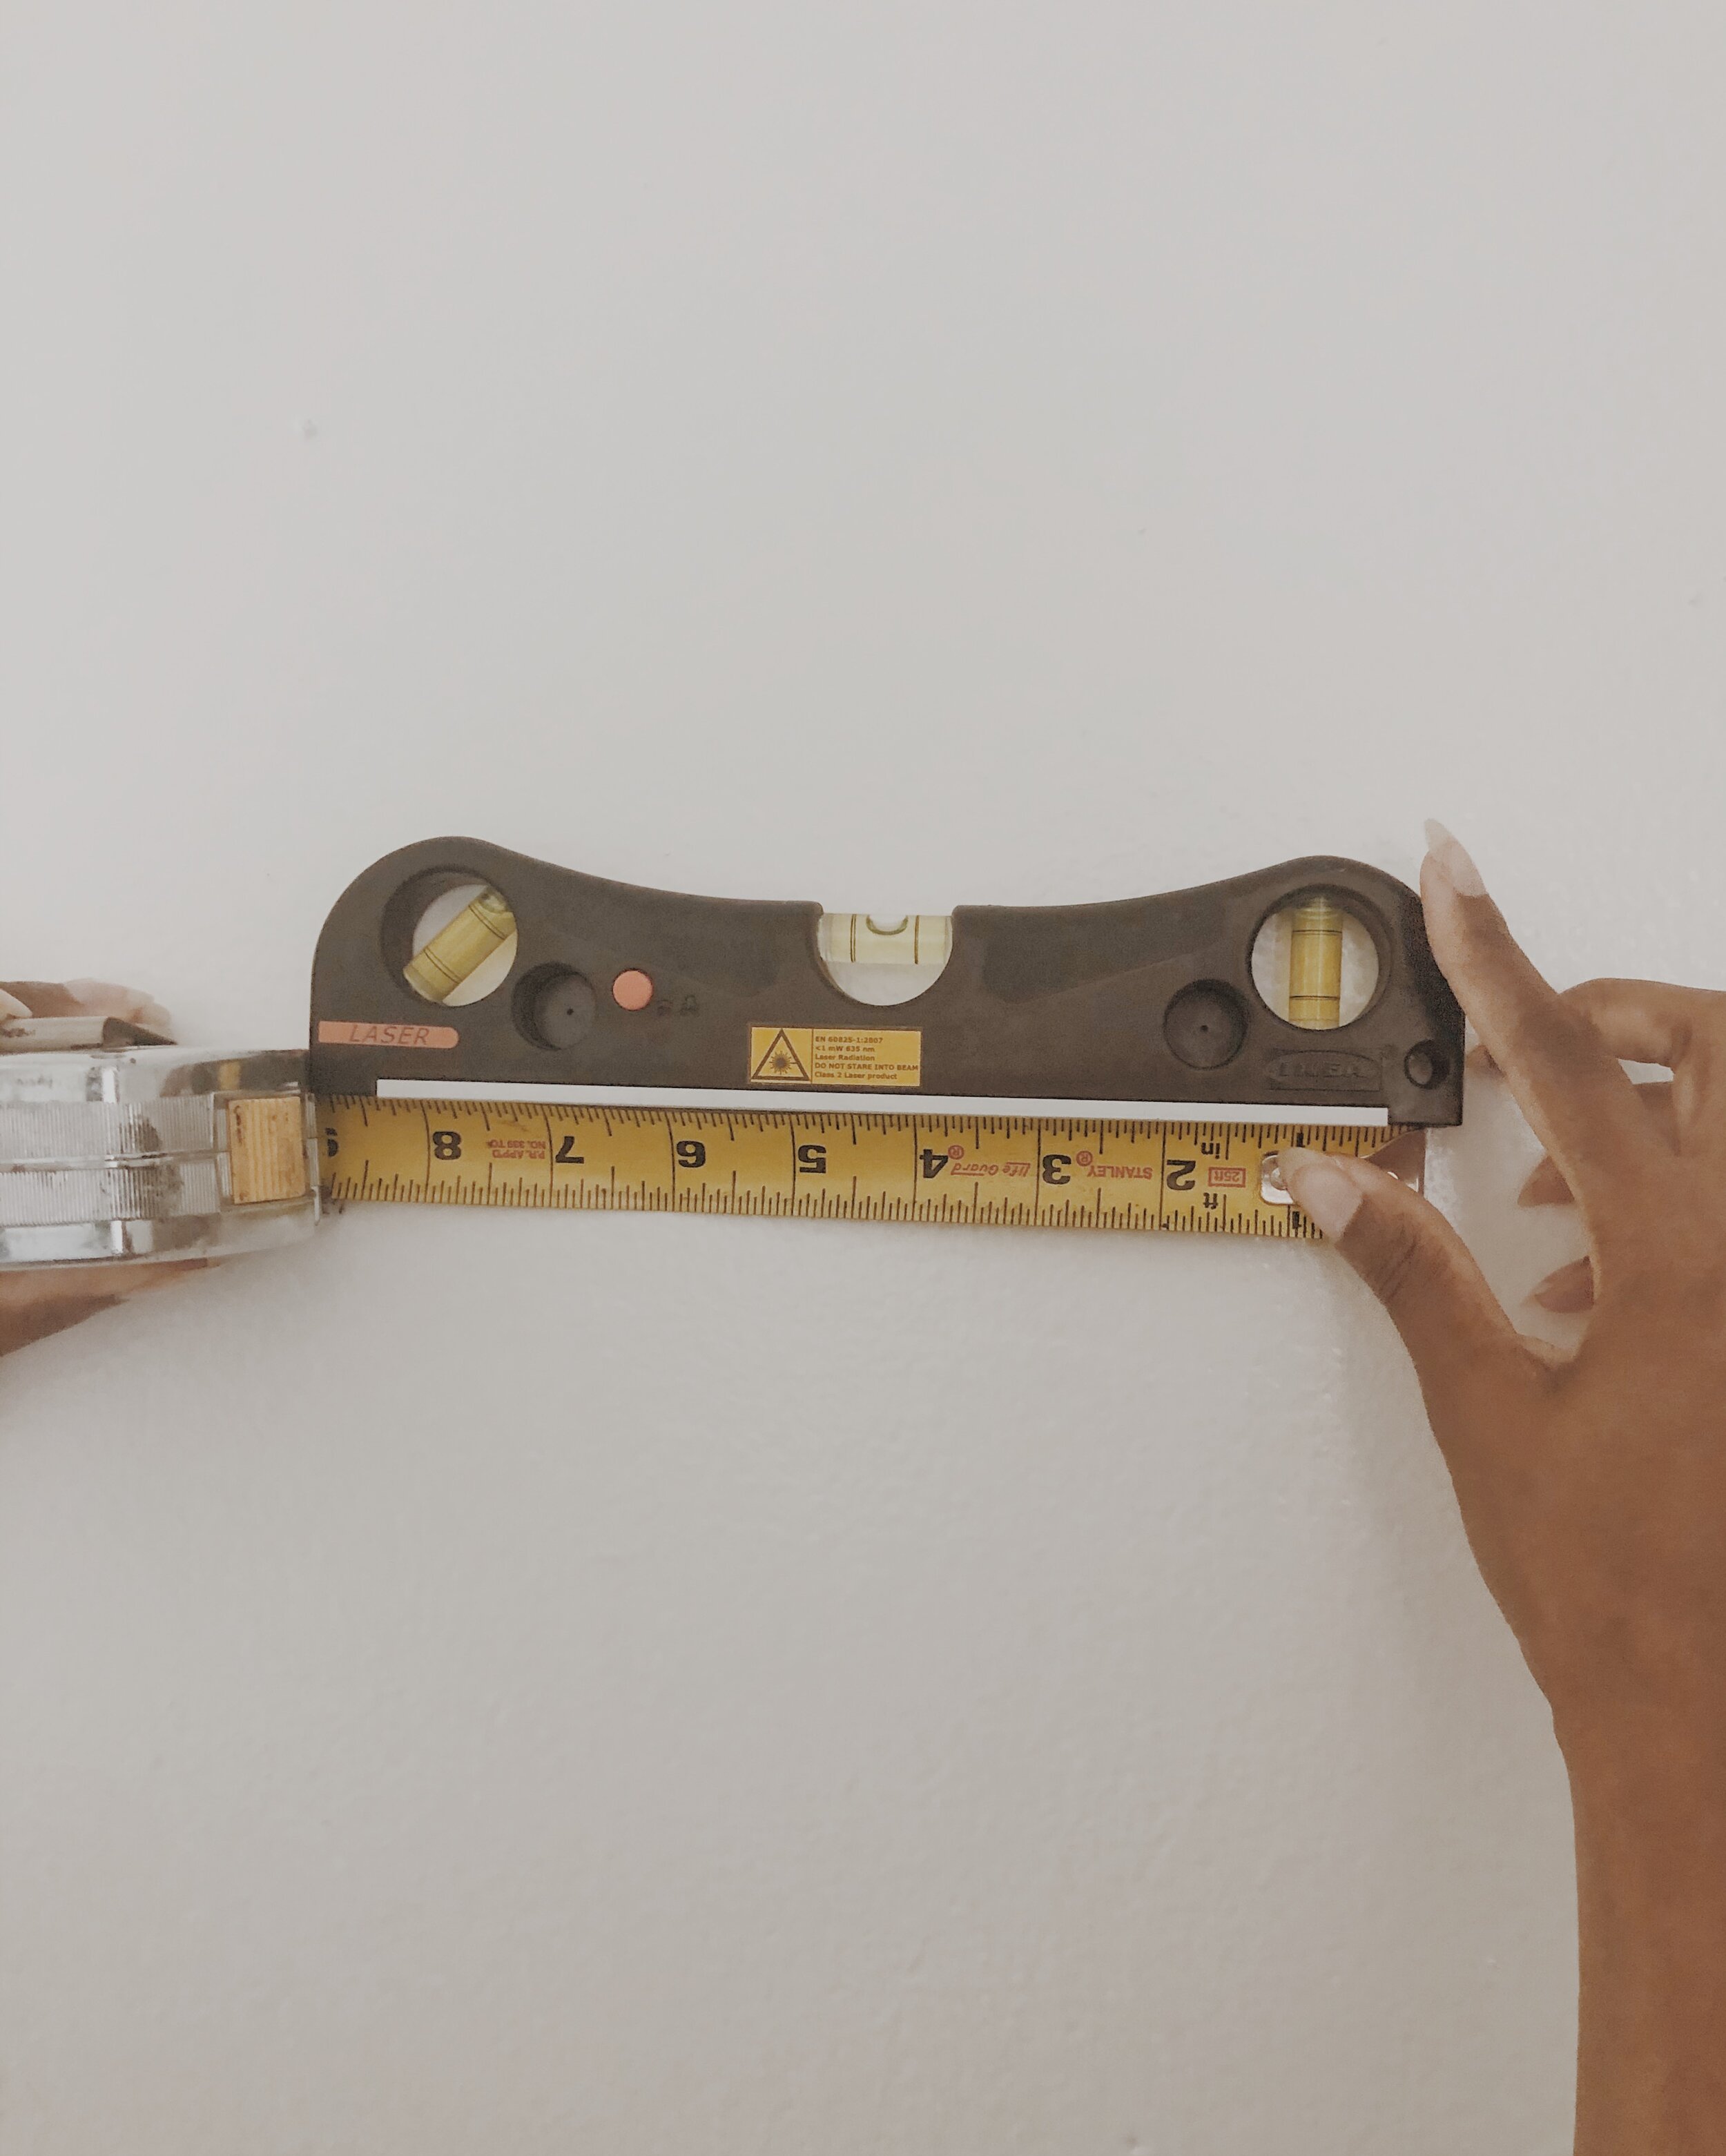
Once you choose the spot, Start by nailing in the top left corner nail, and measure how far to the right you’d like the next nail. Use the level to get a straight horizontal line.

STEP 3
My design will be a vertical rectangle, so I’ve started by measuring 7 inches (horizontally) in between each nail. I’ll only be hammering three horizontal nails to start.

STEP 4
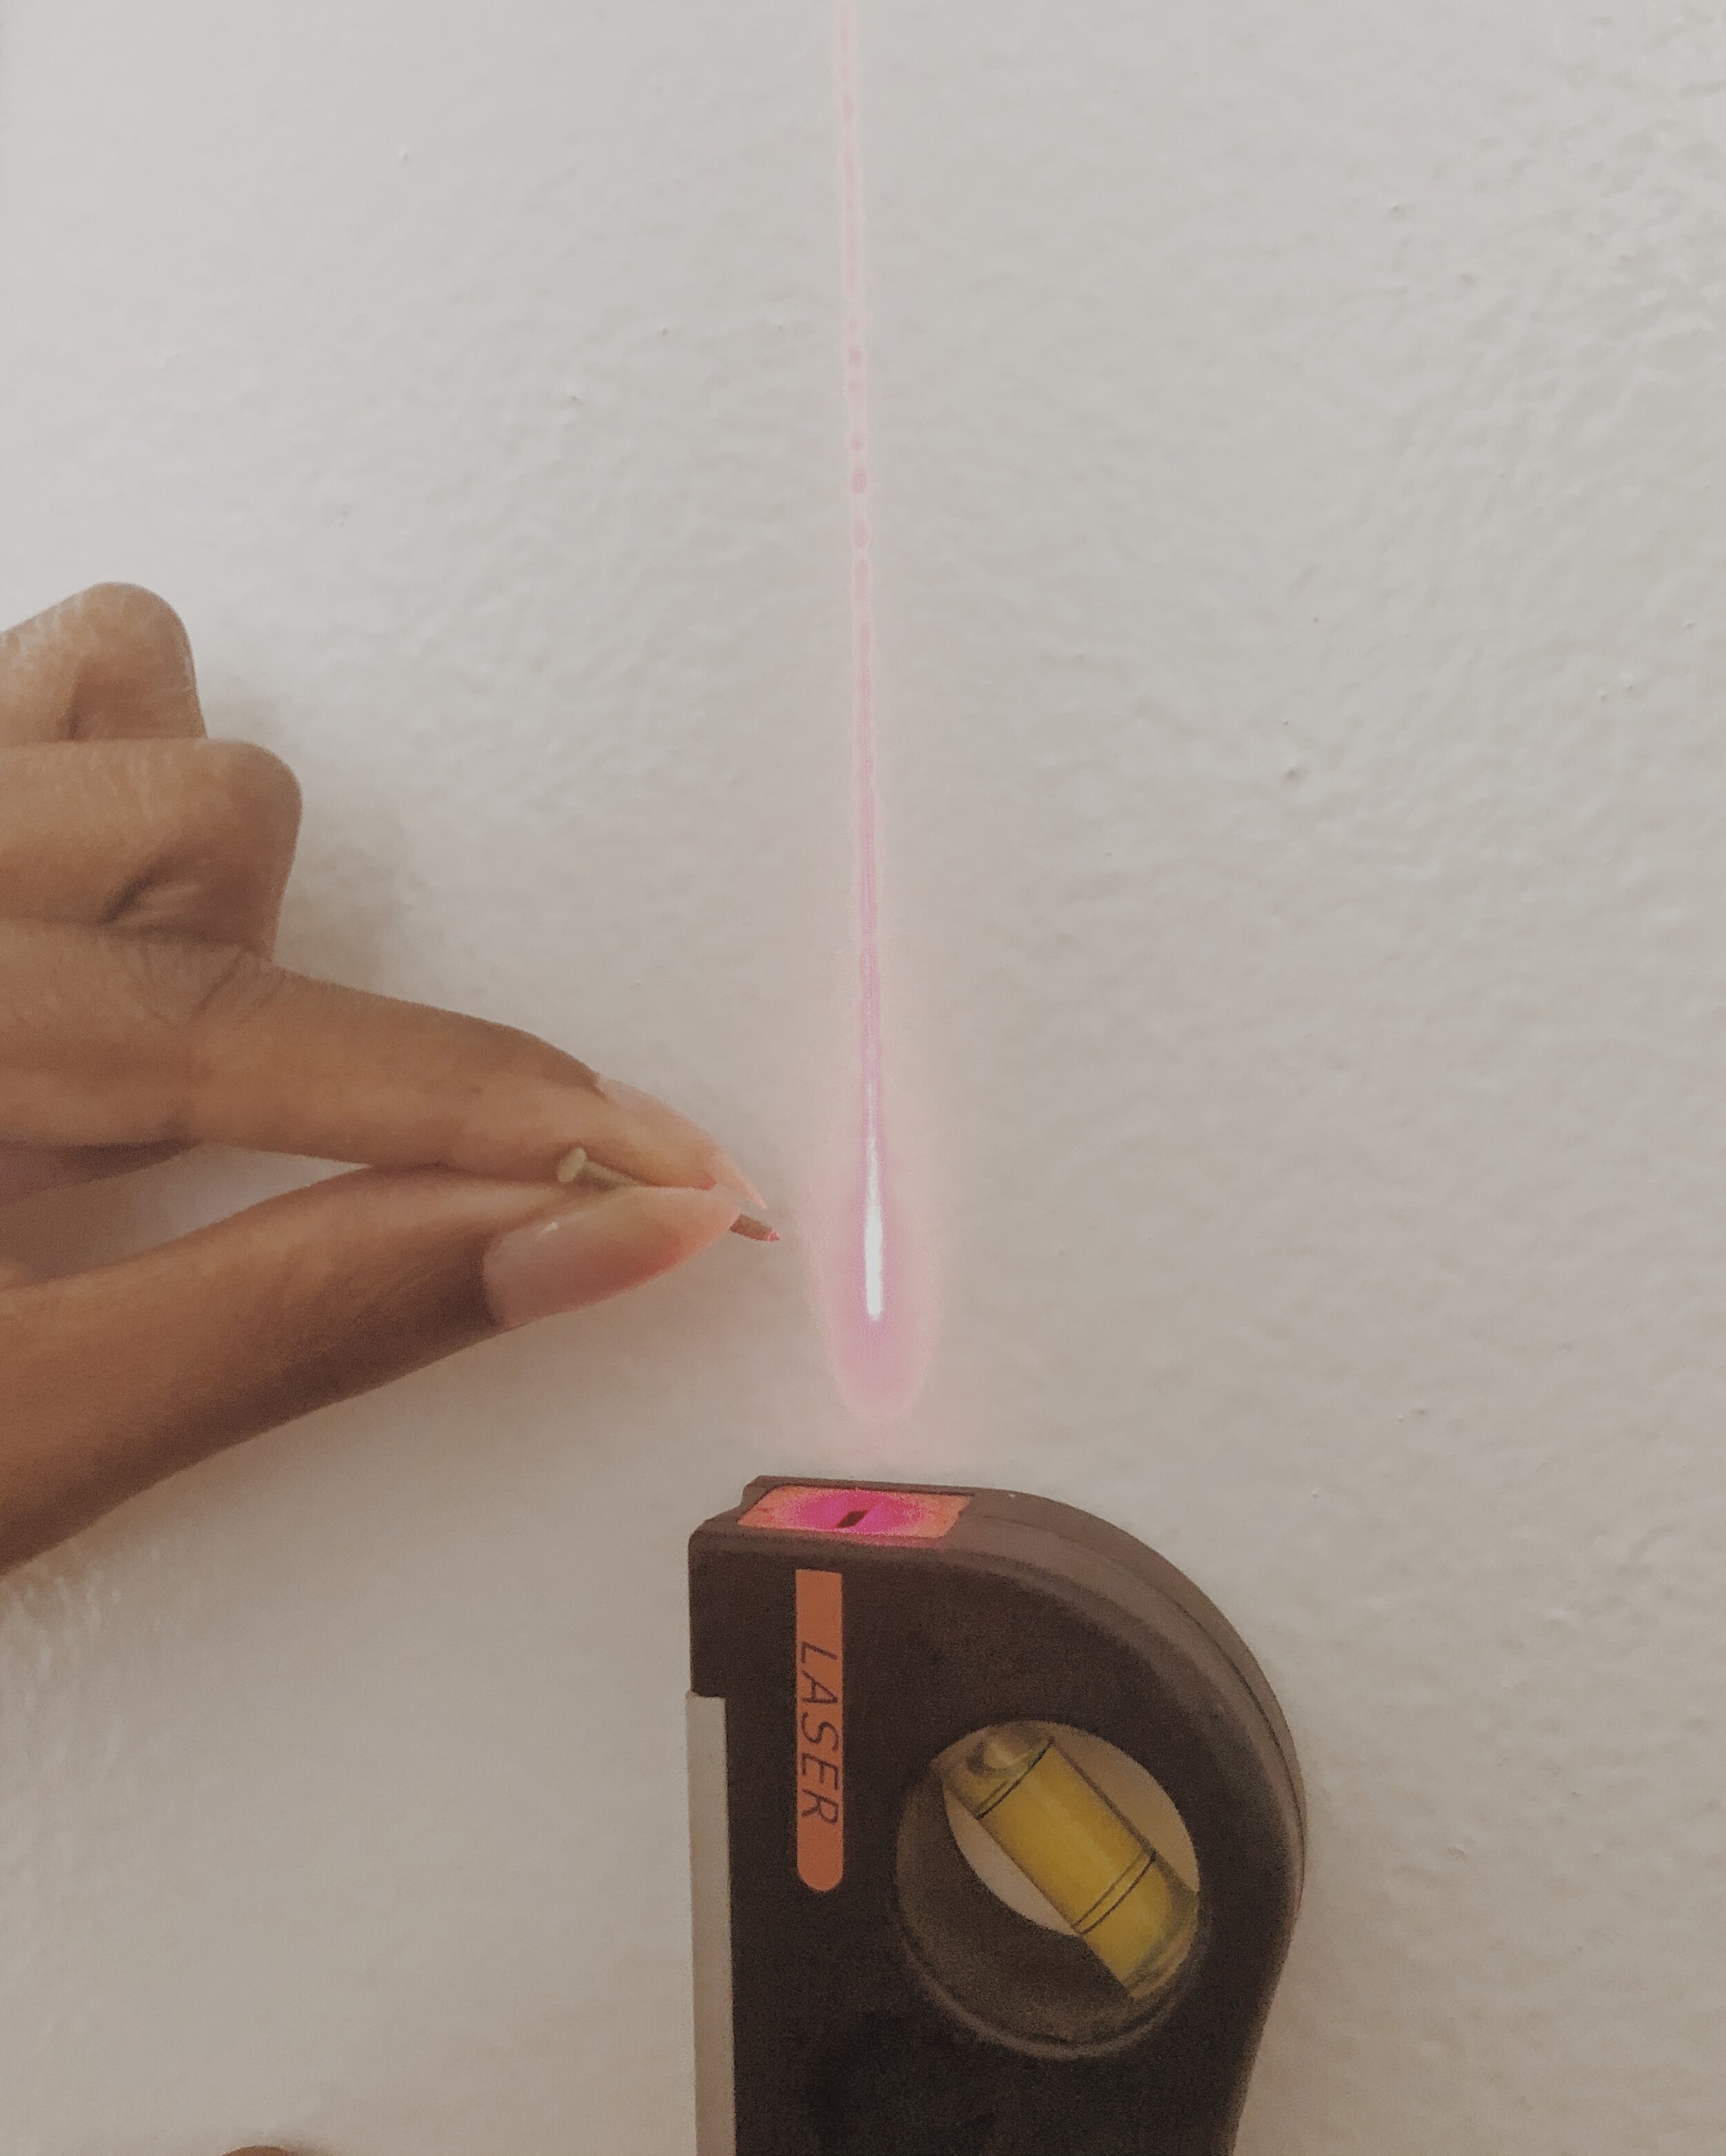
Choose how long (far down) you’d like your wall art. After this, you’ll need to hammer in the bottom left corner nail. You can use your laser-level to help you get the line straight - by using the top left nail as a reference to create a straight vertical-line. This creates the border of the wall art.

STEP 5
Measure 7 inches to the right to place the next nail. Use the laser-level to get a straight horizontal line. Measure another 7 inches to the right to mark the spot for the bottom right corner nail.
STEP 6
Hammer in the bottom right corner nail. This is the last nail you’ll need to complete the border for the wall art. You can use your laser-level to help you get the line straight - by using the top-right nail as a reference to create a straight vertical-line.

STEP 7
Now take your roll of twine and tie the end piece to the top right-corner nail. Make a knot around this nail. Then use the twine to wrap a border around each nail. One wrap-around each nail will do.

STEP 8
Wrap until you make it back to the top left-corner nail. Now you have your border! Make another knot when you’ve made it back to the top left-corner nail.

STEP 9
Release your string, so that you can start making marks for each border nail you’ll need to hammer in. For this design, I chose to go down 8 nails - two inches in between each nail. I did this on both vertical sides of the border.

STEP 10
After you’ve made all of your marks, start hammering in all of the nails.

STEP 11
Above, is a picture of what it will look like once you’ve hammered in all of your border nails. Afterwards, I decided to add a nail in the center of the art piece. I thought this would make a really cool geometric pattern.

STEP 12
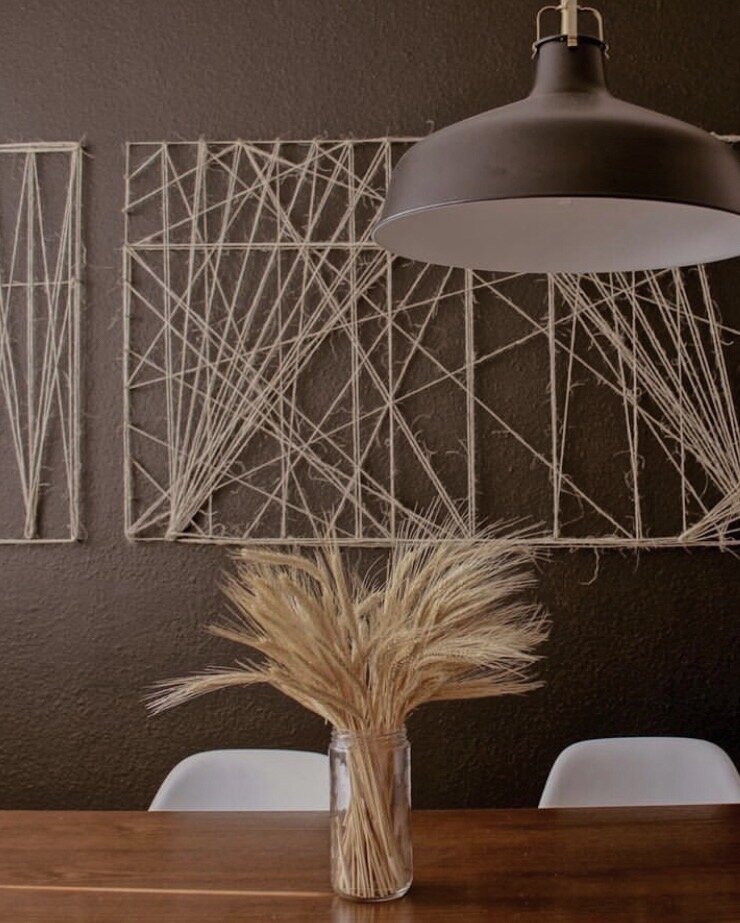
Now grab your jute twine from the top left corner, and free-style a design!

There are no rules as to what design you can come up with. Just be creative and do what you feel. This is what makes a piece like this custom and unique!

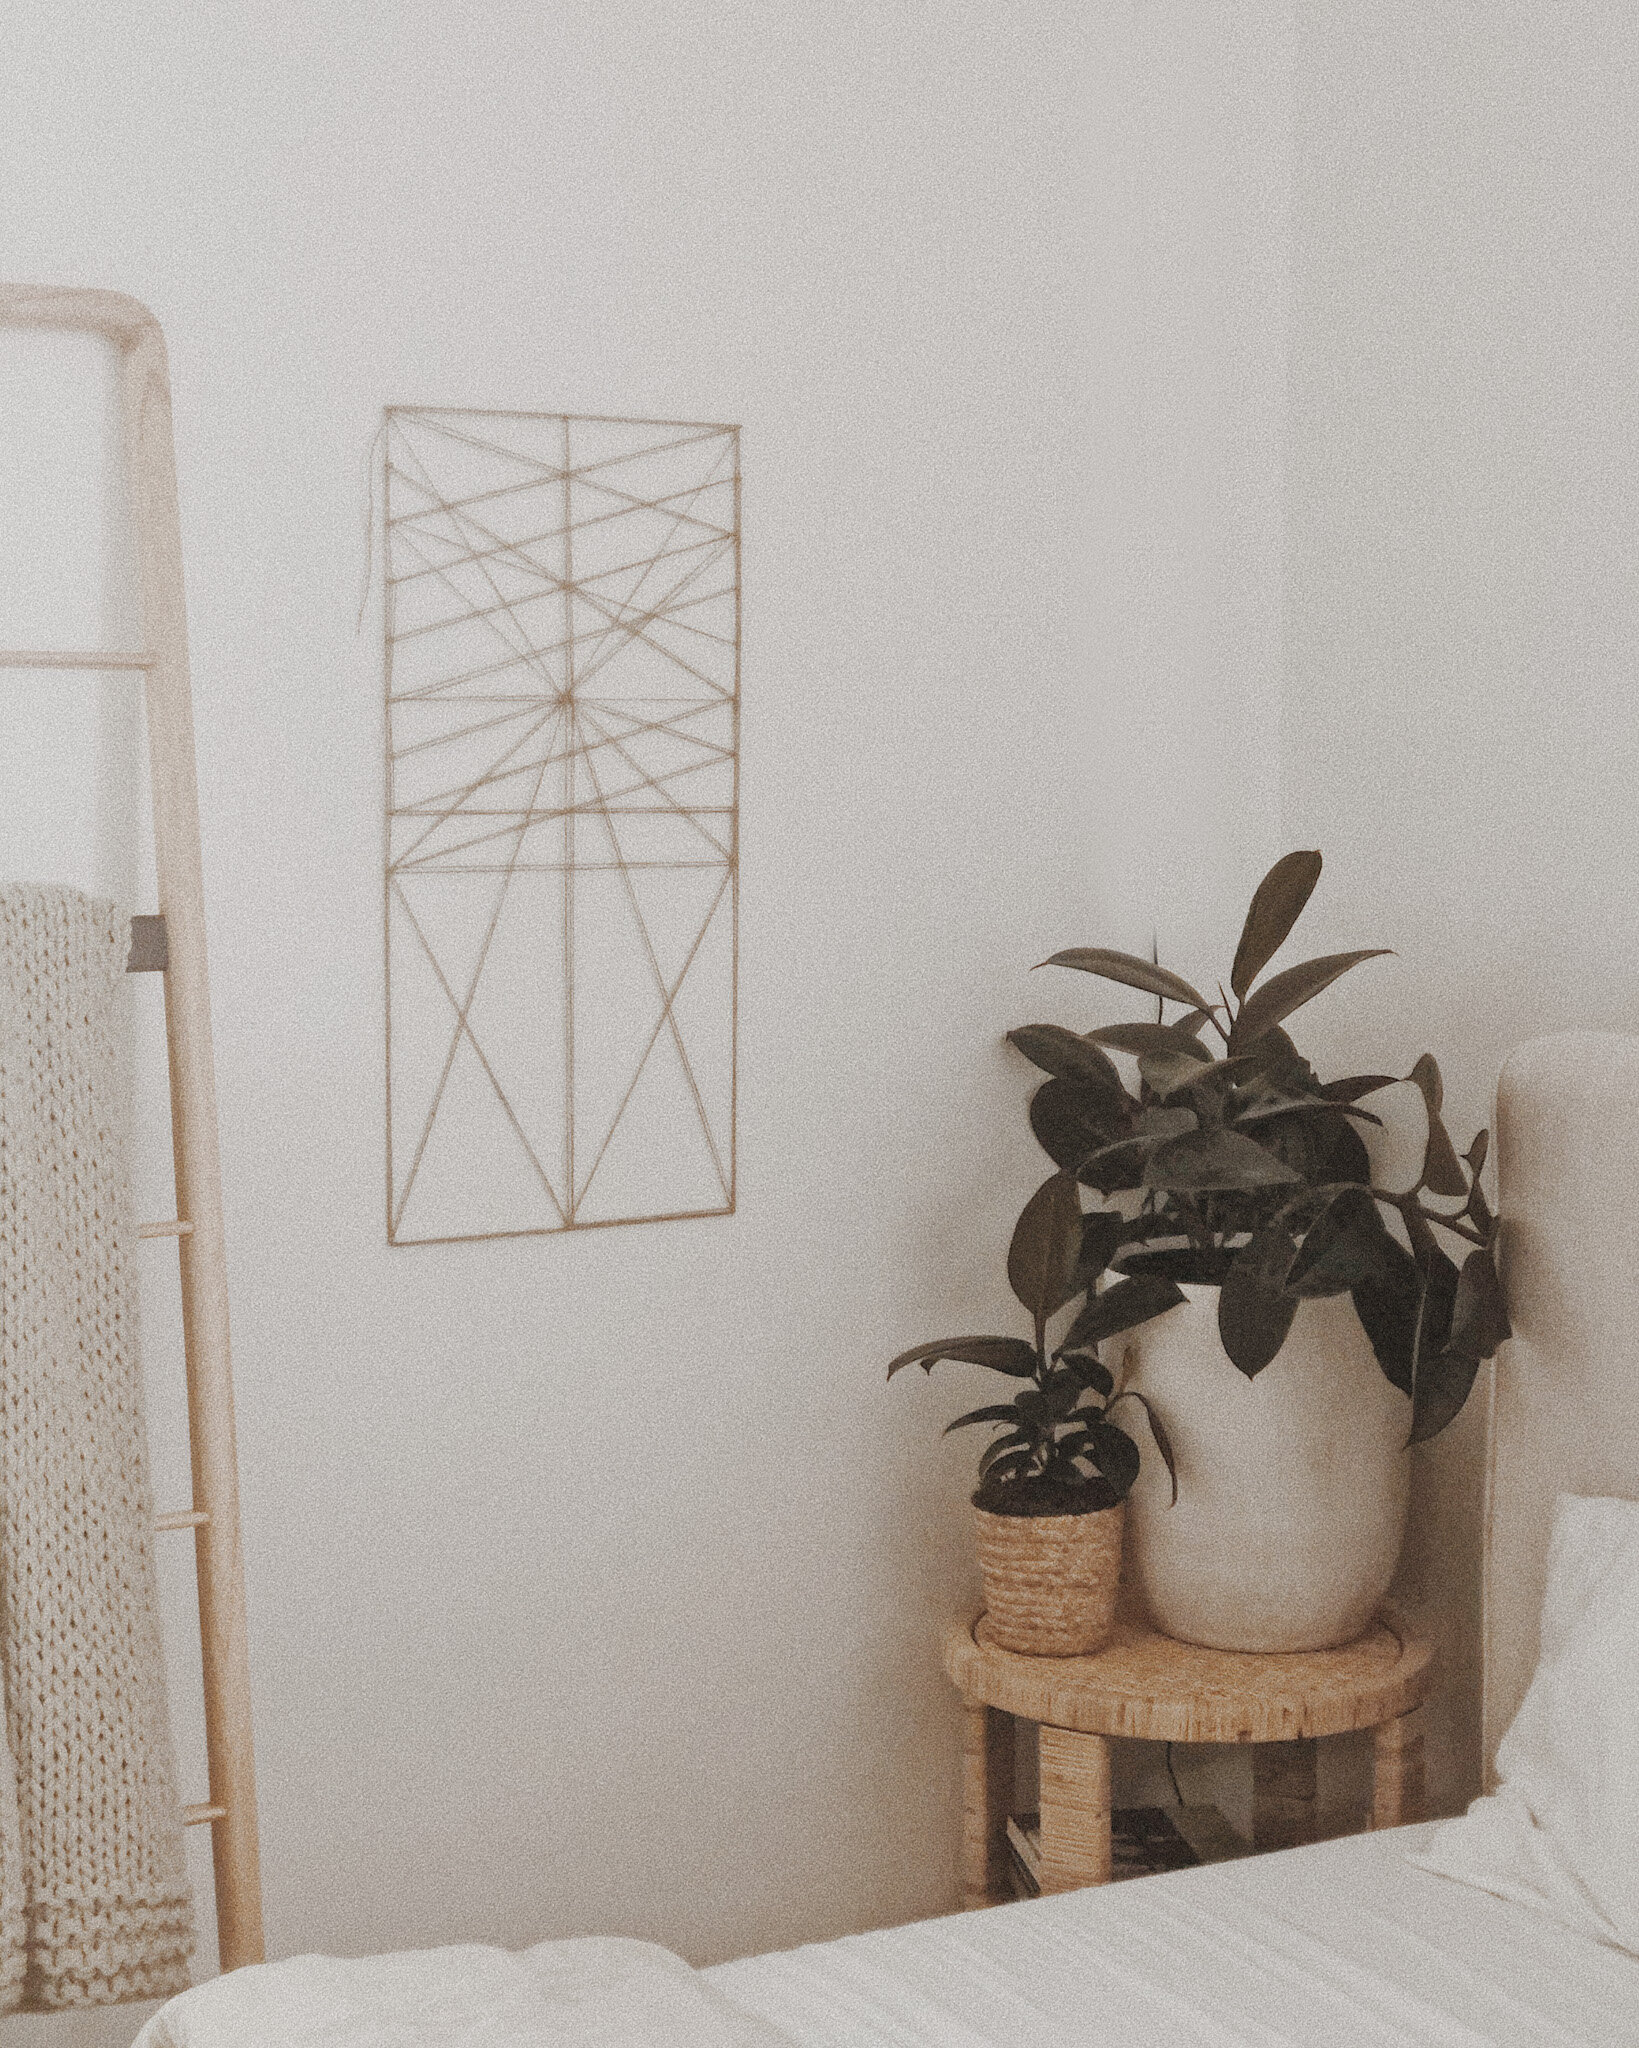
Here’s the design I came up with this time around!

Now you know how to make my jute twine wall art installation! Its such a fun art piece to create and I can’t wait to see your wall art! If you post your piece to instagram, please hashtag #TrueHomeDIY.
Drop a comment below if you have any questions, and I’ll get back to you ASAP!
Happy Designing & DIYing,
Ajai

Pot Painting Hack
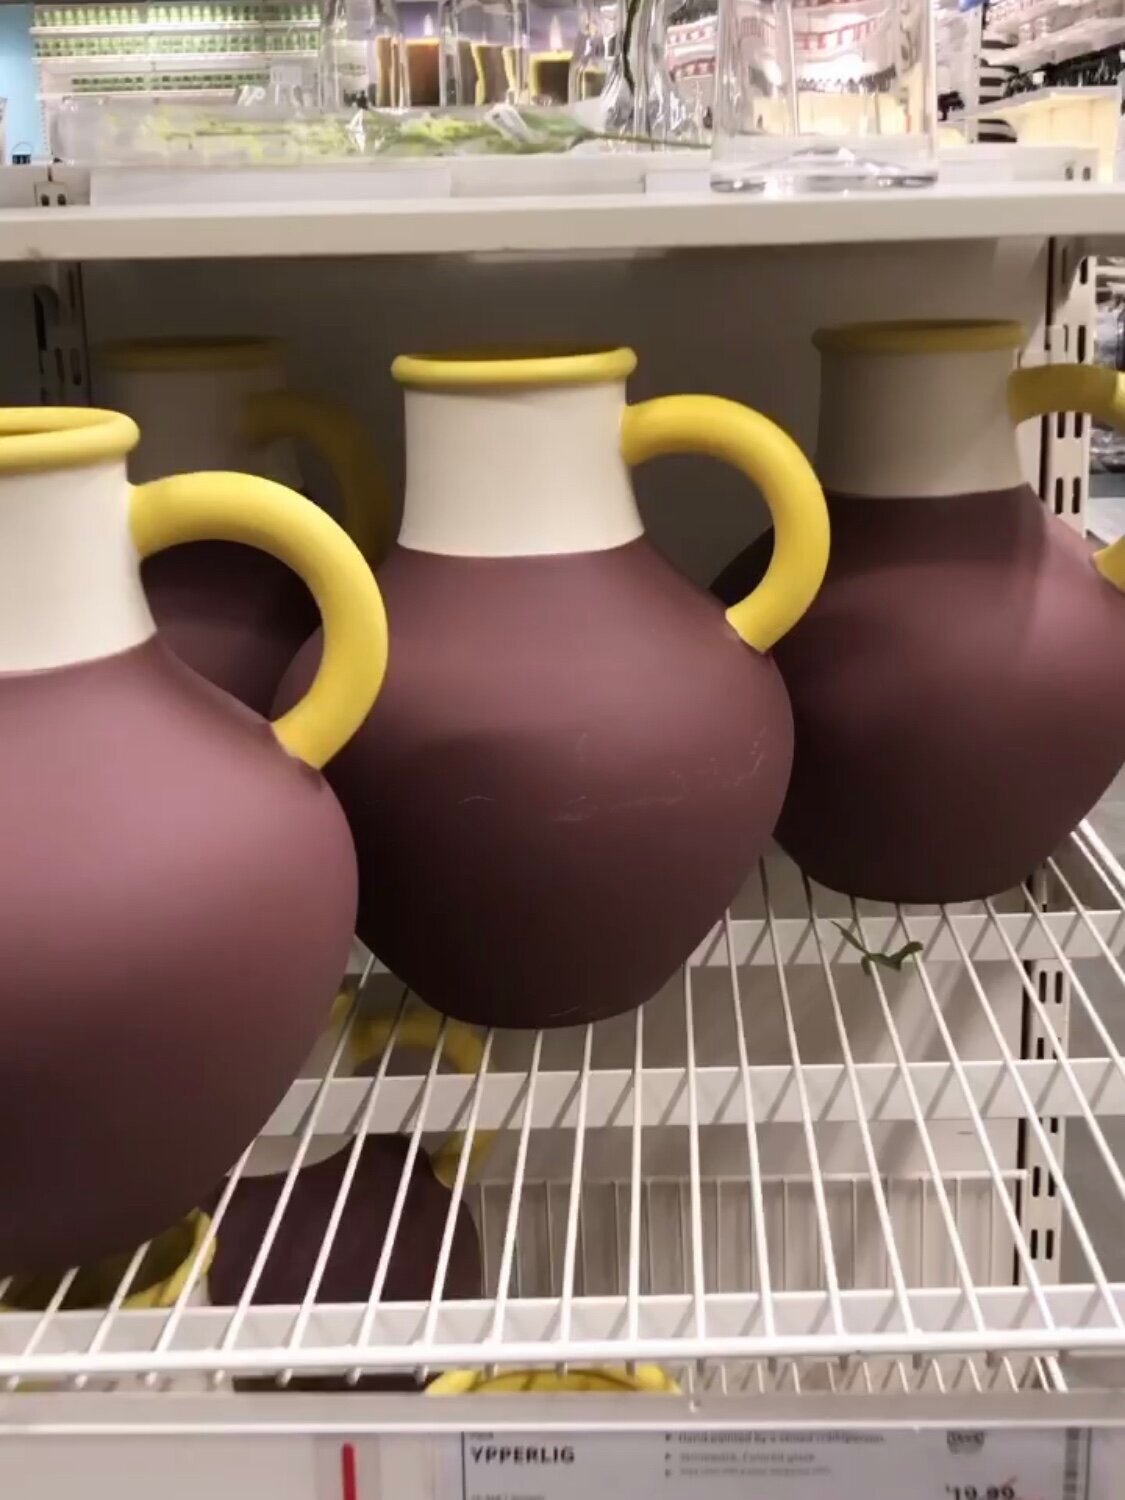
I’ve been on the hunt for a few ceramic pots for some time now, and have luckily found some beauties! However, I’ve been wanting to purchase 3-5 larger sized pots all at once, so I needed to find them at the right price - because pots don’t grow on trees right?
I was able to find larger-sized pots that were great quality at IKEA. Nevertheless, the color of the pots weren’t very desirable, unless you’re a Laker fan that is (click arrow for the “before” photo of pots). Because there aren’t a lot of Laker fans living here in Atlanta, I’m assuming these Ypperlig pots didn’t do so great in sales, and therefore were marked down to $8.99 from their original price of $20.00 per pot.
Long story short, I purchased three! took them home, sprayed them with Rustoleum, and voila! A very quick DIY that’ll give you an upscale artisanal look in your home. I used a white Rust-Oleom Chalked Paint Aerosol and a Rust-Oleom Auto Paint Matte Finish Spray for my black pot . There you have it, my pot-paining secret!
If you try this DIY, drop a comment below and let us know how it turned out for you!
Styling Shelves : Principles of storytelling through visual display
Styling vignettes is my absolute favorite thing to do! It’s such a wonderful form of storytelling, and I use vignette-styling to share bits and pieces of myself with my friends and family that come by to our home to visit. They are truly a good way to get to know me, and that is precisely how to use vignettes, as an invitation to share yourself with your loved ones.

Styling vignettes is my absolute favorite thing to do! It’s such a wonderful form of storytelling, and I use vignette-styling to share bits and pieces of myself with my friends and family that come by our home to visit. They are truly a good way to get to know me, and that is precisely how to use vignettes, as an invitation to share yourself with your loved ones.
I love visiting my friend’s homes and learning about them through the way they have laid out little clues (vignettes) throughout their home. So I would love to share the principles I use to create these sweet spaces!
Principle 1: Vertical Horizontal
Vertical: Styling top to bottom on rows of color Horizontal: Left to right in rows of color
Principle 2: Pyramiding
Using a focal point bringing the eyes to the middle and focusing in on a product. In this case, I’ve used a wreath to bring your eyes to the center of the shelf display. However, this can be applied to feature walls, tables, and shelfs.
Principle 3: Stacking
Stacking is just that - using more items and staking them on one another. I applied this principle by stacking the bell, and three Christmas trees on the book.
Principle 4: Symmetry & Balance
For me, this makes a space comfy and easier for my house guests to experience and navigate through each vignette I’ve laid out. Makes people feel good and not overwhelmed.
Principle 5: Consistency & Repetition
This principle reiterates (like the three Christmas trees and two reindeer for example).
Principle 6: Color Balancing
Visually, balancing the color throughout my entire home and vignettes are extremely important. Colors tell a story just as much as the actual item you’re using to create the vignette. It’s best to keep the colors cohesive when styling. I used a palette of matched tones (brown, black, gold, and forrest green). Be sure to balance the colors well and by being mindful of their placement and spacing - use color variations to achieve the right feeling.
Principle 7: Storytelling
To reiterate, I use visual display to incite imagination and allow my guests to get to know me. A good vignette concept will give your house-visitors inspiration and help them get to know your character. I used this shelf display to convey a Christmas theme, and to share the things I love most about Christmas.